Little Planets.
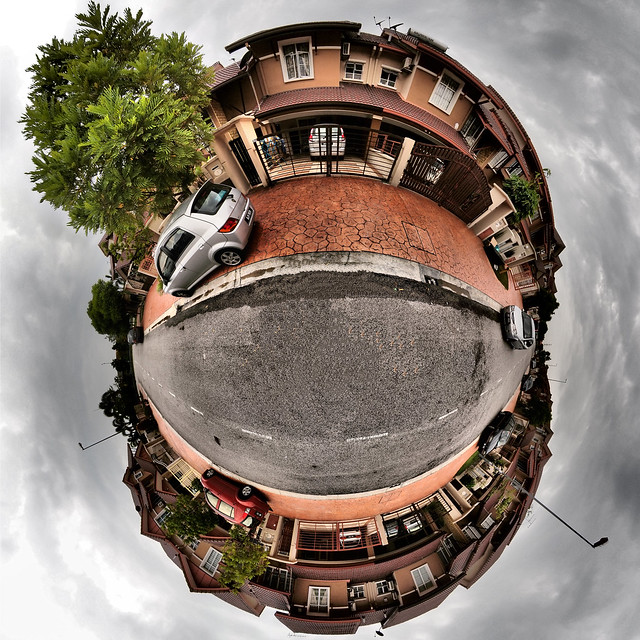
This is the first Little Planet shot,
and the nadir point is covered with pure clone stampings.
I came across this type of photography a couple of years ago. And, though I was intrigued by the techniques to achieve such creative output, I never put the time and effort to learn how to do it.
Somehow, out of the blue, today I took the plunge from zero to hero!
It's a good thing that Flickr.com has a group dedicated to this art. All I did was read through the threads and learned the techniques rather quickly. It did help having an ultrawide angle lens like the Zuiko Digital ED7-14mm F4.0 to assist in getting high quality 360-degree panorama with the least stitching. In fact, I only needed 7 to 8 frames for 52-45 degrees coverage per shot (in portrait orientation), and 2 frames for the nadir point (this is the point where I stood).
As advised by the group, I downloaded the freeware software "Hugin Panorama Stitcher". This software is really very good. The stitching is near flawless as I had a tough time identifying the stitch borders in the panorama pictures.
The software is rather straight forward. It starts with the Panorama Stitcher screen with the "Assistant" tab as the main controller. This tab has a 3-step process to stitch the panorama. It is quick simple as the first step is to 1.) Load Images (where the Lens parameters are very important to ensure the least distortion and error to the image output), and secondly to 2.) Align (where the software automatically scan the images and stitch them into place).
Next is to transform the normal panorama scene into radial that is called Little Planet. On the Hugin "Fast Panorama Preview" window, there's a tab called "Projection" and select "Stereographic". Next, there's a tab called "Move/Drag" and change the "Pitch" parameter to 90 and leave the other two parameters 0. Then click "Apply". The image immediately transforms into a planet, a very small planet. Just slide the zoom applicator and the image will enlarge. Crop to taste.
Finally, 3.) Create Panorama (great output controls which includes TIFF/JPEG and also HDR processing).
Wham... I was hit with the problem. Just look at the picture below!
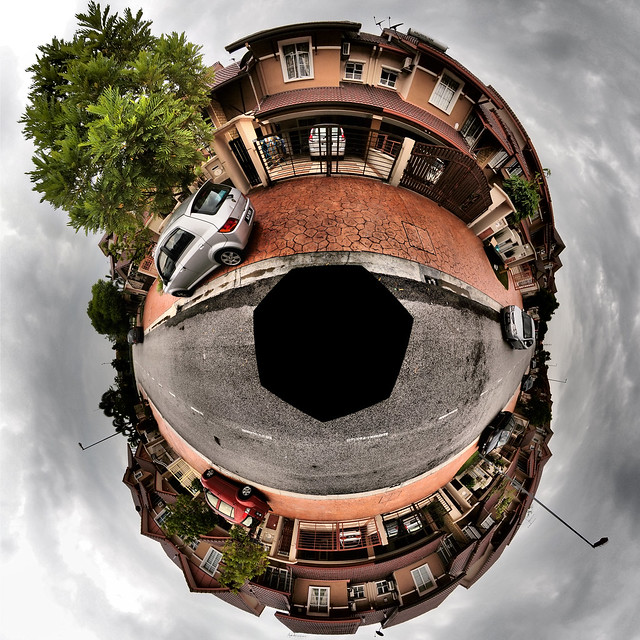
This is the result just after stitching, and the heptagon is clearly seen.
Wow!! That's a big hole!!
How did that happen?
Well, I forgot that the nadir point, i.e. the point I was standing was not in the picture. Thus, the heptagon was so revealing in the picture!! Definitely not what I wanted! Well, to cure that, I simply cloned the road. Not a very elegant solution, I would say. But, it worked none the least.
The image below is the one with the nadir point shot taken (2 frames, in fact).

A refined planet with nadir points using actual frames,
and cloned my feet off the picture
To compare, I did another Little Planet. This one used 8-frames for the 360-degree panorama plus 2-frames for the nadir point. I find this image is much finer in reproduction as it has more frames to construct the planet.
Oh ya!! As I was using Dramatic Tone Art Filter for these shots, I didn't activate the HDR feature in Hugin during stitching. I find the E-5 effect much to my liking.
But I prefer the first image in this blog, as the picture is biased to my house and enlarged it in comparison to the rest of the neighborhood.
At last, I have my own Little Planet at home!


No comments:
Post a Comment