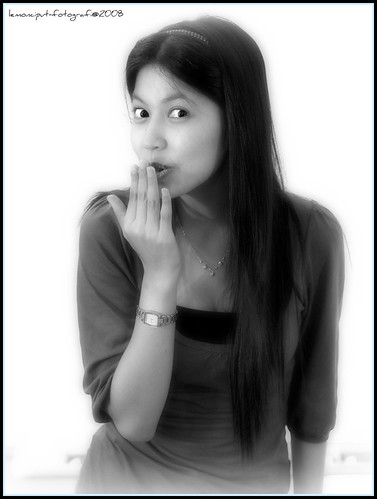
With the spirit of using everything in-house, my friend got hold of a staff who was keen to be the model of the shoot. She was able to illustrate what my friend had in mind, and the shoot was all done within 2 hours.
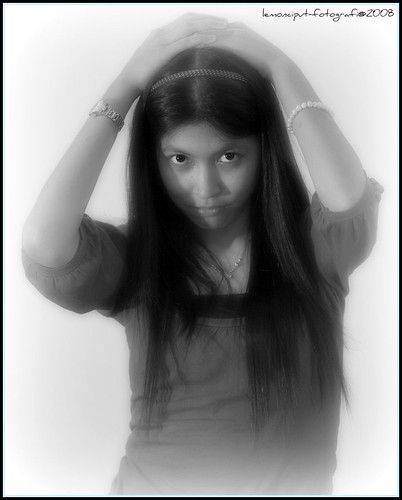
The make-shift studio was simple. We went to the HR training center, and used one of the presentation rooms. The white background was actually a "typical" white board, and to my delight, the surface was matte! What this meant was that my flash setup will be just perfect, without the worry of distracting reflections from the background.
Within minutes, I had setup the location shoot with the E-3 as the main camera, with the Zuiko ED35-100mm F2.0 lens. For the lighting, I used 2 E-system flashes; FL-50R on my left and FL-36R on my right. And I also switched on all the ambient lighting available in the room. There were also windows along the room to my right to allow some sunlight to irradiate into the room.
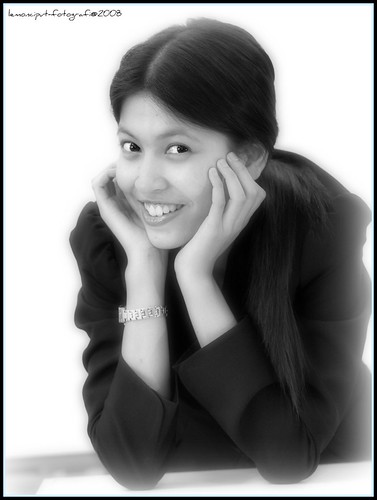
For the shoot, it was a team effort. My friend directed what he wanted the model to do, and all I did was to capture the facial and body expressions instanteneously. The E-system was up to the task, as I was able to setup continuous shooting with both flash. I set it to the E-3 maximum, which was 5 frames-per-second.
More shots can be seen here: http://www.flickr.com/photos/mfahrur/sets/72157608749010583/show/
*** A little technical here ***
I set the E-3 to High ISO about 640, with 5FPS continuous shooting. Camera setting was at Manual Mode, with the Aperture at F2.8 and shutter speed at 1/125s. As for the ED35-100mm F2.0 lens, I set the Focus Limiter to 1.4m-3m setting to ensure minimal focus-refocus on the lens.
For the creative lighting, I programmed the on-board flash commander to communicate at full TTL with both flash using different channels. This was ensure the communication for each flash is independent.
For the main flash on my left, FL-50R, I set on Channel 1A with TTL -2.7EV. For the fill-flashon my right, FL-36R, I set on Channel 1B with TTL -1.7EV. Both these flashes were at about 6-10 distance to the model. Both flash head was pointed up 30 degree to ensure the ample illumination from the model's head to stomach.
***


3 comments:
Nice!
I want to learn!
What is the main consideration being taken before selecting the EV on the flash for every shoot?
And what is the main consideration for choosing the right spot for the flash ?
what is the main consideration before selecting the EV?
Meter the ambient light, and lock the exposure. Decide your flash ratio with respect to the ambient light.
If you want a natural look, power down the flash -1 to -1.7EV.
If you want a flashy look, power up the flash to +1EV.
Choosing the right spot for the flash?
Depends on your shadow control.
If simple situation, 1 flash with a reflector card is best. It's like have 2 lights from different source. But power is still single source.
If 2 flash, you can shoot direct, and the height should be at the middle of the frame. Both flash angles depends on your output, but I usually set at 45 degree, to make a triangle with the subject. I set the flash head at 30 degree upwards to get some bounce.
Post a Comment