Blog Keywords

Popular Posts for the Month

Showing posts with label 7-14mm. Show all posts

Tuesday, May 24, 2011

Zuiko and Picnik

.

I have been using the Picnik software in flickr.com for quite a while.

And, I love it.

There are so many effects that can be used to make the picture more alive and stand out. Or quickly get some special effects that require hours using Photoshop, rather.


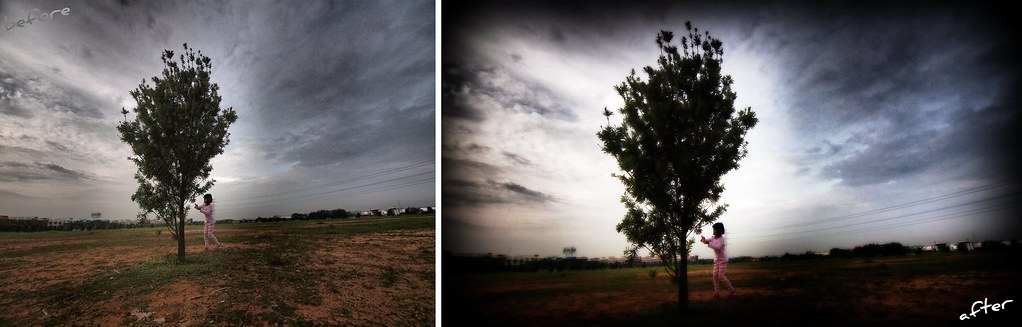
E-5 with Zuiko Digital ED7-14mm F4.0
7mm, f/5.6, 1/1600s, ISO200, -0.3ev

From the original picture, I crop it from 4:3 into 16:9 to give the cinematic effect. Then, changed the tonal and focal impact using the Orton Effect filter and added vignetting to the sides to emphasize more on the central subject.

That's all to it... Well, other than using a super-duper ultra-wide lens, that is!!

Sunday, January 16, 2011

Zuiko and a Little Planet

.
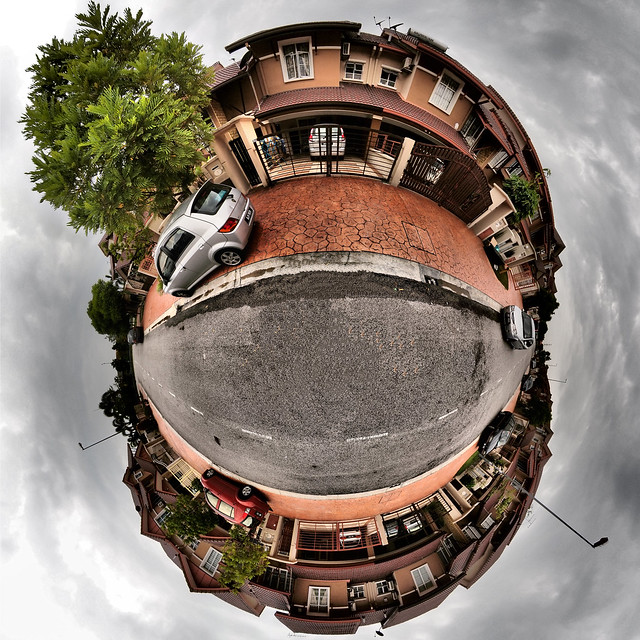
Little Planets.

This is the first Little Planet shot,
and the nadir point is covered with pure clone stampings.

I came across this type of photography a couple of years ago. And, though I was intrigued by the techniques to achieve such creative output, I never put the time and effort to learn how to do it.

Somehow, out of the blue, today I took the plunge from zero to hero!

It's a good thing that Flickr.com has a group dedicated to this art. All I did was read through the threads and learned the techniques rather quickly. It did help having an ultrawide angle lens like the Zuiko Digital ED7-14mm F4.0 to assist in getting high quality 360-degree panorama with the least stitching. In fact, I only needed 7 to 8 frames for 52-45 degrees coverage per shot (in portrait orientation), and 2 frames for the nadir point (this is the point where I stood).

As advised by the group, I downloaded the freeware software "Hugin Panorama Stitcher". This software is really very good. The stitching is near flawless as I had a tough time identifying the stitch borders in the panorama pictures.

The software is rather straight forward. It starts with the Panorama Stitcher screen with the "Assistant" tab as the main controller. This tab has a 3-step process to stitch the panorama. It is quick simple as the first step is to 1.) Load Images (where the Lens parameters are very important to ensure the least distortion and error to the image output), and secondly to 2.) Align (where the software automatically scan the images and stitch them into place).

Next is to transform the normal panorama scene into radial that is called Little Planet. On the Hugin "Fast Panorama Preview" window, there's a tab called "Projection" and select "Stereographic". Next, there's a tab called "Move/Drag" and change the "Pitch" parameter to 90 and leave the other two parameters 0. Then click "Apply". The image immediately transforms into a planet, a very small planet. Just slide the zoom applicator and the image will enlarge. Crop to taste.

Finally, 3.) Create Panorama (great output controls which includes TIFF/JPEG and also HDR processing).

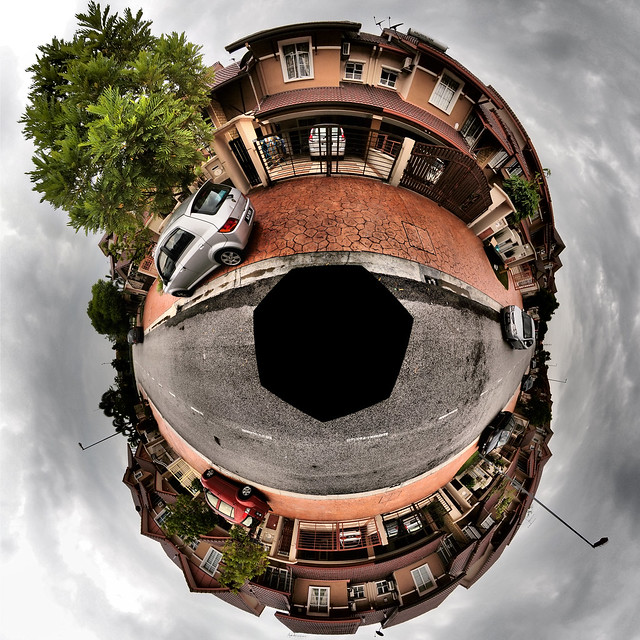
Wham... I was hit with the problem. Just look at the picture below!

This is the result just after stitching, and the heptagon is clearly seen.


Wow!! That's a big hole!!

How did that happen?

Well, I forgot that the nadir point, i.e. the point I was standing was not in the picture. Thus, the heptagon was so revealing in the picture!! Definitely not what I wanted! Well, to cure that, I simply cloned the road. Not a very elegant solution, I would say. But, it worked none the least.

The image below is the one with the nadir point shot taken (2 frames, in fact).

A refined planet with nadir points using actual frames,
and cloned my feet off the picture

To compare, I did another Little Planet. This one used 8-frames for the 360-degree panorama plus 2-frames for the nadir point. I find this image is much finer in reproduction as it has more frames to construct the planet.

Oh ya!! As I was using Dramatic Tone Art Filter for these shots, I didn't activate the HDR feature in Hugin during stitching. I find the E-5 effect much to my liking.

But I prefer the first image in this blog, as the picture is biased to my house and enlarged it in comparison to the rest of the neighborhood.

At last, I have my own Little Planet at home!


Friday, October 1, 2010

Zuiko and E-5: Day 1

.

As promised, I picked up the Olympus E-5 test unit from the Olympus Malaysia office at Mont Kiara during lunch.

Weather-proofing legacy from the E-1 to the E-3, and now the E-5

As always, I was briefed by the Olympus Malaysia executive, Mr. Yang (not a real name) with regards to this little monster. In summary, Olympus sees E-5 as having 4 major improvements or sales pitch.
  1. Highest pixel sharpness
  2. Dust-and-splash proof body
  3. World's 1st 3" Hypercrystal LCD with dual-swivel weather-proof monitor
  4. Dramatic Tone art filter.
To me, the real deal from his presentation was on how Olympus worked on the image quality. Learning from the E-3 debacle, the new TruePic V+ is the super-engine behind the new and improved sharpness. Simply put, the new image processor kicks ass!! Compared to TruePic III+, the E-5 does not require a strong AA filter to reduce the Moire. In effect, with lower strength AA filter, the overall resolution captured by the 12MP Live MOS Sensor is maintained. The TruePic V+ then effectively cleans the Moire.

He also pointed out that the Art Filter now is no longer part of the camera Modes, but part of the image parameters; it's in the same category when selecting Natural, Vivid, Mute or Portrait. This is a good thing, as the camera settings are retained in the Mode selection which enable me to change any image parameters that I want such as ISO, F-number, WB and shutter speed.

My first touch of the E-5 is rather ordinary, as it is really an E-3 construction. The balance, heft and ergonomics are the same. The changes at the back panels are negligible for me. But one thing I notice is the LCD screen presentation. The crisp images are a welcome for chimping; well, I am a chimper! If you think E-30 trumps E-3's LCD, then E-5 is KING!!!

There's this new battery, BLM-5, which is white in color and has a charge of 1620mA. It's compatible with BLM-1 with the exception that it only can be charged with its own charger. Bummer!!

One caveat, though. Although it was confirmed the Firmware to be 1.0 (production), he told me that the AF performance is still not stable. Hmmmm... so much for drawing AF speeds conclusion.

Right after the briefing, I straight away dived into the menu and quickly changed the settings to my liking.

After a quick lunch, I did a quick shoot. Since this test unit is loaned over the weekend, I do not have much time to lose.

A quick trip to Kuala Lumpur City Center was the easiest. The sky was getting darker as the strong winds blowing in the dark clouds. I had to move fast!

In this 30-minute rapid shoot, I shot in Art Filter 10, aka Dramatic Tone. I also shot in RAW for processing later using Olympus Studio. Oh ya, that reminds me to update the Studio to support E-5 RAWs. It has been a while since I did the last update.

UPDATE!! The Olympus Studio is using the latest software; meaning I can't RAW process the Dramatic Tone art filter!!!

Towards the last 5 minutes, rain was pouring. Nothing to worry here, as the whole system is weather-sealed!

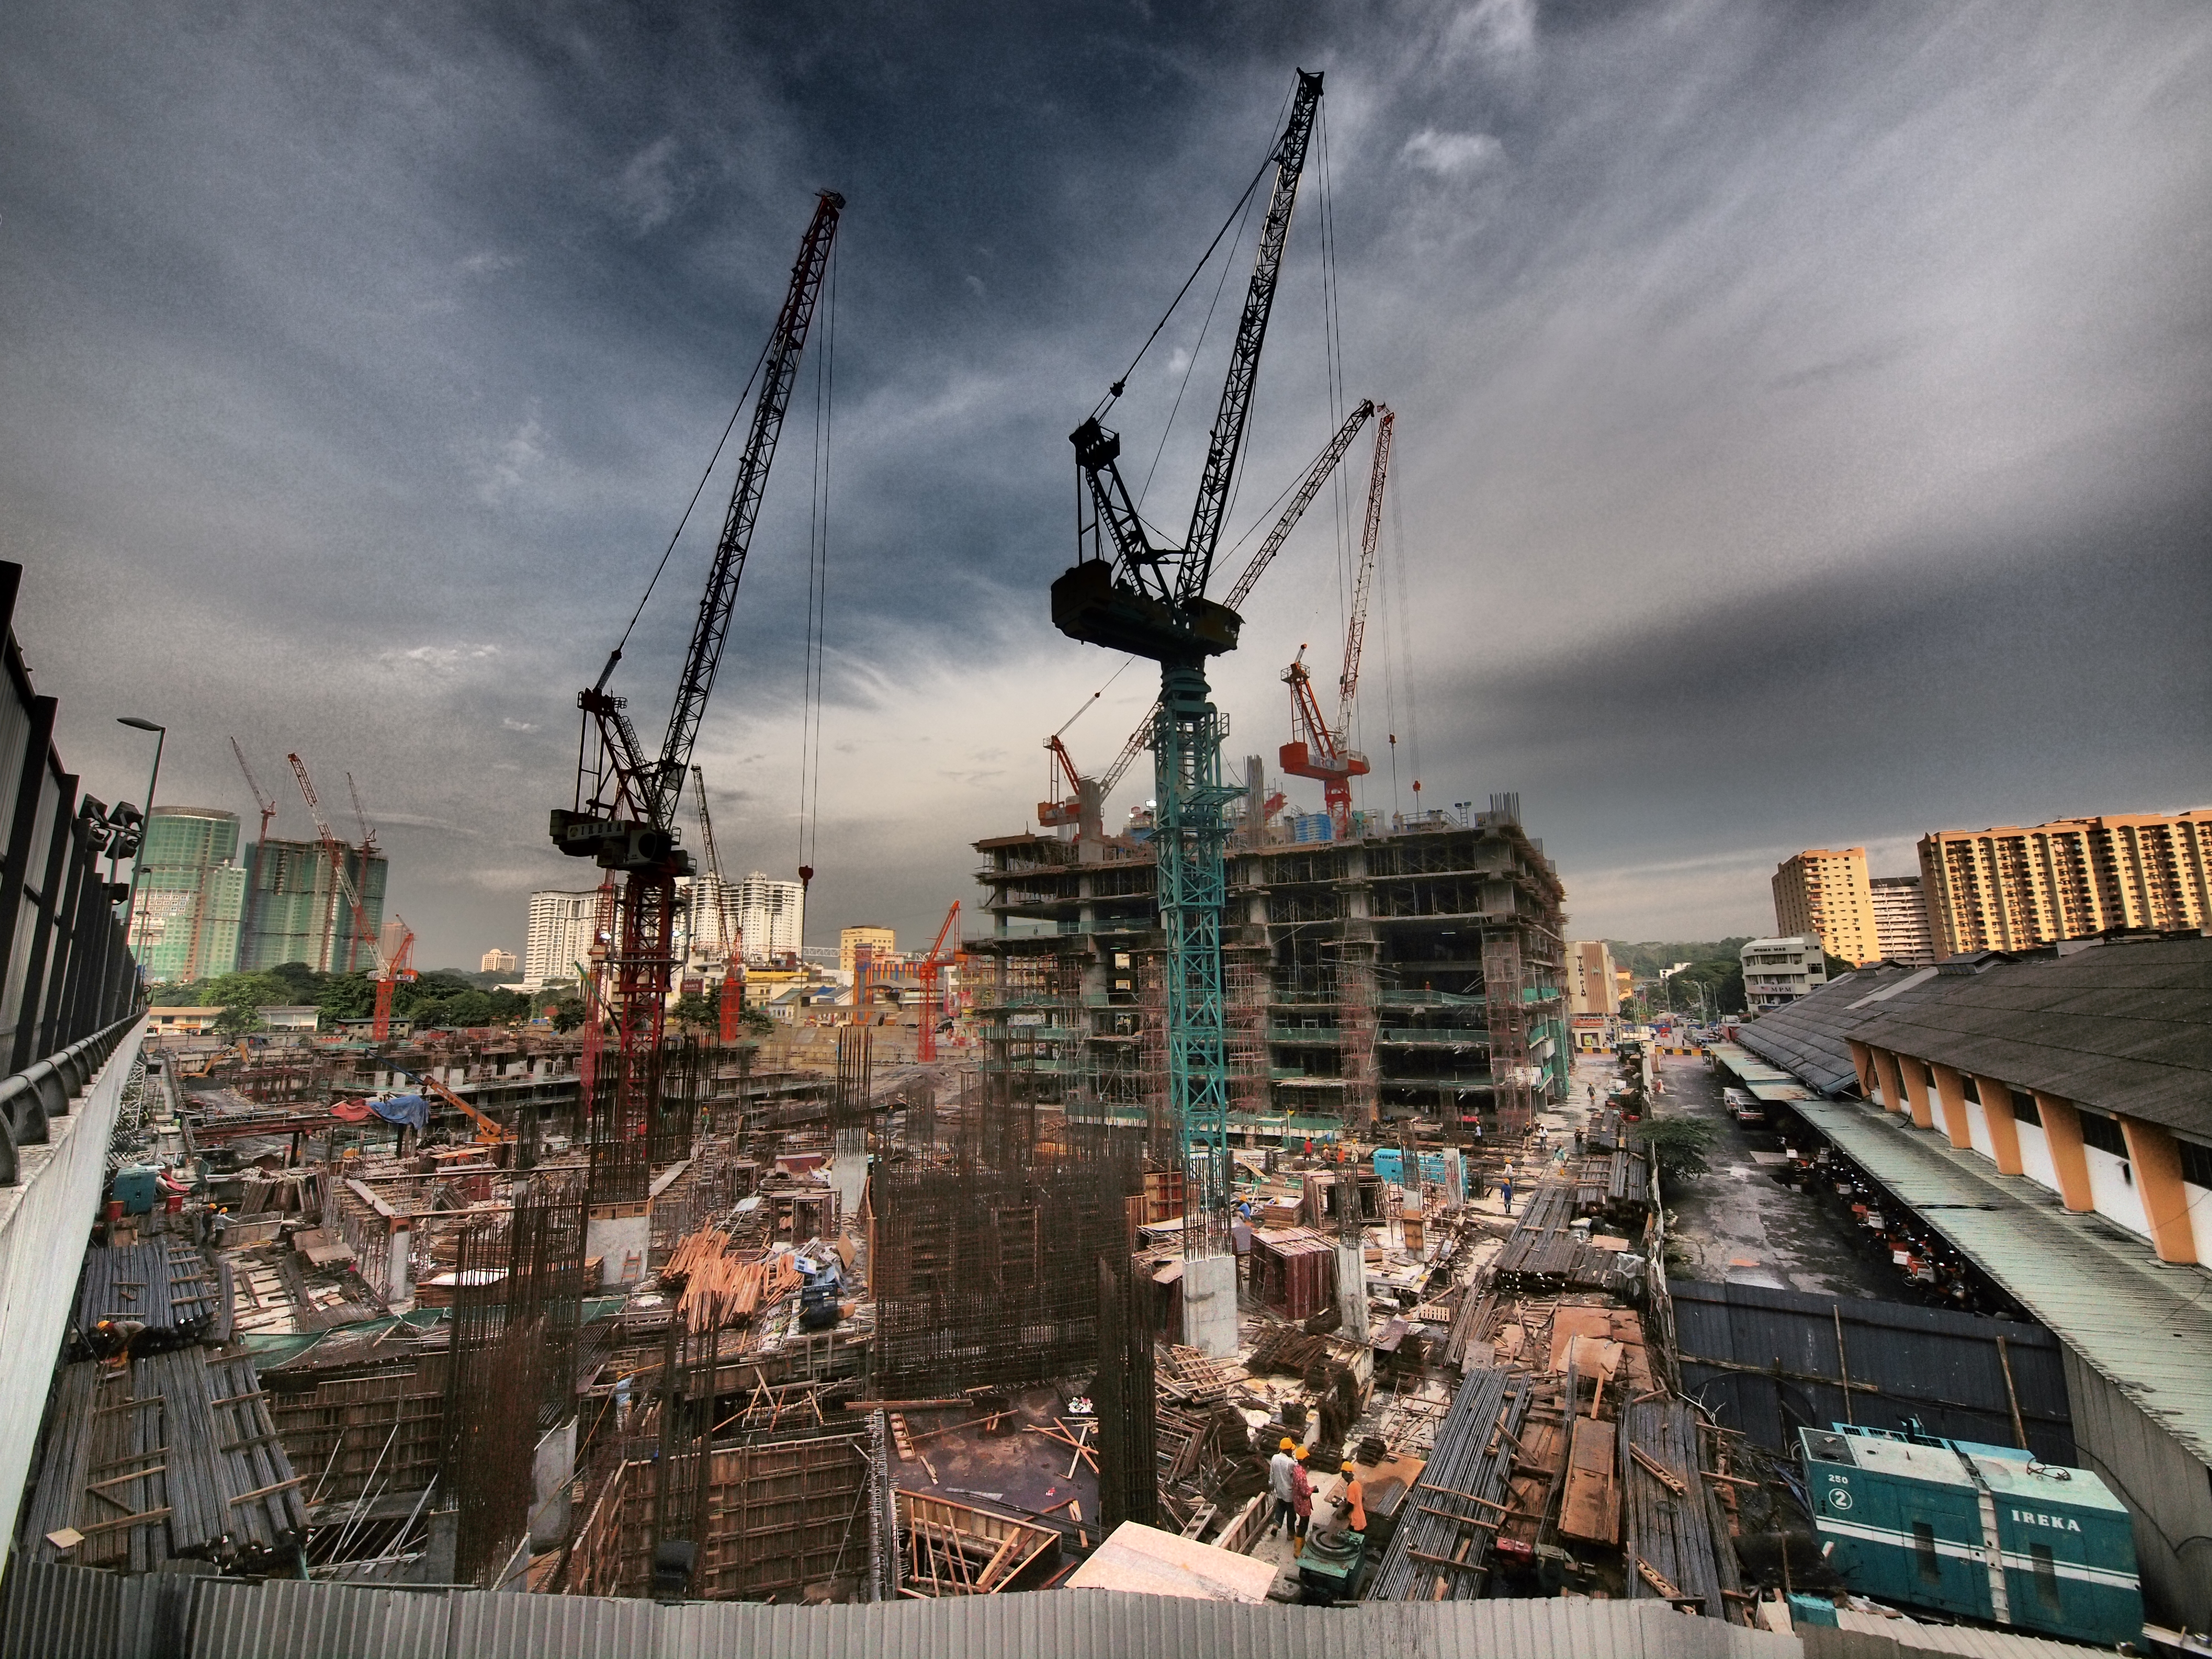
E-5 with Zuiko Digital ED7-14mm F4.0
Dramatic Tone art filter that tries to mimic HDR effect

Upon coming back to office, I happened to bump into my colleague who owns a Canon 7D. Without hesitation, I offered him a look at the E-5. He being a hardcore Canonite, was not smitten with the E-5 with the exception of the Dramatic Tone filter. He deliberated the E-5 for a while, and end up asking about video. I told him it's not full 1080p, only 720p. Well, he's not that particular about it, nor am I. But the funny thing about his question was how to activate the video!!

It was hell when there's no manual to guide me, and I scrolled into the menu many times to look for the button. To no avail, it's not in the menu. After 5 minutes scrolling, we never stopped noticing that the AF points button has a video icon next to it. Pressing the button won't do anything except selecting the AF points. I was feeling embarrassed with my Canonite friend. Then, I thought to myself... Oly tends to do things differently, being odd mostly!! Though there's a button for video, it's shared. Thinking outside the still photography box, and into motion photography box, I concluded that "Hey, what if I activate the Live View?". And yes sir, the AF button is transformed into the Video button. Whew, but why, oh, why do I need to press 2 buttons in sequence to activate the video?

Going back home, I had to walk about half a kilometer to the parking lot. There's a mega construction going on down the lot, and I took a shot.

Comparison of Natural colors with Dramatic Tone. Click texts to see full resolution, and feel free to download as these are set as Creative Commons.

Zuiko Digital ED7-14mm F4.0, 7mm, f/7.1, 1/400s, ISO200, -0.3ev.


It's night time already. Time to make some the low light shots.

For tonight, I am just warming up to the feel of shooting high ISO; thus, won't be making much time writing techno-babble. For a start, the ISO acceptance seems to be up by 1 or 2 stops from E-30. In effect with E-5, I am starting to use ISO1600 as my confident level before having to sweat out perfect exposures (see, with higher ISO, perfect exposure is very vital for low noise images). This is also based on the Noise Filter set to Low, which is my default setting.

E-5 with Zuiko Digital ED50mm F2.0
50mm, f/5.6, 1/30s, ISO1600


There are some complementary tin-can-bottle images depicting ISO increases by 1 full stops from 800 to 6400 in my portfolio. You are free to download these, as I changed them to Creative Commons. Most of the images are full copyrighted, sorry.


Link to E-5 portfolio on Flickr HERE.


Maybe tomorrow I will try to focus on some comparison among the E-5, E-30 and E-3. For a start, I might plan for some AF speed tests (though E-5s AF is not stable yet, at least for the test unit I am using now), or some high ISO tests. Let's see how things go tomorrow.

Saturday, September 25, 2010

Zuiko and Around the Corner

.

It has been a wet week recently here. The rain comes and goes without warning, and most of the time is the cats & dogs variety. A no-no for most cameras; however, glad I have the E-3 and SHG lenses in my drybox! It has been quite a while since I shot the E-3 and the Zuiko Digital ED 7-14mm F4.0 uber-wide angle lens.

The rain just stopped, but there were still drizzles flying around. The dark clouds were still lingering in the evening sky. I was itchy for some shots. Really in the mood for some serious photography. My mojo was back!

E-3 with Zuiko Digital ED 7-14mm F4.0
7mm, f/4, 1/400s, ISO200

But, I wouldn't want to use the E-30 come the sudden rain. E-3 should do it. What-the-hey!!! This archaic camera still works, albeit the recent announcement of the E-5. I was a bit worried the camera stopped working out of jealousy as I am lusting for the E-5 ever since the rumor came about.

I was lazy to go somewhere just for the sake of taking some nice photos. I told myself, what if I just walk around the corner of my neighborhood and take some interesting snaps. That was a thought, and I was glad I did it.

E-3 with Zuiko Digital ED 7-14mm F4.0
7mm, f/4, 1/200s, ISO200

My son tagged along, but mostly he was on his own running across the empty road, zig-zagging his aeroplane run with great sound effect. He was minding his own business, and so did I. Both of us had a great quality time.

Tuesday, January 12, 2010

Zuiko and a Self-Portrait


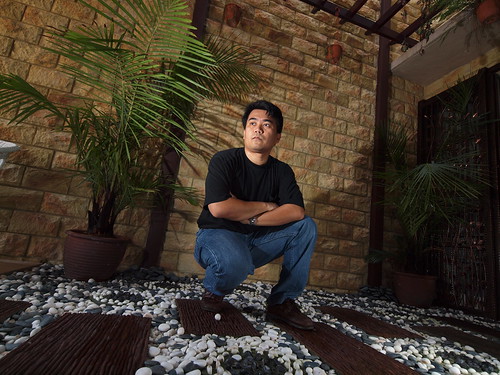
A simple self portrait I did with the E-30 camera and the Zuiko Digital ED7-14mm F4.0 lens.

I used a two-light source, main at high point, fill at low point; with self portrait composed using real-time Live View screen and triggered with a wireless remote.

I tried to do a macho look, so-called a self-portrait of the ultimate maleness in myself. Hmmm... I think I didn't do quite a good job.

The thing is, when I was doing this, I solely relied on two features in self-portrait shooting. 1. The remote trigger, in this case the usage of the RM-1 remote trigger. 2. The flippable LCD, in this case I used the LCD screen flipped facing me so that I can compose myself into the frame (this was done in full Live View mode).

Oh yeah, I used full TTL shooting with the Olympus wireless flash system; with the main using FL-50R and fill using FL-36R. The E-30 was mounted on the Manfrotto 709b table tripod for a very low angle shot.

Well, these feature made shooting self-portrait much easier. But, it still did not solve the problem that I was not a very good model.

Ah well....

Monday, December 7, 2009

Zuiko and Boulevard Putrajaya


A shot of the Boulevard just in front of the Palace of Justice. At the end of the boulevard stands tall the Prime Minister's Office, if not so small thanks to the ultra-wide effect on the background.

E-3 with Zuiko Digital ED7-14mm F4.0

7mm, f/9.0, 1/250s, ISO100

Saturday, November 28, 2009

Zuiko: Using the 7-14mm Ultra-wide

I made a point to myself to use the Zuiko Digital ED7-14mm F4.0 more.

The morning was actually quite rainy, so I chose to use the Olympus E-3 as it was weather-sealed should rain to come during the middle of the shoot. The 7-14mm was weather-sealed, too.

Palace of Justice, cropped in 16:9
7mm, f/9, 1/200s, ISO100

Initially I did not know I would end up here at Putrajaya, but thinking logically that the 7-14mm would be more useful for many architectural and landscape shots, the national capital was the perfect location.

I was driving along the main road, and the Palace of Justice struck me. Since the town was virtually empty due to the long Eid Adha holiday weekend, only a couple of tourists and keen photographers were there. This was good for architectural shots! And a bonus; the sun suddenly appeared amongst the clouds to render the buildings with good light.

Shooting with an ultra-wide lens was very tricky. One thing that could really could screw things up were the perspective. It could easily be a nightmare if not done properly. For that shot, to keep the perspective in check, I used the E-3's focus markers and put the horizon along the 5 points. And I checked the 3 vertical markers with the building's pillars to ensure the perspective was correct. And all was done handheld, without any tripods or supporting gizmos. To get it right the first time, I held my breath to freeze my framing and quickly but calmly clicked the shutter.

The composition was heavy bottom, with half of the frame being the road. Well, I just cropped off the bottom.

Another thing, to get all in focus, it was very easy as the depth-of-field for such a wide lens with the 4/3 format was very huge. I just dialed in F/9.0 and it was more than enough.


Palace of Justice framed in the Putrajaya Holdings HQ main entrance
7mm, f/8.0, 1/1000s, ISO100

For both images, the sun was directly in the frame. This posed a problem in the Dynamic Range department. And, I chose not to use RAW, instead opted for the Superfine JPEG (which means the JPEG file is ultra huge, but not as huge as TIFF). The original file showed much shadows in the buildings' details; thus, I had to post-process the images using my trusty GIMP software.

Using tone mapping with Overlay settings at 40%, I used 3 layers duplicated on top of each other and merged them one-by-one. A bit of S-curve to enhance the shadows and highlights, and increased the saturation by 40 points did the trick (during the tone mapping, the colors faded).

One thing that ticked me off during the shoot. I was actually chased away by the security, claiming that this place was not for public shooting. I was aghast, and immediately responded that I am taxpayer, and these buildings were built using the people's money. I was not even inside the building, just outside within the corridors!

I was shocked, and immediately left the place. I managed to get a couple of great shots, but those were it!


Tuesday, July 21, 2009

Zuiko and the Rainforest

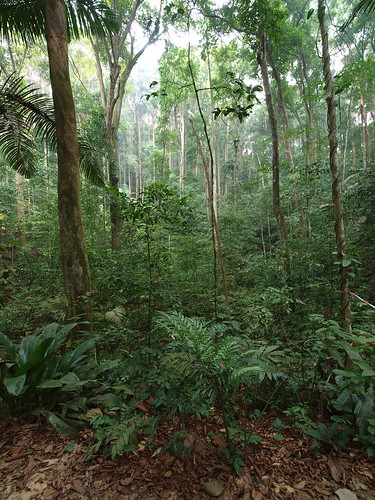
A beautiful scene within the jungle trail; a hint of haze is imminent!
The Sumatran forest fires are a real hazard!

Malaysia is blessed with its tropical beauty be it on land or at sea. Malaysia is also blessed with the abundance of rain and precipitation throughout the year. These two conditions really make the E-3 and the Super High Grade Zuikos feel at home!

About a 20-minute drive from the city center to the east side lies the Forest Reserve Institute of Malaysia. The 486-acre facility is home for a plethora of scientific and academic activities for forest research and conservation. It is quite surprising that this little hamlet nestles just next to the hustle and bustle of city life; practically it just located mere hundreds of meters from the nearest main highway in Klang Valley!

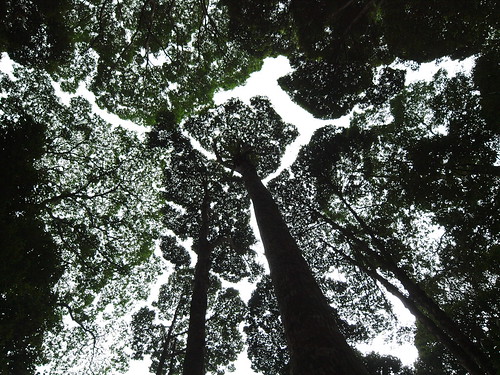
The forest canopy high up!

The main attraction at FRIM is the Canopy Walk, which allows the visitors to traverse along the forest canopy along the 5-sectioned 15-meter pathways that is about 90 meters above ground!!! But, what luck for my party... it was raining by the time we reached the entrance. The gates was closed!!! And this was after a 15-minute hike up a steep hill!!! Boy, was I disappointed!

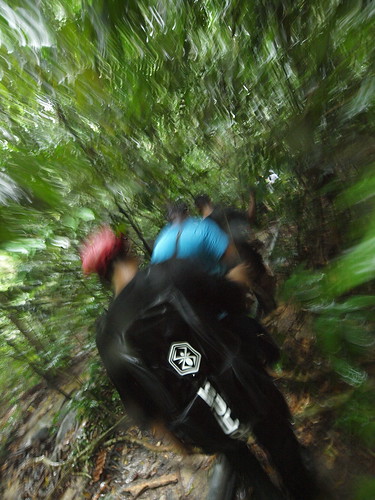
Racing down the hill to escape the heavy rain. Watch out for the slippery rocks!

As it was raining heavily, my E-3 and the Digital Zuiko ED7-14mm F4.0 was drenched. I was not ever worried one bit, as the superior weather-sealing for both camera and lens have surpassed many thunderstorms before!

A quick shot of the small waterfall, I was leaning on the biggest rock for support.
The In-body Image Stabilization system was awesome; shot in 1/2s!!

We had to rush down to the nearest camp shelter, which was a 500-meter descent across thick jungle and slippery and rocky slopes. Along the path, a small stream passes through that ends as a small waterfall near our camp shelter.

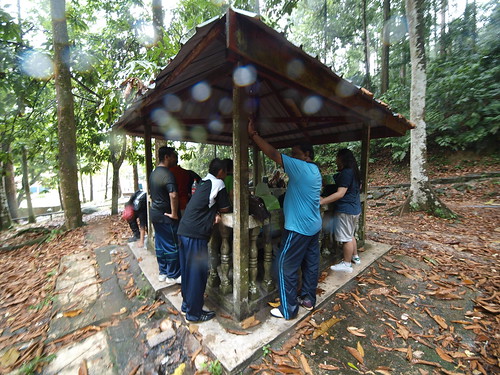
The whole party seeking refuge under the small shelter.

Well, we are scheduling another trip next week for the Canopy Walk, and the FRIM organizers will reschedule it as it was paid for already. This will be awesome, as I was told that in fair weather the skyline of Kuala Lumpur will be at its mercy!


Saturday, June 27, 2009

HD Videos with E-P1 and Zuiko Digital Lenses


Romantic


An HD video at 720p with the E-P1 and two Zuiko Digital lenses; ED7-14mm F4.0 and ED50mm F2.0 Macro. AE program in Art Filter "Pop Art".


At the Mamak's


HD video, with multiple Art Filters. Shot with M.Zuiko 17mm lens (typo on the title).


Lake Gardens

Wednesday, June 24, 2009

E-P1 with 4/3 Zuiko Digital Lenses


It is very interesting to note that the E-P1 supports Contrast Detection Auto Focus, aka CDAF with all Zuiko Digital lenses. Since I have 4 Zuikos, this is great!

My experience with the Zuiko Digital ED7-14mm is so far very satisfying. With the MMF-1 adapter, the balance and feel is good. A bit lens heavy, though!

With the E-P1, only Single Auto Focus works. And, during Manual Focus mode, the MF Assist is great providing 7x magnification with the slightest touch of the focus ring.


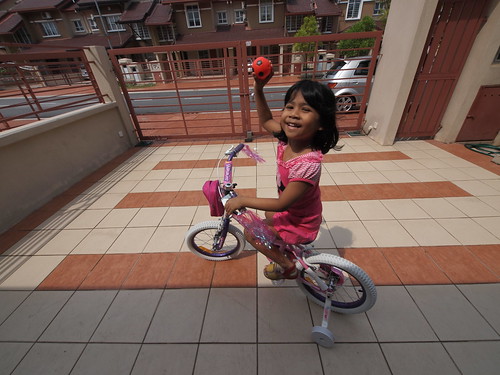
7mm, f7.1, 1/640s, ISO100, -0.3ev

A shot of my daughter on her bicycle. Since Continuous AF is not supported, I used the pre-focus technique to get the shot. Shutter speed was adequate to freeze the motion.


Macro with the Zuiko Digital ED50mm F2.0 MACRO lens is superb. In Manual Focus, the MF Assist is a blast!

50mm, f/2.0, 1/125s, ISO2000

Don't worry, Olympus engineers have done wonders to ensure inter-compatibality between Fourthirds and microFourthirds! And the results are very reassuring!

Thursday, June 4, 2009

Zuiko and the View from a Hill

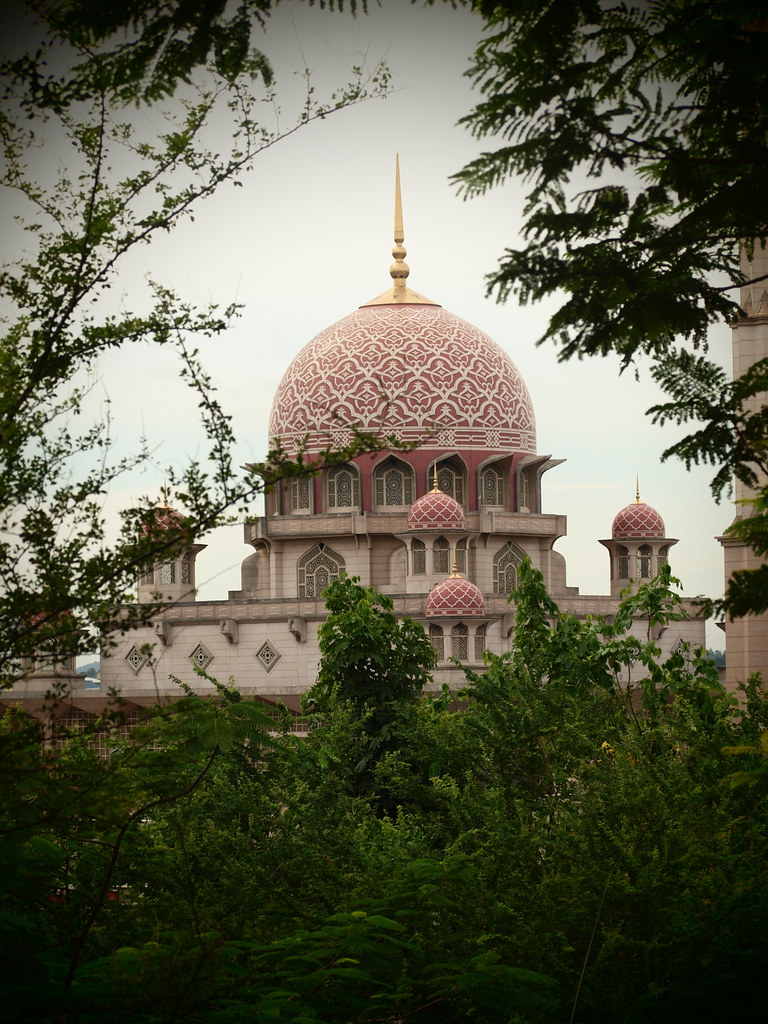
A shot of the domes from a hill nearby.

E-30 with Zuiko Digital ED50mm F2.0 Macro + EC-14 Teleconverter
70mm, f/5.6, 1/640s, ISO200, Pin Hole Art Filter

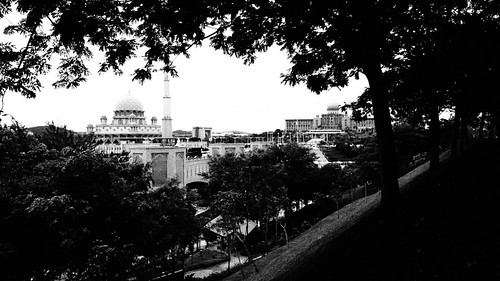
I discovered a nice vantage point overseeing the Putra Mosque and the Prime Minister's Office. Located nicely on the east side of the bridge, the hill is nicely landscaped with pathways and seats for passers by to enjoy the beautiful landscape of Putra Jaya.

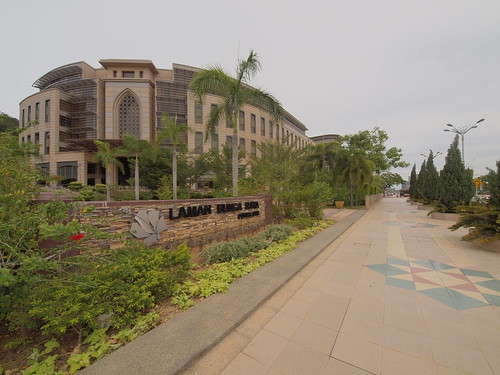
As you walk across the bridge from the Mosque, there is a park on your left - Laman Bunga Raya or Hibiscus Lawn.


Climb the stairs up the hill, and you will see a pathway across the hill terrain. Chances are you will see gardeners tending the park. Quite clean, too.

A retro touch to a classic landscape image. The foreground provided the framing to isolate the Putra Mosque and the Prime Minister's Office. The overpowering contrast makes some fine textures seem to bolt out of the scene.


Monday, May 11, 2009

Zuiko and Easy Self-Portraits

One lazy Sunday morning, I did a photoshoot. Of myself, again!!

The beauty of the E-3 and E-30 was its ability to provide live feedback while shooting self-portrait! Flip the LCD to face the intended subject, set to remote control to trip the shutter with 2 seconds delay, and activate the Live View for live framing for easier self composition.

How easy was that?

Very easy!!!!


E-3 with Zuiko Digital ED14-35mm F2.0 SWD
FL-50R & FL-36R wireless RC (camera on tripod 6 feet high)

I set the E-3 with the 14-35mm lens at 6 feet high using the Velbon Sherpa 250n tripod to get a downward angle, and made a portrait orientation; hence, the LCD was position at the highest point for easy viewing.

I looked at the LCD screen, adjusted my posture and location, and pressed the remote control. That's it.

The next two shots were made possible with the Manfrotto 209 Table-top Tripod with #482 mini ball head. The height of the E-30 and the 7-14mm lens was a mere 6 inches. The upward angle exaggerated the perspective lines and created a very elongated effect!


There were 2 flash guns. The FL-50R was on a 5-foot ladder and I mounted it on the top most step. This provided the main illumination on the left of the camera. The FL-36R was on the ground on a 6-inch tripod to provide the fill illumination and targeted the lower part of the body.


Thank God for Live View & flippable LCD screen. I shot myself using the remote RM-1 and viewing myself for the correct pose and position via peeking through the live view screen.

This is an excellent system for self-portraits!!!
Definitely!!!!

Thursday, May 7, 2009

Zuiko and "People, People, More People" Challenge

Wow!


This is the highest placing I have ever reached in the dpreview.com challenge; 6th spot!!!


Olympus E-30 with Zuiko Digital ED7-14mm F4.0
7mm, f/4.0, 1/80s, ISO640
I have been entering some images prior to this submission, and most of them were abysmal. The reason I noticed was due to the fact that I just submitted images from my Flickr database, and the composition and story of the image did not really tie strongly with the theme of the challenges.

Well, not this one. This really nailed the spot!!


The task was to "Take a shot with as many people as possible on a single frame. Try to avoid random stadium/concert shot." If you browsed through my previous blog, you can see this image as part of the coverage of the Banana Republic fashion show.


Aptly titled "Crowding to the Banana Show", the vantage point was the striking aspect. With the use of Live View with articulating LCD, and the ultra-wide Zuiko Digital 7-14mm f4.0 lens, I was able to capture the immense breadth of of people watching the show!

Definitely a great view!

Saturday, April 25, 2009

Zuiko and Outdoor Flash Photography

Playing with wireless flash, the primary on the right and the fill on the left. I set the flash to Super FP mode allowing high shutter speed capabilities, so that I have full control of the aperture range from f/2.0 to f/16.0.

My intention was to get this darkened effect. What did I do?

E-3 with Zuiko Digital ED7-14mm F4.0 & FL-50R + FL-36R
7mm, f/4.0, 1/4000s, ISO100, -1EV

Camera setting:
  • Select aperture priority with remote commander activated
  • Lower the overall exposure by -1.0EV (dial the exposure compensation)
  • Lower the RC flash to -3.0EV; this is to reduce the fill-flash from the RC
  • Set RC panel at Channel 1 & High
  • Set RC panel for Channel 1 A at +3EV with FP TTL; this is the FL-50R on the right (Main)
  • Set RC panel for Channel 1 B at +3EV with FP TTL; this is the FL-36R on the left (Secondary)
Flash setting:
  • Set both flash 5 feet away from the subject with 45-degree azimuth angle
  • Set the flash height at the eye-level of the subject, and tilt down towards the guitar
  • Put a diffuser on the Main light (adjust the FL-50R to +1EV to compensate for the diffuser light loss)
  • Adjust accordingly to get the desired illumination
My test shot showed perfect exposure for the image, but that was not I was looking for. I was looking for a darkened effect. The easiest way was to meter the blu sky directly above.

So, I just looked up and lock the camera Auto Exposure using the Spot Meter (in which I programmed in the AEL/AFL button). With the exposure locked, the overall exposure was pushed -2EV (camera already -1EV, the blue sky forced another -1EV). Hence, the darkened effect.

Some say it was underexposed, and I agreed.

To get more detail, I lifted the shadow areas using the simple Contrast Mask procedure. Whilst the effect is still darkened, you can observe the more details coming out from the shadows without sacrifing the highlights at the background.

The GIMP v2.4 with Contrast Mask at 40%
&
High Pass Sharpening at 4.0 points

Either image, that was what I wanted - a darkened effect. And I like them both.


Click image for slideshow of the whole photoshoot.

Friday, April 24, 2009

Zuiko and Banana Republic

Banana Republic...

E-30 with Zuiko Digital ED7-14mm F4.0

The name reminded me of the attires the rich brats wore while I was at college 12 years ago. This brand also lingered in my head recently when it opened a few stores in various areas of Klang Valley.

Well, there's the same consistency about the price: Exorbitantly Expensive!!!


E-30 with Zuiko Digital ED7-14mm F4.0

I was at Suria KLCC after Friday prayers attending a meeting later at Menara Maxis nearby. While walking pass the centercourt at Level 3, I heard a commotion from the Concourse level. Hustling to the center, I was greeted with this view of a fashion show. The first I noticed was the scores of photographers already camped a mere 5 feet away from the catwalk.


E-30 with Zuiko Digital ED50mm F2.0

While the models look beautiful for the frontal headshot, the skinniness was too obvious. It was not to my liking. Sometimes, these models took the Barbie image into the next level. To me, they look like walking planks.

Well, even the guys took the Ken image too seriously, too. I was not amazed!!


E-30 with Zuiko Digital ED50mm F2.0

Again, always have your camera ready for some photographic opportunities. You never knows what will be in store for you. Just don't leave home without it!!


E-30 with Zuiko Digital ED50mm F2.0

Bye....

Sunday, April 12, 2009

Zuiko and a Morning Walk at the Park

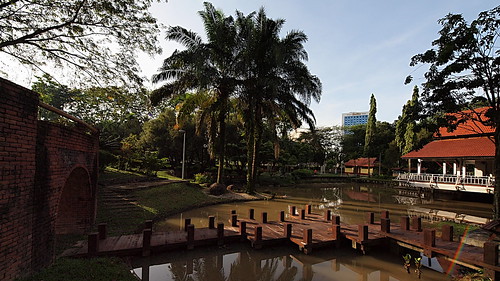
There is this a little part of the Shah Alam Lake Gardens that I had never ventured before. The landscaping of this particular area is so compact, that only now, after numerous visits, did I notice its existence.

It is situated just behind the Laman Refleksologi, and adjacent to a restaurant. I was just flabbergasted at its beauty, its richness of color and texture, and just simply a heaven for photography! 

I just came from my weekly chore at the Pasar Tani equipped with only the E-30 camera and 7-14mm ultra-wide angle lens. The aim was to shoot some landscape, well I hit the jackpot!

At 8am in the morning, while the sun was shining brightly at a very low angle, the challenge was to control the high contrast. Opting to get as much detail as possible, I chose low ISO with the Auto Gradation contrast correction. This setting allowed the camera JPEG engine to lift the shadow details while preserving the highlights.

E-30 with Zuiko Digital ED7-14mm F4.0
7mm, f/7.1, 1/320s, ISO200, -0.7EV

If not for the Grand Bluewave Hotel giving away its location, it is difficult to believe that this part of the gardens actually is nestled just at the edge of the lake gardens by the main road!!

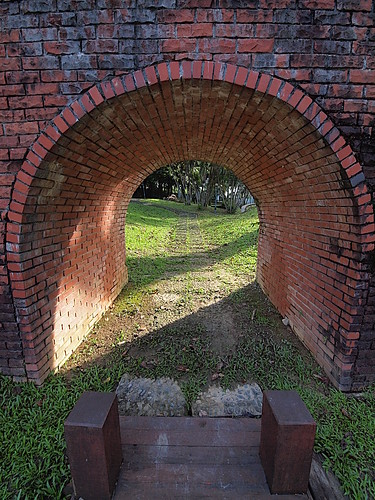
A pathway.
This brick tunnel forming the structure of the overlying bridge had a nice sunlight streaking into it, forming a triangle highlight effect into its shadowy cavern. I lifted more shadow detail in post-process to brighten the overall image.

The converging lines of the bricks along with the elongation of the ultra-wide lens enhanced the impression of walking into the tunnel following the path to the left.

7mm, f/7.1, 1/180s, ISO200, -0.3EV.


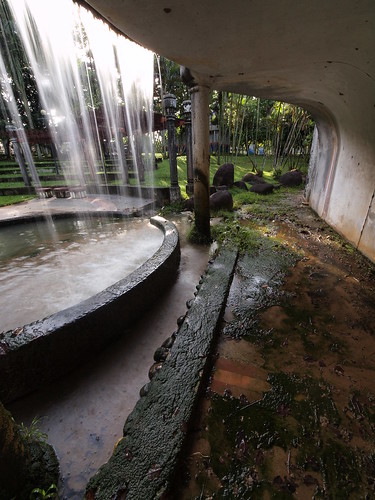
Behind the waterfall.
There was a small ampitheatre like architecture towards the inner part of the garden, and this caught me by surprise. The circular and sloping contour converge at this small waferfall structure. I took the advantage of going behind the waterfall, with the sunlight providing the desired highlight to the water lines.
With a very low shutter speed, I was able to streak the flowing water, and recording it in its greatest splendor.

7mm, f/20, 1/4s, ISO100, -0.7EV.

The richness of texture in this image amazed me! The wet and slimy moss added depth to the opposing dry wall.


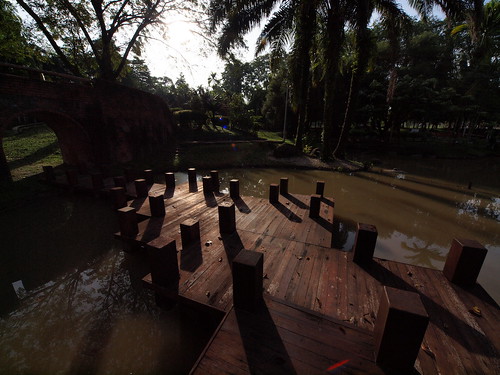
Morning shadows.
I just cannot pass this scene. The shadow lines were just overpowering to be ignored.

The challenge was getting the necessary shadow details. Again, I was amazed by the camera Auto Gradation.

7mm, f/11, 1/320s, ISO200, -2EV.


Restaurant by the pond.
This classic postcard-like composition capped the outing. It was just marvellous! And, it only took me less than 30 minutes to capture them all. 

E-30 with Zuiko Digital ED7-14mm F4.0
9mm, f/6.3, 1/400s, ISO200

I was just amazed at the richness of texture and color in this small enclave. I just wished I knew about it much earlier.

Keep on shooting....

Wednesday, March 25, 2009

Zuiko and "A wind blows" Challenge

Lately, I have been entering my images, either from my database in Flickr.com or by making new shots, into the dpReview Challenges.

E-30, Zuiko Digital ED7-14mm F4.0
7mm, F/10, 1/100s, ISO200

In Challenge #11, A Wind Blows, I was tasked to capture an image that "show how winds effects nature, people or animals and how it can have both a gentle caress and be an unstoppable force."

I was walking in the Shah Alam Lake Gardens on Sunday morning after shopping at Pasar Tani, aka Farmer's Market. The sight of these tall trees struck me. The tallest tree bent with the wind blow. With the ultra-wide angle zoom lens, I was able to capture the converging perspective of the towering trees, with the flopped one being the centerpiece!

The early morning sun brought added depth to the shadows and highlights, with the light and dark intertwined majestically bring out the glow in the shot. The strong blue sky prodded in fresh perspective, too. Not too shabby, I would say.

And much to my delight, the dpreview forum crowd also appreciated my effort, and this image got 30th place out of 313 entries.

Not a bad effort, I would say!


Thursday, March 19, 2009

Zuiko 7-14mm F4.0, An Ultrawide Zoom

E-30 with Zuiko Digital ED7-14mm F4.0
7mm, F/16, 1/25s, ISO100

When Olympus announced the Zuiko Digital ED7-14mm F4.0 lens back in September 2004, it was the widest ultra-wide zoom in the market. This was a strong selling point for quite a while until Nikon released the Nikkor 14-24mm lens in Fall 2007.

This is lens is meant to be a pro lens. Typical of an award-winning lens, the optical quality is superb, with strong control in barrel distortion and chromatic abberrations that are synonimous with this type of lens. Sharpness is superb across the frame, too!

The wide vista, with a 114-degree angle-of-view, allows for creative photography in confined spaces which are suitable for architecture. The superb rectilinear performance further enhances its pedigree for reliable and accurate rendition of the scene.

This lens is just simply superb!