Blog Keywords

Popular Posts for the Month

Showing posts with label landscapes. Show all posts

Wednesday, June 29, 2011

iZuiko and a View Out of the Window

.

Take a peek outside... the window.

There's nothing much to see actually from my room. Just the neighbor's house, a mirror view of my own house!

That's the typical view of a Malaysian suburban house, terrace mostly.


XZ-1, 6mm, f/4, 1/800s, ISO100, Grainy Film Art Filter

And would you believe if I say that my house has appreciated in value from a mere RM330,000 to RM650,000 in just less than 5 years? Well, such is the bloated price for houses in Klang Valley has become, it makes most people cringe! That's the reality. Whilst other price of goods have steadily risen in double digits annually for the past couple of years, the price of land and property is much more staggering.

To survive in Klang Valley now takes more than just a good paying job, a middle-income earner needs to have strong financial support from other sources, if he/she yearns for a house! To think that the starting salary for most jobs has not changed much for the past 15 years says a lot too. When I started work back in '96, I was paid RM2,600 a month. Guess what? A fresh grad is getting the same amount now, in '11!

Take a peek through the window...

The harsh reality for the next 15 years? I wouldn't know, but I think it will get harder every time!


Tuesday, May 24, 2011

Zuiko and Picnik

.

I have been using the Picnik software in flickr.com for quite a while.

And, I love it.

There are so many effects that can be used to make the picture more alive and stand out. Or quickly get some special effects that require hours using Photoshop, rather.


E-5 with Zuiko Digital ED7-14mm F4.0
7mm, f/5.6, 1/1600s, ISO200, -0.3ev

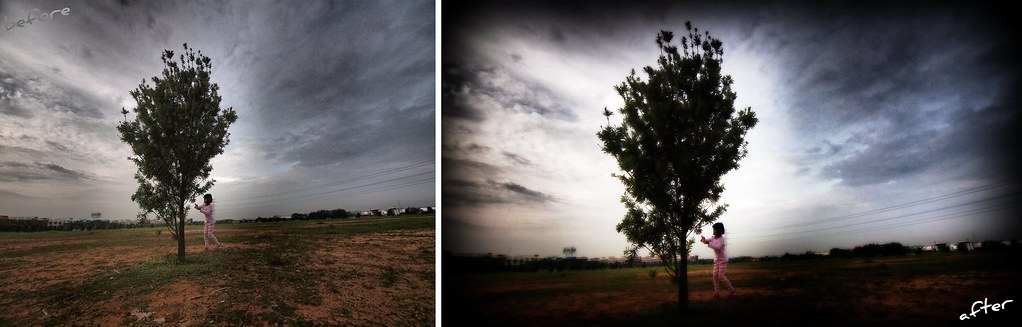
From the original picture, I crop it from 4:3 into 16:9 to give the cinematic effect. Then, changed the tonal and focal impact using the Orton Effect filter and added vignetting to the sides to emphasize more on the central subject.

That's all to it... Well, other than using a super-duper ultra-wide lens, that is!!

Thursday, February 24, 2011

i.Zuiko and Photography Class

.
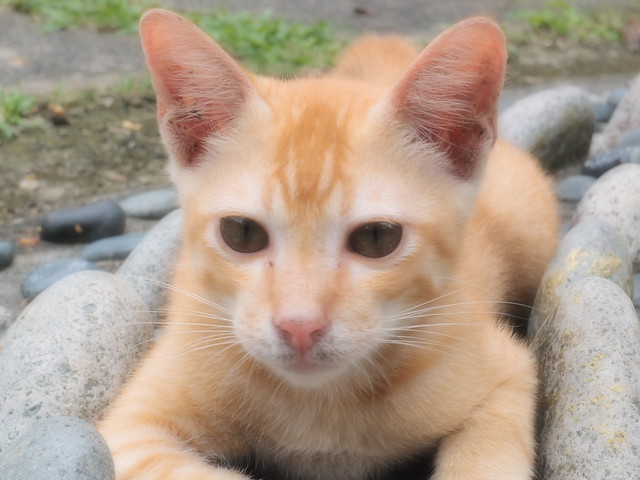
A kitten was lying on the pebbles, and I just took the shot with the fast XZ-1 lens


I recently conducted a short beginners class for 5 students. It's simple and direct approach to photography, with emphasis on key skills to create beautiful images.

My class is a half day morning event targeted for 4-6 students at RM50/pax. Location is outdoors, most probably at Shah Alam lake gardens. If interested for any class, as I can cater as much topics as possible, please contact me at 012-2040883.


A beautiful banana flowerette with smooth bokeh rendition
24mm, f/8, 1/160s, iso200, +0.3ev


This was a DSLR course, but as the teacher, I opted to use my Olympus XZ-1 as the tool of instruction. Though it's not a DSLR, it has all the key features for a basic beginner's DSLR with kit lens. Even the lens depth-of-field effect is achievable with the XZ-1. That's good enough for the class. Also, for me to lug around a full size E-5 with the Zuiko Digital ED14-35mm F2.0 lens will be tiring as I have to chase around the field with my students scattered like little lambs.

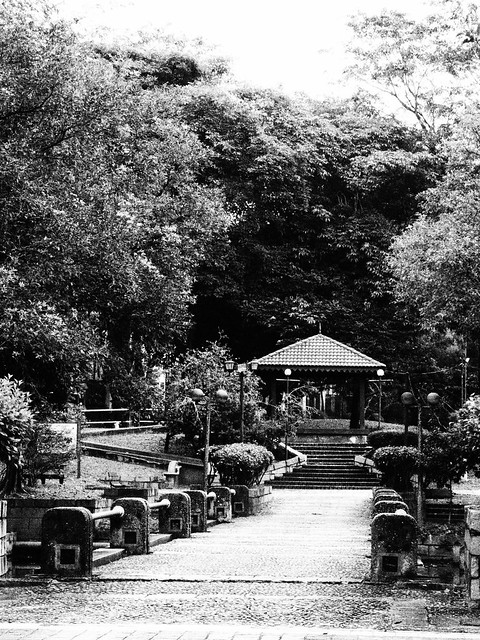
The monotones are just nice to accentuate the telephoto landscape effect

Just focus on a few rules to create great images:
  • Look for the tones (check in black & white)
  • Capture sharp images (in correct focus)
  • Set the subject off-center with the Rule of Thirds
  • Try to grab the story and emotion

Till next time...

Sunday, January 16, 2011

Zuiko and a Little Planet

.
Little Planets.

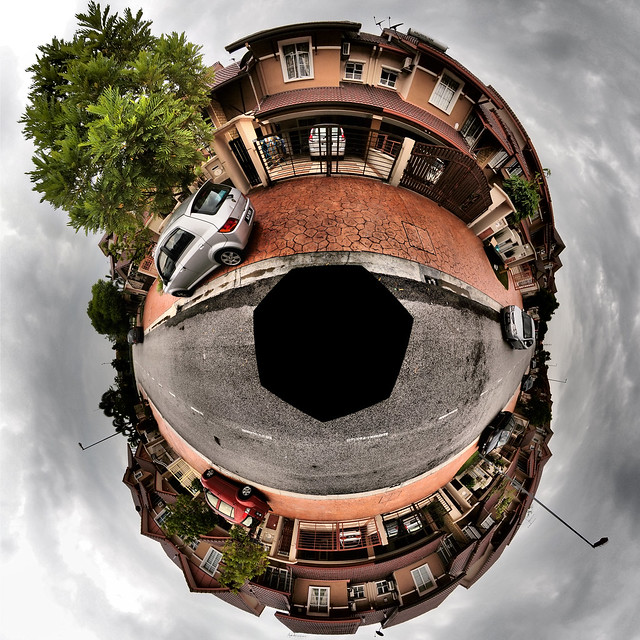
This is the first Little Planet shot,
and the nadir point is covered with pure clone stampings.

I came across this type of photography a couple of years ago. And, though I was intrigued by the techniques to achieve such creative output, I never put the time and effort to learn how to do it.

Somehow, out of the blue, today I took the plunge from zero to hero!

It's a good thing that Flickr.com has a group dedicated to this art. All I did was read through the threads and learned the techniques rather quickly. It did help having an ultrawide angle lens like the Zuiko Digital ED7-14mm F4.0 to assist in getting high quality 360-degree panorama with the least stitching. In fact, I only needed 7 to 8 frames for 52-45 degrees coverage per shot (in portrait orientation), and 2 frames for the nadir point (this is the point where I stood).

As advised by the group, I downloaded the freeware software "Hugin Panorama Stitcher". This software is really very good. The stitching is near flawless as I had a tough time identifying the stitch borders in the panorama pictures.

The software is rather straight forward. It starts with the Panorama Stitcher screen with the "Assistant" tab as the main controller. This tab has a 3-step process to stitch the panorama. It is quick simple as the first step is to 1.) Load Images (where the Lens parameters are very important to ensure the least distortion and error to the image output), and secondly to 2.) Align (where the software automatically scan the images and stitch them into place).

Next is to transform the normal panorama scene into radial that is called Little Planet. On the Hugin "Fast Panorama Preview" window, there's a tab called "Projection" and select "Stereographic". Next, there's a tab called "Move/Drag" and change the "Pitch" parameter to 90 and leave the other two parameters 0. Then click "Apply". The image immediately transforms into a planet, a very small planet. Just slide the zoom applicator and the image will enlarge. Crop to taste.

Finally, 3.) Create Panorama (great output controls which includes TIFF/JPEG and also HDR processing).

Wham... I was hit with the problem. Just look at the picture below!

This is the result just after stitching, and the heptagon is clearly seen.


Wow!! That's a big hole!!

How did that happen?

Well, I forgot that the nadir point, i.e. the point I was standing was not in the picture. Thus, the heptagon was so revealing in the picture!! Definitely not what I wanted! Well, to cure that, I simply cloned the road. Not a very elegant solution, I would say. But, it worked none the least.

The image below is the one with the nadir point shot taken (2 frames, in fact).

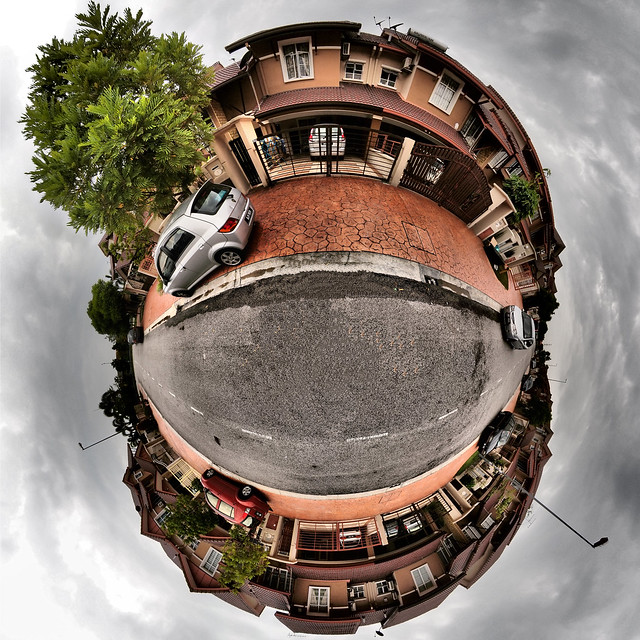
A refined planet with nadir points using actual frames,
and cloned my feet off the picture

To compare, I did another Little Planet. This one used 8-frames for the 360-degree panorama plus 2-frames for the nadir point. I find this image is much finer in reproduction as it has more frames to construct the planet.

Oh ya!! As I was using Dramatic Tone Art Filter for these shots, I didn't activate the HDR feature in Hugin during stitching. I find the E-5 effect much to my liking.

But I prefer the first image in this blog, as the picture is biased to my house and enlarged it in comparison to the rest of the neighborhood.

At last, I have my own Little Planet at home!


Tuesday, December 14, 2010

Zuiko and a Touch of Soft Monotone

.

Simple photography. Get back to basics. I always remind myself.

Composition.
Mood.
Story.

In my journey to recover and rejuvenate, I am resorting back to simple basic stuff. Always go back to solid composition with the typical rules and lines and curves and contrast and tones. See the light, and the pictures will come.

I like this picture. It's not a complex fast-action nor close-up nor low-light nor portrait nor landscape shot. It's neither of these that makes it interesting to my eyes. It just simple composition, with the correct mood and outline to the story. The mood is quietness, something that I find serenity in the picture. I am not sure why. I took more than a dozen shots, but I am stuck with this shot. Somehow this has character, a story waiting to explode from the frame. But, the amazing thing is I cannot put why and where. That's what makes it interesting to my senses.


I overexposed the shot, blowing out the sky with the priority not to blacken the subject. Furthermore with the High Key curve profile, the shadows were minimized. A minimal crop to bring the subject closer, use of Red filter to highlight skin tones in monotone, and a touch of Soft Focus Art Filter effect was all it needed to tighten the loose ends. The low vantage point, the contra of subject with background, the curves of the pool and gazebo, the diminishing twin towers, the empty cabana chairs, and the placement of children made the quietness deafening.

Back to basics, take note of the subtleties in details, and just pray for the best.

Somehow, I am inclining to explore the works of Sam Abell....


Friday, November 26, 2010

Zuiko and Dramatic Tone for Landscaped Portraits

.
I am still warming up with the E-5. Though it is mostly based on the E-3, the technical jump has challenged my creativity to a new level. Notably on the technical improvements are the image quality ranging from ISO100 to ISO1600 with the excellent sensor pixel sharpness. With my collection of F2 zooms, this has opened a plethora of situations with regards to exposure value parameters (aperture, shutter speed, and sensor sensitivity). On the creative improvements, the addition of Art Filter 10 Dramatic Tone and Hi-Def video at 720p have pushed a new level of imaging possibilities.

E-5 with Zuiko Digital ED 14-35mm F2.0 SWD
22mm, f/8, 1/100s, ISO200, -0.3ev

Recently, I have been focusing a lot on the Dramatic Tone art filter. And why not? This new filter beckons to be explored. I started with simple landscape shots during my E-5 review. The 3-day loan was not long enough for me to explore its creative possibilities. Only now do I have the time to explore the beauty of the E-5.

The previous blog entry showed how the Dramatic Tone art filter interacts with wireless TTL flash setup. The diffused lighting seems to bid very well with the filter. I really like the output. I am looking forward to explore different lighting setup with this filter.


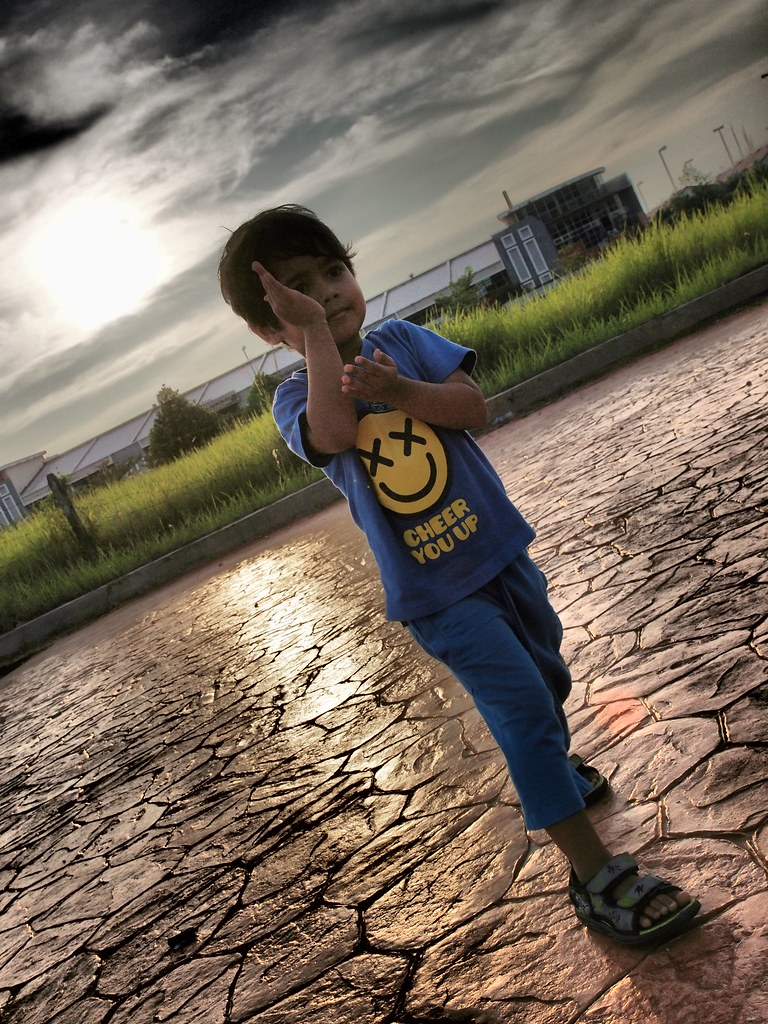
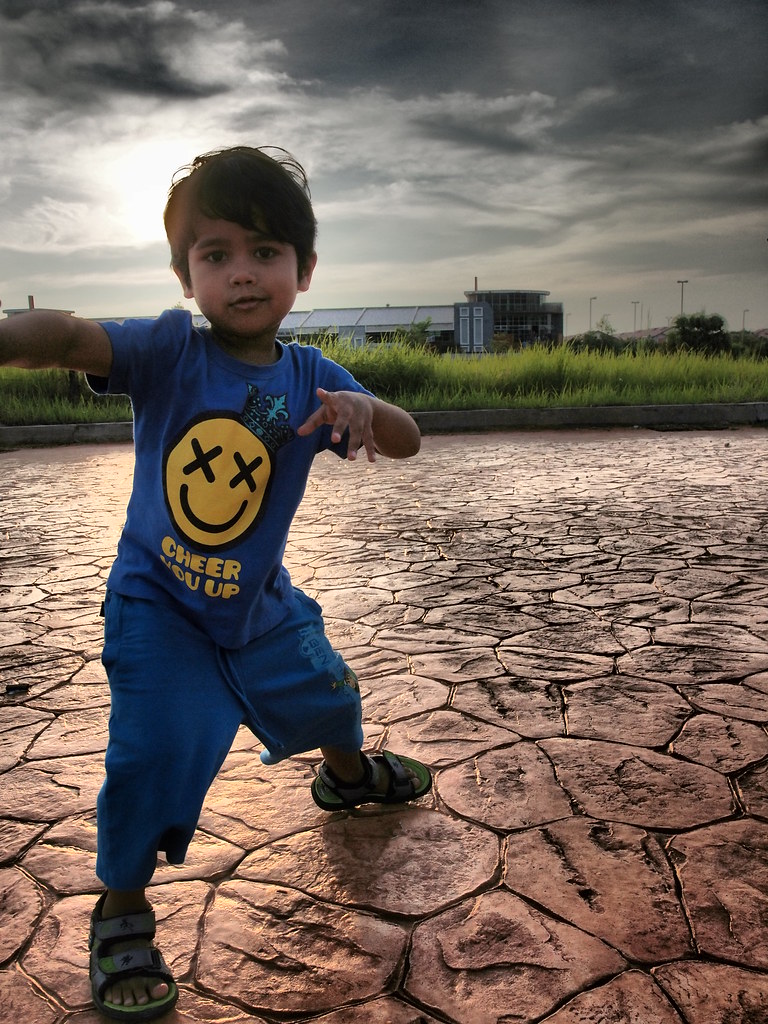
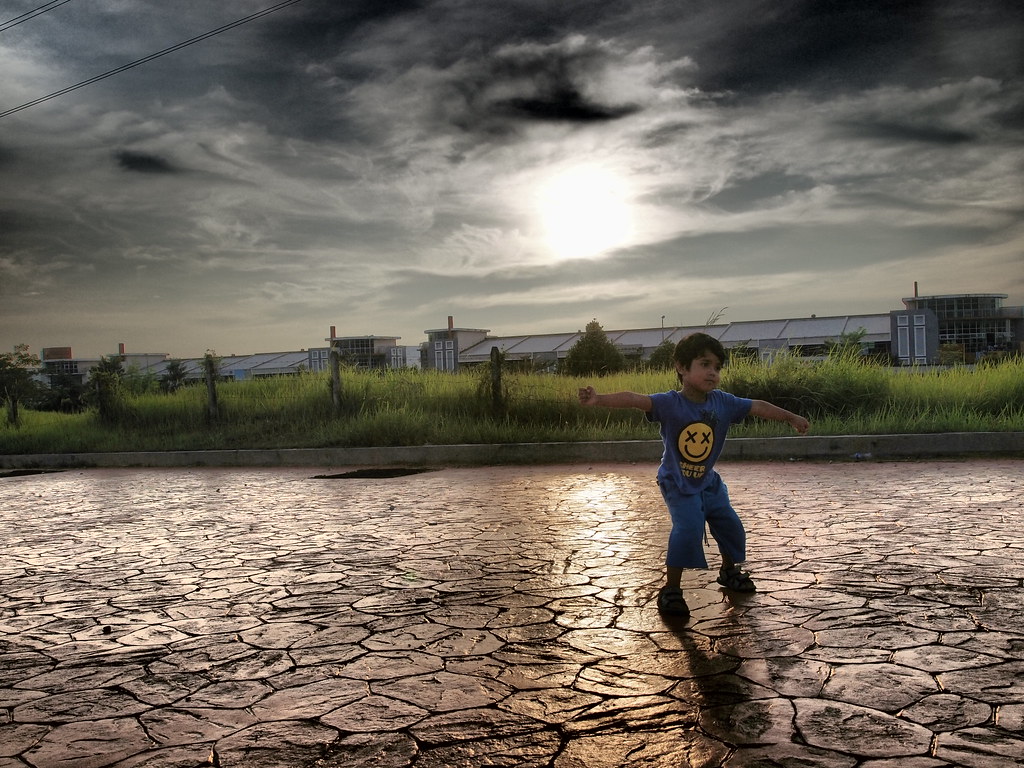
In this entry, the exploration of the Dramatic Tone filter with portraiture against strong backlight; in this case direct sunlight, was done. It's simple, actually. I put my composition setup as shooting landscape, meaning small aperture (f/8 or something like that) and pseudo hyperfocal distance focusing technique (not that I use Manual focus, but during Auto Focus, I keep in mind the hyperfocal distance relationship towards the subject to achieve image in-focus sharpness across the frame).

And I purposely did not use the flash for fill-in, as I really wanted to explore the capability of the filter to lift the near silhouette subject, in this case my ever-willing son.


To my surprise, the filter did a very good job. No doubt there was still noise even at base ISO200, but considering that the filter lifted easily about 3 to 4 stops of exposure, I considered this to be very good indeed. I doubt whether the E-3 or the E-30 can deliver this quality (just take a look at the SAT output). The TruePic V processor really shines!


In case, if you noticed, the solar ghosting and flares were also tamed. With the Dramatic Tone tendency to exaggerate contrast, I was smitten with the clear and crisp output. This was practically due to the Zuiko Digital ED 14-35mm F2.0 SWD lens. The optical properties for this lens was just phenomenal!

Hmmm.. what's next? Maybe shooting with the Circular Polarizer (C-PL) with wireless TTL Flash. That sounds interesting. The color saturating properties of the C-PL should produce more vivid output to the already eye-popping Dramatic Filter effect.

Now... where did I put my filter pouch?!!!


Tuesday, October 19, 2010

S90 and a Bicycle Ride Around the Neighborhood

.

Last weekend I went for a ride on my bicycle around the neighborhood. Since I have my Android phone with me, I activated my SportyPal app to record my ride using the built in GPS. The Canon S90 was the obvious choice as the E-system does not prove to be compact enough for me to carry during the ride.


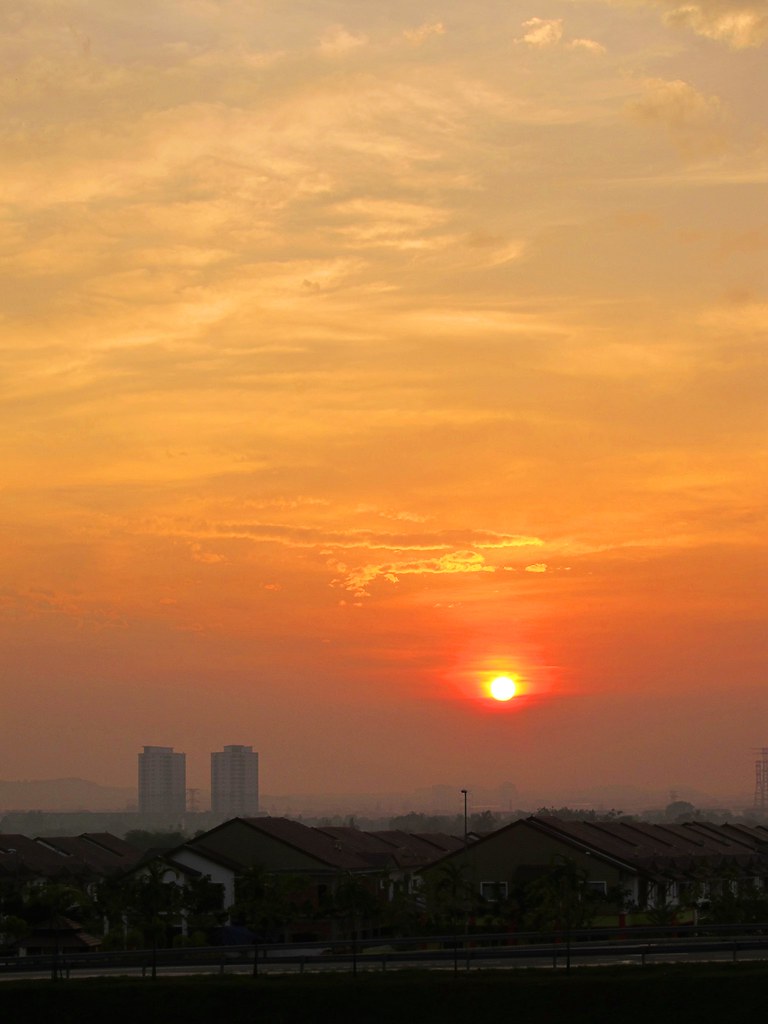
Sunrise over Putra Avenue

My first ride was late in the day, around 6pm. A sunset picture would be nice, along with the 5km ride. About 2km from my house, there was this empty lot with a pond. Apparently the pond was made to capture and hold water during heavy rainfall as means of flood management. The lotus leaves provided a beautiful scene although from the roadside the area looked like ordinary shrubs. A ten-foot walk across the roadside was all it took to see the difference in scenery.

Thirty minutes before sunset, and the sky was still blue

I continued my ride for another 2km on an open field. I was looking for a sunset shot overseeing the power lines. I found out that this kind of shots really put the Canon S90 to the limit. The limited aperture range up to f8 and shutter speed up to 1/1000s really made it difficult to control the sunlight.

Solar energy overpowering fossil fuel, not until 10 years from now


The next morning, the sky was a bit cloudy. Nonetheless, I carried on with my ride. I was eager to capture the sunrise on the other side of the neighborhood. After a 2km ride, I reached this vista point. Actually, the KLCC Twin Towers and KL Tower are visible during clear days.

Sunrise atop Putra Avenue and parts of Puchong

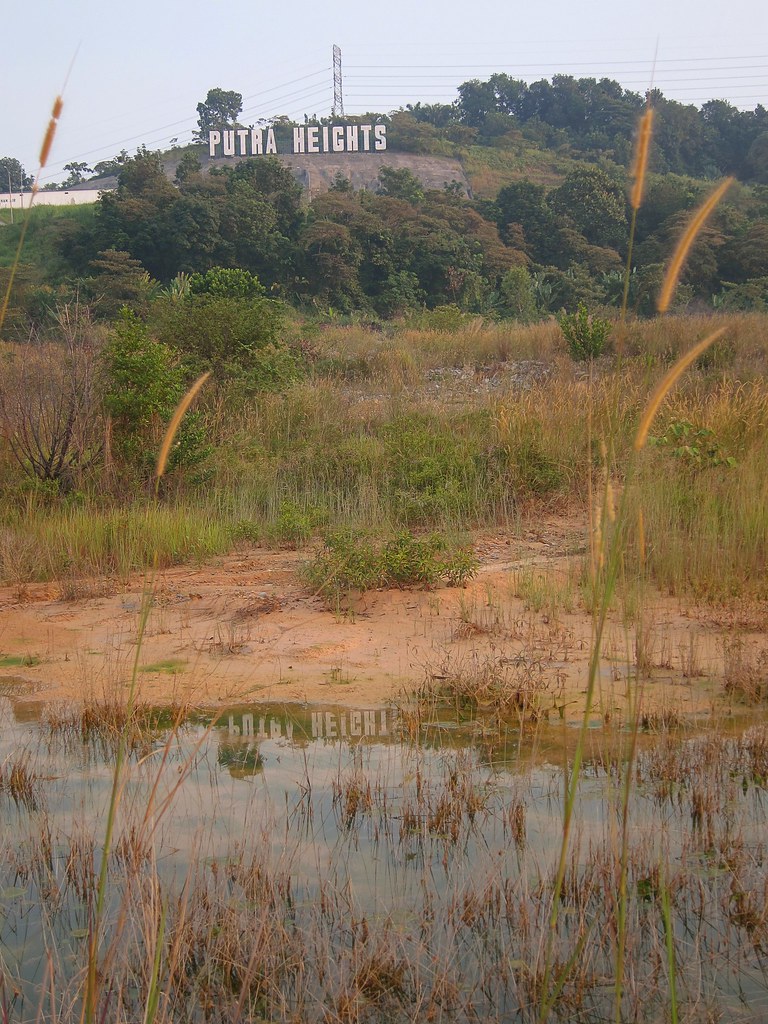
Riding up the rocky hill with my Hybrid bike proved to be okay, but I thought a proper MTB should be the best. Somehow, I managed to go up halfway to the Putra Heights landmark point. That's quite an achievement for a bike made to speed like a Racer and climb like an MTB.

I may need an MTB for this

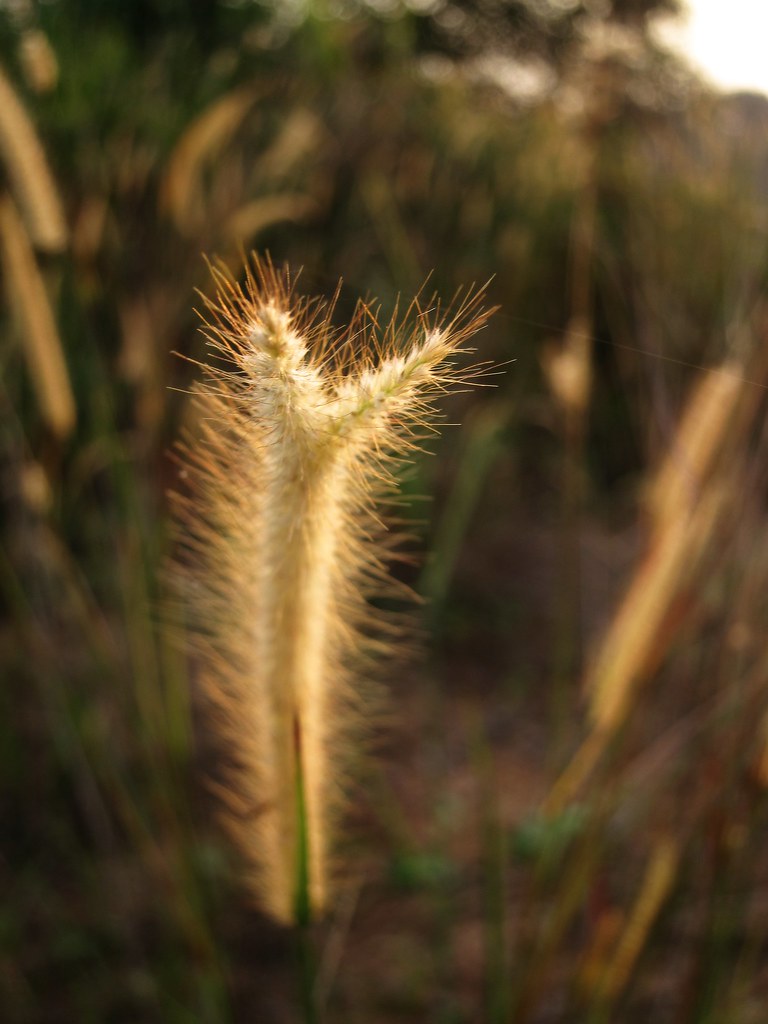
The sunrise had a beautiful glow to the grass, that I took many shots. The S90 had trouble coping with the strong backlight that many pictures did not came up to my satisfactory level.

The split ends were an interesting aspect of this grass

Maybe I will return with a better camera, the E-system for the ride. But I have yet to figure out how to pack the camera effectively for comfort and easy access. For now, the S90 provided some nice images, and I couldn't have been more glad.


Monday, October 4, 2010

Zuiko and E-5: Day 4

.

This is the day. The sad day. The day I have to return the E-5 to Olympus Malaysia.

E-5 with Zuiko Digital 14-54mm F2.8-3.5 mk2

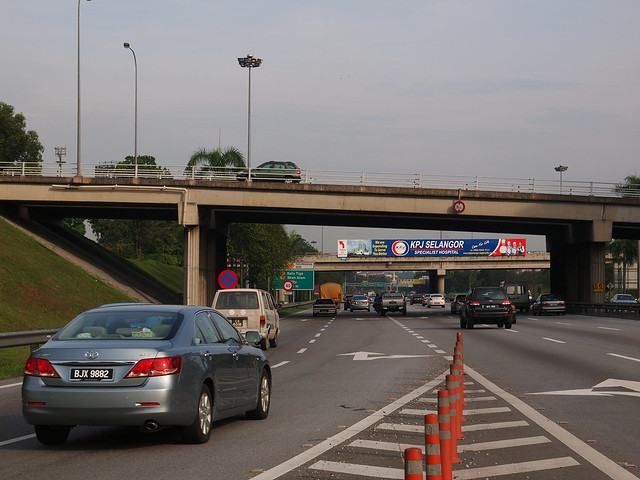
On my way to work, a small mishap happened. I ran out of gas!!! A small miscalculation on the reserve. I was just 1km away from the nearest petrol kiosk. But then, it turned out to be a blessing.

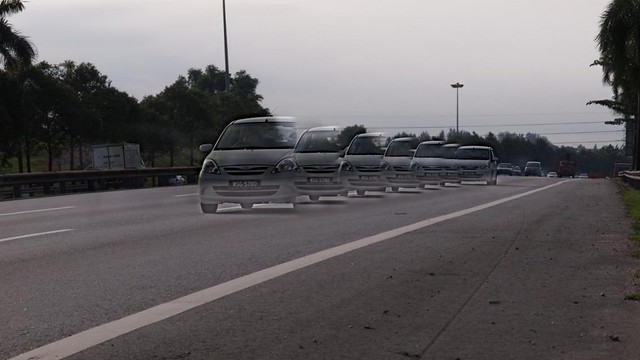
While waiting for the ELITE Expressway Patrol to pass by, I managed to make some C-AF rapid shots. The fast moving cars at the excess of 100km/h (55mph) were just perfect!!

As I had experience shooting C-AF sequence at 5fps with RAW + SuperFine JPEG (total of 18-20MB per shot) during my kid's concert yesterday, the limit of the buffer was 7 frames. As can be seen in the panorama stitch shot above, I was stuck after the 7th frame!

About the C-AF performance? Well, most of it was based on technique and approach. In this case, my experience was about 70-80% hit rate. This was the only clean sequence I got out of 4 attempts. To tell you the truth, if I had been doing this type of shots day-in day-out, the hit rate might have been in the high 90%.

A quick landscape shot of the ELITE and KESAS expressways interchange


After my mishap was settled, I sped off to Olympus Malaysia office at Mont Kiara. I was thinking, I might as well milk out the last drop of pixel out of this E-5. Yeah, that's a great idea! The indoor shots were between ISO800 and 1600, while outdoor shots were at ISO200. All using Dramatic Tone, as I was at high emotions actually!

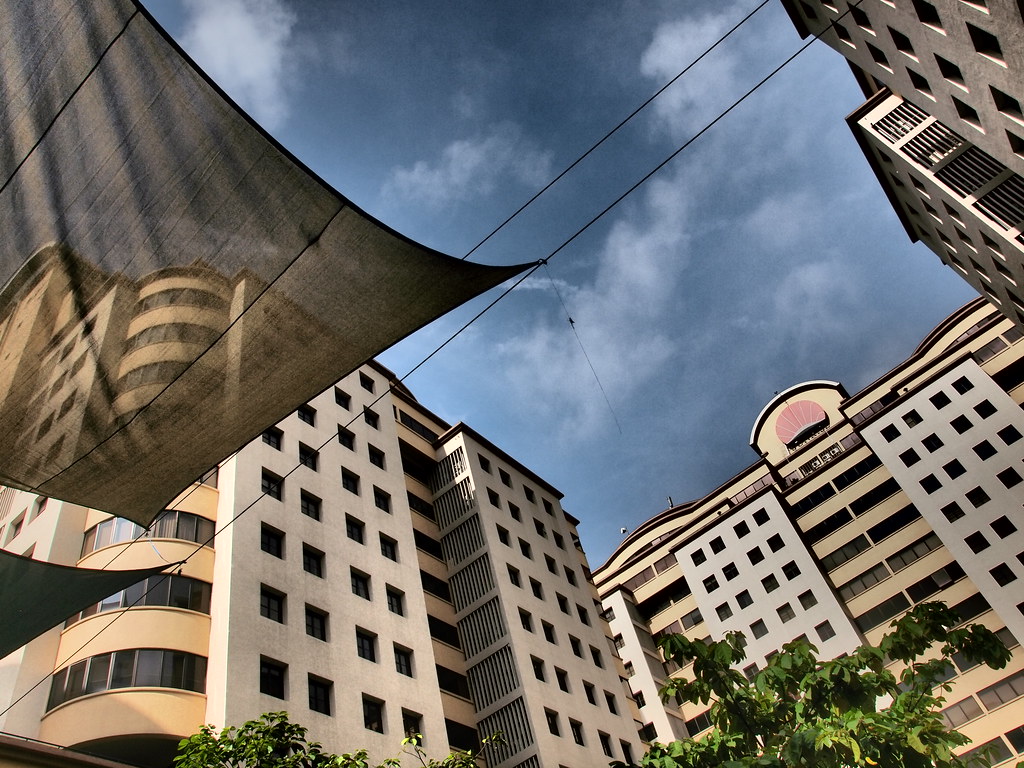
Dark parking bay below the office.

Olympus office is somewhere here.

At Olympus, I was greeted by Mr Yang (not a real name). I shared my experience, and felt very sad about it. We exchanged experiences shooting the E-5, and he showed me some great prints at A3-size to show the edge-to-edge details. Well, I haven't printed my shots yet, and boy were the prints looked great!!

After about half an hour chit-chat, I bid farewell, just after we were joined by Mr Big Boss. I also exchanged experience about the shoot with him, and also tried to lobby them to loan a couple of E-5s to our small community's upcoming trip up Mount Ledang (the MyChiaroscuro.net). Hope they agree to the idea, because brother Robin Wong will be joining the trip, too.


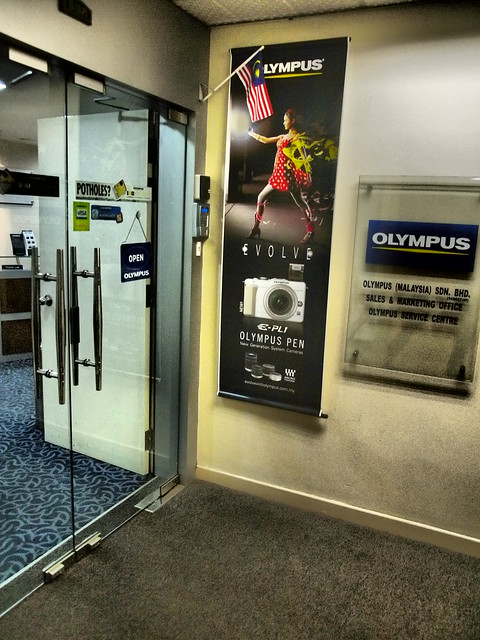
Entering with sadness...

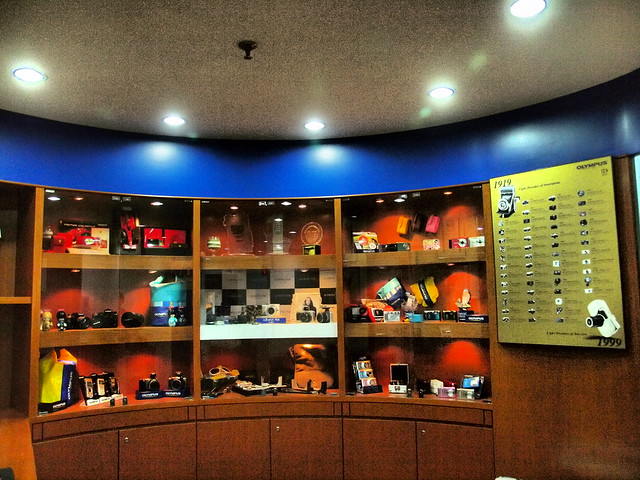
Olympus cameras display

I just wished that I just could just grab hold of the bag and ran away!!

Well, now I am having a severe E-5 withdrawal syndrome. My mood is a bit off, and strangely when I arrive home I immediately grab hold of the E-3... Three days were just not enough!!! And, I apologize for any shortcomings of my write-up regarding the E-5 as I did not have much time to really study and test its capabilities.

It's going to be a tough few weeks for me to cope with the loss!!


Saturday, September 25, 2010

Zuiko and Around the Corner

.

It has been a wet week recently here. The rain comes and goes without warning, and most of the time is the cats & dogs variety. A no-no for most cameras; however, glad I have the E-3 and SHG lenses in my drybox! It has been quite a while since I shot the E-3 and the Zuiko Digital ED 7-14mm F4.0 uber-wide angle lens.

The rain just stopped, but there were still drizzles flying around. The dark clouds were still lingering in the evening sky. I was itchy for some shots. Really in the mood for some serious photography. My mojo was back!

E-3 with Zuiko Digital ED 7-14mm F4.0
7mm, f/4, 1/400s, ISO200

But, I wouldn't want to use the E-30 come the sudden rain. E-3 should do it. What-the-hey!!! This archaic camera still works, albeit the recent announcement of the E-5. I was a bit worried the camera stopped working out of jealousy as I am lusting for the E-5 ever since the rumor came about.

I was lazy to go somewhere just for the sake of taking some nice photos. I told myself, what if I just walk around the corner of my neighborhood and take some interesting snaps. That was a thought, and I was glad I did it.

E-3 with Zuiko Digital ED 7-14mm F4.0
7mm, f/4, 1/200s, ISO200

My son tagged along, but mostly he was on his own running across the empty road, zig-zagging his aeroplane run with great sound effect. He was minding his own business, and so did I. Both of us had a great quality time.

Tuesday, March 16, 2010

Zuiko and a River

A river runs through it.

Canon S90, 7.5mm, f/8.0, 1/20s, ISO80


It has been more than 10 years since I visited this small Malay village en-route to Slim River from Tanjong Malim. The water still flows cool and clear. The scene is still beautiful. Nature at its finest.

It was an impromptu visit, and I didn't have my swimming trunk and even the DSLR with me. Luckily, the Canon S90 point-and-shoot was there.

While the IS helped a lot to get low shutter speed to get the water flowing effect while ensuring the image is sharp and crisp, I was not able to get a lower shutter speed to say 1/4s. This was because of the f-stop limitation! The S90 only allowed until F8.0, as this was the theoretical limit before diffraction effect kicked in. Even with ISO80, the shutter speed wouldn't go lower than 1/15s.

Nonetheless, the S90 did a very good job. I got the image as I perceived it to be. That's the bottom line.

Monday, December 7, 2009

Zuiko and Boulevard Putrajaya


A shot of the Boulevard just in front of the Palace of Justice. At the end of the boulevard stands tall the Prime Minister's Office, if not so small thanks to the ultra-wide effect on the background.

E-3 with Zuiko Digital ED7-14mm F4.0

7mm, f/9.0, 1/250s, ISO100

Saturday, November 28, 2009

Zuiko: Using the 7-14mm Ultra-wide

I made a point to myself to use the Zuiko Digital ED7-14mm F4.0 more.

The morning was actually quite rainy, so I chose to use the Olympus E-3 as it was weather-sealed should rain to come during the middle of the shoot. The 7-14mm was weather-sealed, too.

Palace of Justice, cropped in 16:9
7mm, f/9, 1/200s, ISO100

Initially I did not know I would end up here at Putrajaya, but thinking logically that the 7-14mm would be more useful for many architectural and landscape shots, the national capital was the perfect location.

I was driving along the main road, and the Palace of Justice struck me. Since the town was virtually empty due to the long Eid Adha holiday weekend, only a couple of tourists and keen photographers were there. This was good for architectural shots! And a bonus; the sun suddenly appeared amongst the clouds to render the buildings with good light.

Shooting with an ultra-wide lens was very tricky. One thing that could really could screw things up were the perspective. It could easily be a nightmare if not done properly. For that shot, to keep the perspective in check, I used the E-3's focus markers and put the horizon along the 5 points. And I checked the 3 vertical markers with the building's pillars to ensure the perspective was correct. And all was done handheld, without any tripods or supporting gizmos. To get it right the first time, I held my breath to freeze my framing and quickly but calmly clicked the shutter.

The composition was heavy bottom, with half of the frame being the road. Well, I just cropped off the bottom.

Another thing, to get all in focus, it was very easy as the depth-of-field for such a wide lens with the 4/3 format was very huge. I just dialed in F/9.0 and it was more than enough.


Palace of Justice framed in the Putrajaya Holdings HQ main entrance
7mm, f/8.0, 1/1000s, ISO100

For both images, the sun was directly in the frame. This posed a problem in the Dynamic Range department. And, I chose not to use RAW, instead opted for the Superfine JPEG (which means the JPEG file is ultra huge, but not as huge as TIFF). The original file showed much shadows in the buildings' details; thus, I had to post-process the images using my trusty GIMP software.

Using tone mapping with Overlay settings at 40%, I used 3 layers duplicated on top of each other and merged them one-by-one. A bit of S-curve to enhance the shadows and highlights, and increased the saturation by 40 points did the trick (during the tone mapping, the colors faded).

One thing that ticked me off during the shoot. I was actually chased away by the security, claiming that this place was not for public shooting. I was aghast, and immediately responded that I am taxpayer, and these buildings were built using the people's money. I was not even inside the building, just outside within the corridors!

I was shocked, and immediately left the place. I managed to get a couple of great shots, but those were it!


Friday, July 10, 2009

Zuiko and the Star Effect


Star Effect @ F22, originally uploaded by thru-the-zuiko.

I made this shot with the E-30 and Zuiko Digital ED14-35mm F2.0 SWD lens. I set the exposure to Aperture Priority mode, with 21mm focal length. Exposure value was f/22, 1.3s, ISO400, -2.7ev. I developed the ORF file in Olympus Studio v2.3 - which is the latest version - and applied Soft Focus Art Filter effect to give a surreal aura to the image.

A few days back I had been teasing one of my students with some shots depicting star effects on the lamp posts. I compared with a similar shot that did not show the star effect. I did a quick quiz on how I achieved a simple effect without doing any postprocessing tricks or any add-on filters.

He argued that the long exposure was the reason for such effect. I told him, it was not the case. I hinted that the resulting effect was due to the lens behavior, rather than long exposure. He did not agree.

After about half an hour of arguing, I told him it was due to the small aperture, usually at F11 and above. He did not believe me. So, I gave him one night to try it out.

The next day, he agreed that I was right.

Another simple tip to get nice star effect direct from the shot. Nothing else matters.


A comparison of F11 (left) and F5.6 shots. Notice how the star effect starts to diminish as the aperture gets bigger.


Sunday, July 5, 2009

Zuiko and the Eternal Wait


I was out and about on a Sunday morning. After an hour-long shopping for fresh groceries at the Farmers' Market, I sped to Shah Alam for a morning walk.

E-30 with Zuiko Digital ED14-35mm F2.0 SWD
14mm, f/2.0, 1/1250s, ISO200, -0.3ev, Pinhole Art Filter effect

I have this habit of carrying at least a camera and a lens wherever I go; at least I try to...

Since it was very cloudy with a tinge of haze, I opted to use the "Hoya Pro1 Digital" Circular Polarizing filter to cut the ugly glare and light refractions. The colors were highly saturated, as the hidden colors were revealed by the filter. This worked marvelously, as the image attests.

The main problem with this shot was getting the right balance of the main subject, central supporting subject and the background. There was a gazebo at the right of the image, and using the E-30 I had to use great care not to capture a portion of the roof (should be just to the right of the minarets).

The main subject was central to the message, invoking solemn loneliness in search for life's main purpose. The background, whilst blurred, showed the distant faith that needed to be omni present to keep any hope and sanity in check. The supporting subject suggest that help is nearby, whenever needed.


Abstract shots are very difficult to create, e.g. landscapes in portraits. Sometimes it just waits to be captured. Just be there, and look for it!


Friday, June 26, 2009

E-P1 Visits KLCC Park


A couple of shots at KLCC Park.

E-P1 with M.Zuiko ED14-42mm F3.5-5.6
14mm, f/22, 1/5s, ISO100, -0.3ev, Pin Hole Art Filter

The wavy effect of the water added with the glare from the afternoon sun created a surreal effect on the overall image. Added with a rather long exposure and Pin Hole effect, the isolation of the Petronas Twin Towers is complete.


42mm, f/8.0, 1/25s, ISO100, -0.3ev, Grainy Film Art Filter

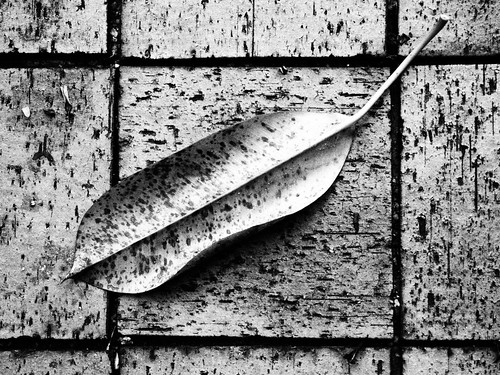
This lonely leaf struck a chord with the checkered bricks layout. It broke the monotonous repetition, sort of bring the life out of the image. The contrasting texture was exaggerated with the Grainy Film Art Filter effect. I selected a rather deep DoF to get the whole image in sharp focus.


42mm, f/5.6, 1/250s, ISO200, -0.3ev, Aperture-priority

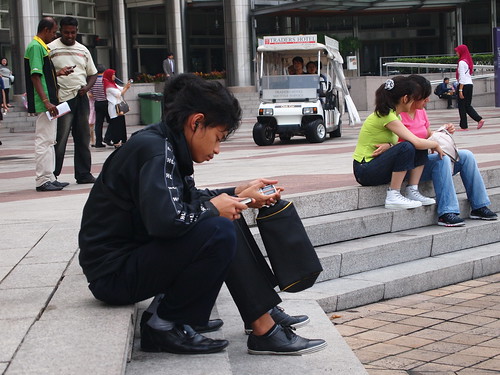
A typical scene everyday near the pond. Scores of people taking a break to see the fountain show, and possibly just to kill time. There is a shuttle service from the Traders Hotel across the park to the Petronas Twin Towers. Great for fast moving businessmen and shoppers.

Thursday, June 4, 2009

Zuiko and the Bridge Up Close

Next time, try to shoot landscapes using a telephoto lens. And put an interesting subject in the foreground, for example.

You'll be astounded with the compression effect.

E-30 with Zuiko Digital ED50mm F2.0 Macro + EC-14 Teleconverter
70mm, f/6.3, 1/800s, ISO200

"I have never seen the bridge this huge before...".


Zuiko and the View from a Hill

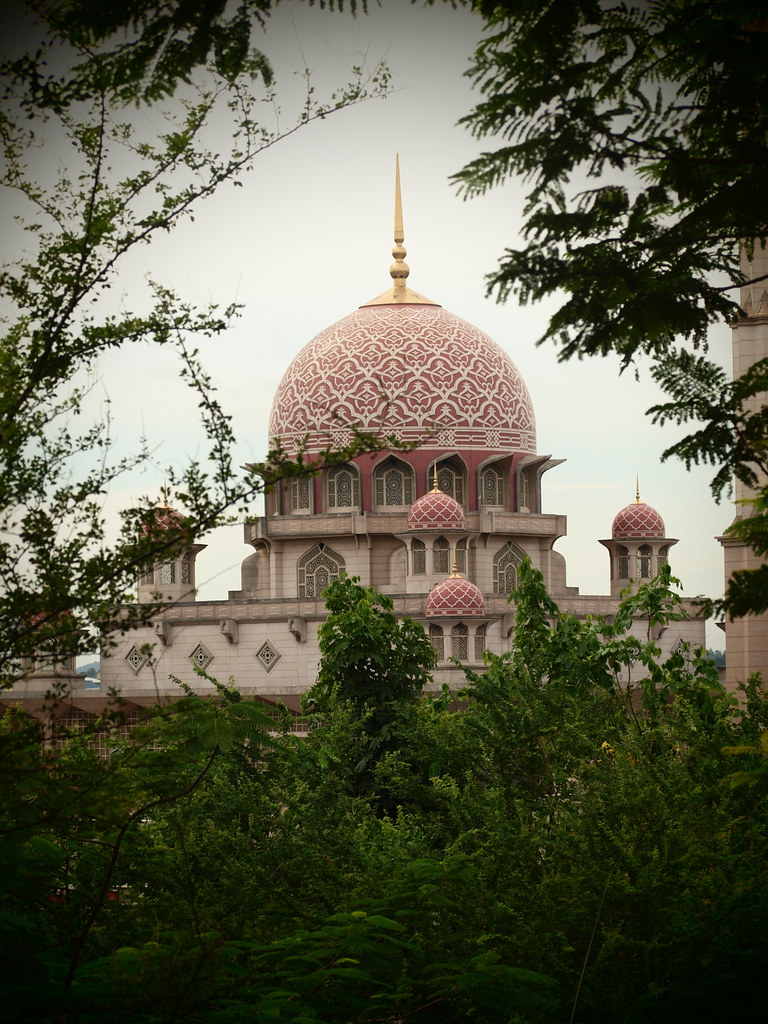
A shot of the domes from a hill nearby.

E-30 with Zuiko Digital ED50mm F2.0 Macro + EC-14 Teleconverter
70mm, f/5.6, 1/640s, ISO200, Pin Hole Art Filter

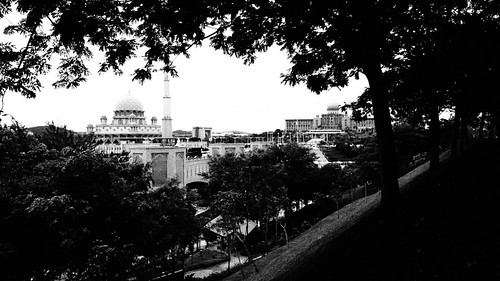
I discovered a nice vantage point overseeing the Putra Mosque and the Prime Minister's Office. Located nicely on the east side of the bridge, the hill is nicely landscaped with pathways and seats for passers by to enjoy the beautiful landscape of Putra Jaya.

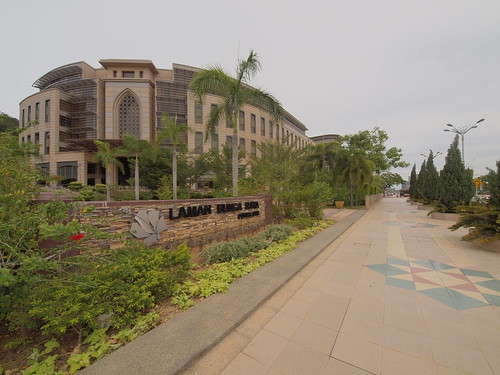
As you walk across the bridge from the Mosque, there is a park on your left - Laman Bunga Raya or Hibiscus Lawn.


Climb the stairs up the hill, and you will see a pathway across the hill terrain. Chances are you will see gardeners tending the park. Quite clean, too.

A retro touch to a classic landscape image. The foreground provided the framing to isolate the Putra Mosque and the Prime Minister's Office. The overpowering contrast makes some fine textures seem to bolt out of the scene.


Zuiko and the Boat

A boat zipping across the lake. The texture richness of the water surface intrigued me!

What I like most about this scene was how the water form being sliced through by the speeding "sampan". To emphasize the fine textures of the shadow and highlights, I chose the "Film Grain" Art Filter. Indeed a wise choice!

E-30 with Zuiko Digital ED50mm F2.0 Macro with EC-14 Teleconverter
70mm, f/6.3, 1/800s, ISO200, Grainy Film Art Filter

The trail of the boat's wake can be seen across the image. The calmness of the lake stirred by the motorboats roaring blades captured brilliantly in shades of shadows and highlights. 

If it was in color, I do not think it will convey the same impact!

Zuiko and Two Sisters at Putrajaya

Doing some street photography; that is one of my photography goals for 2009. 

To start with, I am not really a real street photographer, as I do not have the panache for such subtleness to shoot strangers in public. But, sometimes, I do manage to sneak a few images into my niche street photography portfolio.

E-30 with Zuiko Digital ED50mm F2.0 Macro + EC-14 Teleconverter
70mm, f/6.3, 1/800s, ISO200, Light Tone Art Filter

I already set in my mind to shoot a compressed landscape with a 70mm focal length, especially with the magnificent PICC building as the point of convergence. 

Then, with an instance two sisters raced to the car. The elder arrived first... I noticed this and quickly reframed my shot.

All I did next was just waiting for the little sister to run in front of the dark columns to accentuate her running profile. 

Snap... perfect.

The compression of perspective introduced by telephoto lens strengthened the background, and I did crop the bottom part of the image as it was mainly pavement.

This is one of the images I made during my brief escapade to Putrajaya. There will be more coming in the next blog entries... 

The E-30 was really cooking, in which I really put the Art Filters to the test!

Sunday, April 12, 2009

Zuiko and a Morning Walk at the Park

There is this a little part of the Shah Alam Lake Gardens that I had never ventured before. The landscaping of this particular area is so compact, that only now, after numerous visits, did I notice its existence.

It is situated just behind the Laman Refleksologi, and adjacent to a restaurant. I was just flabbergasted at its beauty, its richness of color and texture, and just simply a heaven for photography! 

I just came from my weekly chore at the Pasar Tani equipped with only the E-30 camera and 7-14mm ultra-wide angle lens. The aim was to shoot some landscape, well I hit the jackpot!

At 8am in the morning, while the sun was shining brightly at a very low angle, the challenge was to control the high contrast. Opting to get as much detail as possible, I chose low ISO with the Auto Gradation contrast correction. This setting allowed the camera JPEG engine to lift the shadow details while preserving the highlights.

E-30 with Zuiko Digital ED7-14mm F4.0
7mm, f/7.1, 1/320s, ISO200, -0.7EV

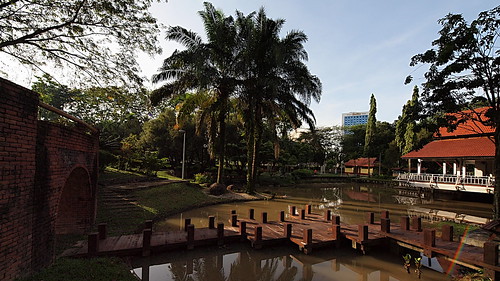
If not for the Grand Bluewave Hotel giving away its location, it is difficult to believe that this part of the gardens actually is nestled just at the edge of the lake gardens by the main road!!

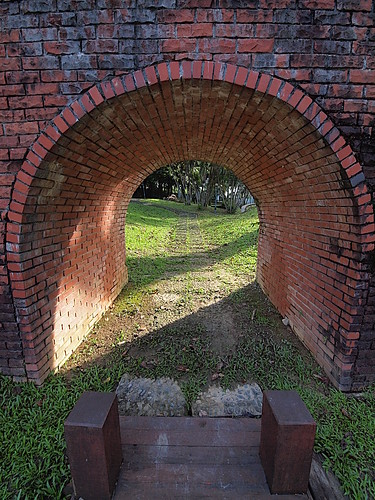
A pathway.
This brick tunnel forming the structure of the overlying bridge had a nice sunlight streaking into it, forming a triangle highlight effect into its shadowy cavern. I lifted more shadow detail in post-process to brighten the overall image.

The converging lines of the bricks along with the elongation of the ultra-wide lens enhanced the impression of walking into the tunnel following the path to the left.

7mm, f/7.1, 1/180s, ISO200, -0.3EV.


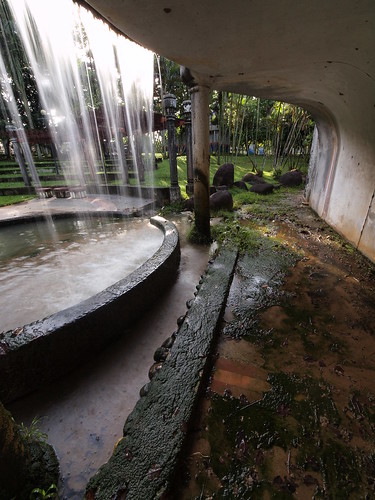
Behind the waterfall.
There was a small ampitheatre like architecture towards the inner part of the garden, and this caught me by surprise. The circular and sloping contour converge at this small waferfall structure. I took the advantage of going behind the waterfall, with the sunlight providing the desired highlight to the water lines.
With a very low shutter speed, I was able to streak the flowing water, and recording it in its greatest splendor.

7mm, f/20, 1/4s, ISO100, -0.7EV.

The richness of texture in this image amazed me! The wet and slimy moss added depth to the opposing dry wall.


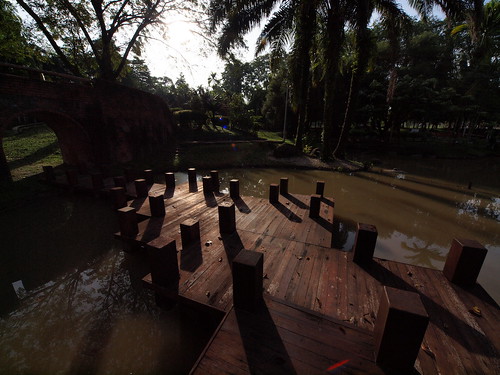
Morning shadows.
I just cannot pass this scene. The shadow lines were just overpowering to be ignored.

The challenge was getting the necessary shadow details. Again, I was amazed by the camera Auto Gradation.

7mm, f/11, 1/320s, ISO200, -2EV.


Restaurant by the pond.
This classic postcard-like composition capped the outing. It was just marvellous! And, it only took me less than 30 minutes to capture them all. 

E-30 with Zuiko Digital ED7-14mm F4.0
9mm, f/6.3, 1/400s, ISO200

I was just amazed at the richness of texture and color in this small enclave. I just wished I knew about it much earlier.

Keep on shooting....