Blog Keywords

Popular Posts for the Month

Showing posts with label tutorial. Show all posts

Monday, April 5, 2010

Zuiko and Green Apples

.
I had some spare time after sending my daughter to Enopi Math class. The 30-minute gap was used to do some quick flash shoot.


35mm, f/4.0, 1/60s, ISO100
This was processed in High-key to accentuate the full breadth of flash coverage


Green apples.. that looked simple but cool!

How did I do a 2-minute setup?

Get the E-30 with a moderate telephoto lens, in this case the Zuiko Digital ED14-35mm F2.0 SWD.

Get the FL-50R flash, and set to Remote mode. Quickly activate the Remote Commander menu on the E-30, and fiddle with the TTL setting.

Place the two apples on a dark glass table. Shut the room lights, and use ISO100 to blacken as much as possible the disturbing backgrounds.

Position the flash in various angles and height to see the different effects.

And don't forget the Do's and Don'ts of simple composition techniques. Rule-of-Thirds, Depth-of-Field separation, contrast isolation, parallax error, etc, etc.

Shoot in RAW only, and later process it using the Olympus Studio software. The E-30 Art Filters are available in Studio v2.2.

Voila!


By changing the angle and light intensity, a different effect was created.
This was processed in Low Key to accentuate the dark contrast zones.

Zuiko and Flash Techniques

.
Event shooting is all about getting the right shots and meeting the client's needs. You only have one chance and there's no repeat! Hustle, hustle!!


E-30 with Zuiko Digital ED14-35mm F2.0 SWD + FL-50R
23mm, f/5.6, 1/1250s, ISO400, -0.3ev + Direct FP Flash + Spot Metering

Those were the mantras I kept repeating in my recent Event Shooting class. And boy, did the participants got a whole load of flash techniques.

You name it; the basic flash techniques for quick event shooting were covered. It started with simple direct flash and output balance calculation. Then we proceeded with the bounce & white card, and estimating ceiling height factors. Next, it was dragging the shutter in dark lit room, playing with 2nd/rear curtains. We went outdoors, and played with FP high sync flash to negate "the skull effect". High speed coverage with rapid flash and rapid movement followed, which was finally topped off with the indoor/outdoor flash balance technique.

Of course, the basic EV measurements along with GN calculations and DoF controls were thrown in the whole sha-bang! At least I managed to confuse most of the class before they got their hands dirty the next day and saw what I was talking about the whole day before!

Though I was tired, it was satisfying. To see the participants learning a lot within a short span of time was very rewarding.


On to the next class....

Sunday, September 6, 2009

Zuiko, What's with the Grades?


Any Zuikoholics would know that Olympus has a clear line in defining the lenses in the E-system. Apparently, it is categorized in three distinct grades: Standard Grade (SG), High Grade (HG) & Super High Grade (SHG).

For a normal consumer, this does not mean much, except that the higher the grades go, the higher the price.

Now for shutterbugs, more questions are abegging. What really matters if I move to a higher grade? What to gain? Nothing to lose? If it's getting better, will the high price justify it?

Really?

For me, I had started with the SG lenses namely the kits of 17.5-45mm & 40-150mm. These lenses were the defacto for my early foray in E-system; though, I have to admit that since I was not a beginner in photography when I got my first E-system camera, I did purchase the 11-22mm beforehand. And, it is a HG lens!

With the 3 lenses, I found myself understanding the precise difference of the grades. Olympus did not simply grade the lines by the differing optical speed, but also the overall quality.

I quickly found that the 11-22mm was really kicking the two kits' "asses"!

Optically superior, better build quality and superb tactile response were the immediate attributes that I quickly appreciated. Once I saw the images on the computer screen, the 11-22mm lens yearned for a better companion.

This was really an example of how Olympus really put the grades on their Zuikos. Simple and true!

Let's look at the current line of Zuikos. There are about 20 or so lenses, which is about 7 lenses per grade. Well, I stopped counting...

With the SG the most obvious trait is that these lenses tend to have f/4-5.6 openings. In no way fast; however, they are very compact and light! Ingenious optics with the ultra wide and generous spread of ED elements for telephotos mean that the SG is in now way inferior. Optically may be a bit lower than the HG range, but by not much!

I have also tested the 9-18mm and 70-300mm lenses, I found them to be high performers! The only gripe I have with these range is the slightest tend for chromatic aberration at strong contrast at the periphery of the frame. Nothing too serious, though!

For the price, I will not complain much on the build quality and ergonomics. It is simply as good as it gets!!


As time went by, I slowly sold the kit lenses and replaced them with the HG lenses. Along came the 14-54mm, 50mm and 50-200mm. The 11-22mm was not lonely anymore, and these lenses had f/2.8-3.5 openings as a minimum! That's fast!!!

The funny thing was, I was shooting with the E-510, which was not weathersealed!! Odd, wasn't it. Part of the HG lenses were for this feature, and the body was not up to par!

The most notable uniqueness of the HG line is the ability to provide high zoom range from 12mm to 200mm with just 2 lenses, with the speed honorably starting at f/2.8. And the close focusing distance of these lenses are just great for pseudo-macro shooting, too!

Olympus put a HG sticker on these lenses for a reason, and this means that it's not really the best of the Zuikos! And, from my assessment, this is true!

Don't get me wrong. The HG lenses are exceptional, but there a quirks that need to be told to understand why it's not the Top-of-the-Line Zuiko!

I never really got the 8mm Fish Eye, and it's such a specialized lens, I hadn't found a reason to own it.

From the 11-200mm range, I could tell that the 11-22mm was the best performer!! The 14-54mm was not sharp enough unless at f/4, the 50-200mm had annoying bokeh, and the 50mm macro simply was a focusing nightmare! If you can live with these quirks, you are Okay with the Zuikos. There's no need to look much further!


I couldn't! I yearned for higher performance!

Enter the 14-35mm. This was the first SHG lens that I bought. And boy, this was an optic marvel. I paired this with the 50-200mm, and boy did the 50-200mm struggled to keep up. This eventually made me move up to 35-100mm. Alas, to fund for it, I had to sell off all of the HG line except for the 50mm macro.

The SHG are high performance lenses. Big, fast, and heavy! I kid you not. Essentially, the biggest attribute of the SHG lenses is not the mind-boggling F/2 aperture, specifically designed for low light and more creative control.

In practical terms, it is catered for Full-frame type of shooting. You see, the behaviour of these lenses matches the Canikon F/2.8 variants. I think that Olympus is really trying to penetrate the pros by matching it as close as possible with the Big Boys. I won't comment on their market success; but, suffice to say that Olympus took the telecentricity aspect a bit too far and made a behemoth of lenses that are optically superb!

What I learn when I move up to SHG, I have to change my shooting style. And this is by no means an easy feat!!! Focusing distance are much farther than the HG variants, and the weight! Boy, these lenses are really heavy!! Back pain and arm stiffness may be the common ill-effect after hours of shooting, but the soothing of the eyes appreciating the optical perfections made all pain go away. It's really worth it. If you have the dough, please splurge on it!


There... my observations on the Zuiko grades. They may be different, but they are alike all the same. All the ranges have their own strength and weaknesses. Learn your needs, and buy the right lenses. Do have confidence when putting the lenses on, as the performance of Zuikos are actually above par from the competition.


Grades... who needs them, actually? It may be good for marketers, though!


Monday, August 10, 2009

Zuiko and f/4


Whenever in trouble, shoot F/4. All will end well!

E-500 with Zuiko Digital 11-22mm f2.8-3.5,
22mm, f/4, 1/45s, ISO400


Ever heard the quote, "F8 and be there."? Well, this phrase emphasizes the importance of being on location to capture the shot than meddling with the technical details.

It was coined during the height of 35mm film cameras, to remind gearheads that the picture matters not the gear!! This is where the aperture stopped at F8 at most general focal lengths will result in the images having adequate in-focus sharpness for most of the frame. Somehow, this is a type of a hyperfocal distance hack, of sorts. If you have a 135 format camera, it's safe to say that you are at the optimum sweetspot of the lens coupled with the ample depth-of-field for general photography.

A quick scan at the depth-of-field table for a typical 35mm and 50mm focal lengths yield adequate depths-of-field for scenes shot from a 10-foot distance. With a 35mm lens, the backfocus will have acceptable focusing depth of up to 24 feet, and with a 50mm lens up to 14 feet.

Now, will this apply with the Fourthirds system?
Definitely, not!! Simply because it's a different format from 135; and being smaller by 2x, the effect changes.

I have long abandoned F8 ever sinced I moved to digital. And the digitals I have been using eversince have never been larger than 135, there is never a need for me to shoot at F8 for general photography.

With 4/3, I have to readjust a lot of things I learned with the 135 format. One of it is to shoot F4 instead of F8!!! It's no easy task, but at least the 2x crop factor is much easier to calculate than the 1.5x or 1.6x.

When shooting with E-system cameras, to get similar F8 just use F4! In this case, I will use a lower ISO compared to 135 format for a similar lighting situation. I won't say that this is an advantage of achieving lower ISO, but it's just different.

With a 25mm lens, all I need is an F4 to mimic the situation of a 50mm lens in 135 format stopped to F8.


* Note: when I mean F8 or F4, it also includes the +/- o.3ev of the range.

Thursday, July 16, 2009

Zuiko and a Wedding Preparation


There is an obligatory wedding that I have to do this coming weekend. I have to confess, I haven't shot weddings for quite a long time, actually the last was back in September. And, things have changed a lot, especially my gear.

Back then, my gear was more mobile and small. However, since last August I have been upgrading my lenses from High Grade F2.8-3.5 zooms to Super High Grade F2 zooms. The transition was rather quick, with the dual F2 zooms acquired by October. My rationalization into these lenses was more of need rather than want. I really need F2 aperture to cope with low lightings, and the shallow depth-of-field provided by F2 to F2.8 range is just exquisite for my workflow. I don't really need F1.4 for now, and maybe never.

The major penalty for large aperture is weight and size. But, with F2 aperture, I essentially have multiple prime lenses. And they are really great!! The promise of tele-centric design in the E-system philosophy also guarantees very good performance from wide open aperture to F11; this is just before diffraction kicks in. Well, this is superb because there's a lot aperture range that is highly usable for high quality output.

Around January of 2009, I added the E-30 body to my setup and later the Zuiko Digital ED7-14mm F4.0 ultra wide lens. With the already acquired Zuiko Digital ED50mm F2.0 Macro a couple of years ago, my dual-camera setup is complete.

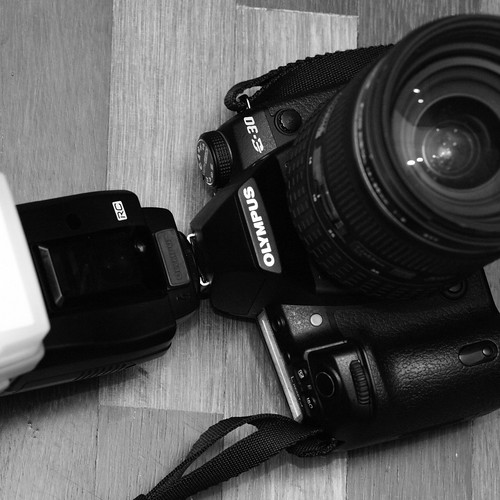
Olympus E-30 with Zuiko Digital ED14-35mm F2.0 & FL-50R
This will be the workhorse camera; thus the focus is on lightweight body and high powered flash unit

The wedding in discussion is my sister-in-law's. Yeah, you know what that means! Ultra-high expectations!!

The solemnization will be on Friday night, around 8.30pm, at my in-law's house. This is the most auspicious occasion for a Muslim wedding, all the focus will be on the bride and groom. It is a very closed event, with only family and closest friends and neighbours in attendance.

I will be in a very cramped situation to move around in such a small space; the main hall being about 18 feet wide with 20 feet long. Every other part of the house will be similar or smaller. Now, that's very challenging when you add another scores of people in attendance! It's like stuffed in a sardine can!!

Inevitably, that's the challenge for every wedding photographer in most situations. Unless the couple is from a well-off family, chances are it will be a cramped affair.

Luckily the next day will be a bit relaxed for me as the couple has engaged an official wedding photographer for the reception. This is the full blown event with many guests in attendance from both sides of the family. I will take a back seat approach and shoot a minimalist style. It's not good practice to be in the way of the official photographer. The good thing is the location will be at a community hall that provides seatings up to 300 guests. At least there's a lot of space for me to move around to silently snipe with my 35-100mm lens!!

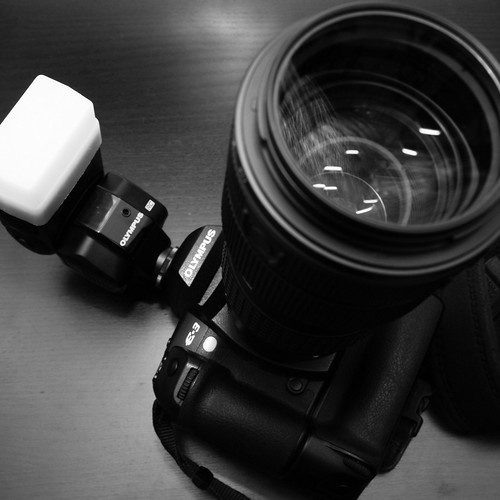
Olympus E-3 with Zuiko Digital ED35-100mm F2.0, HLD-4 & FL-36R
This will be the backup camera, with the ZD ED7-14mm providing additional ultra-wide coverage.

My main concern is to optimize the system line-up to ensure my end-to-end workflow is not compromised in any circumstances. Selecting the combination of body, lens and flash is crucial so to ensure the shooting process is as fluid as possible. I did a few shooting scenarios in my house to simulate the scenes, and from the possible combinations I have arrived at the dual camera setup shown in the images above.

The other part of the workflow is definitely on the image parameters and post-processing requirements. In this instance, I have to synchronize all the shooting settings and parameters for both cameras to be identical so that the output will be consistent. For example, I will be shooting in Natural color mode with the Auto ISO setting maximum up to 3200. To combat the noise, I increase the Noise Filter setting from Low to Standard. Bottomline, I don't want to be bogged down with differing outputs and end up in front of the computer screen correcting hundreds of shots. These two activities are important to me. It ensures that my end-to-end workflow to be as smooth as possible.

To further cut a lot of post-processing time, I will be shooting in JPEG Large SuperFine that mimics TIFF-like output. The high accuracy of E-3 and E-30 Auto White Balance and skin tone colors also is the real strength. I do not have to shoot in RAW to be worried of inconsistent readings and outputs. JPEG workflows are much faster, too. This is great!!! Less memory space is used, more pictures can be taken.

Wedding photography is a hectic event, both during and after for the photographer. At the event, the photographer must be alert always for that once-in-a-lifetime moment. Most of the beautiful wedding images are emotionally charged; thus, shooting candid is the best way. Post-processing the images is another hectic event. The final presentation tells a lot about the wedding; and even the most sombre wedding can be presented into a quite happy occasion. The magic is in the hands of the photographer to convey the historic moment in the couple's lives.

The best way to achieve good results is to ensure the workflow works, and be prepared for anything. It's a wedding!! Enjoy!!!!!!


Friday, July 10, 2009

Zuiko and the Star Effect


Star Effect @ F22, originally uploaded by thru-the-zuiko.

I made this shot with the E-30 and Zuiko Digital ED14-35mm F2.0 SWD lens. I set the exposure to Aperture Priority mode, with 21mm focal length. Exposure value was f/22, 1.3s, ISO400, -2.7ev. I developed the ORF file in Olympus Studio v2.3 - which is the latest version - and applied Soft Focus Art Filter effect to give a surreal aura to the image.

A few days back I had been teasing one of my students with some shots depicting star effects on the lamp posts. I compared with a similar shot that did not show the star effect. I did a quick quiz on how I achieved a simple effect without doing any postprocessing tricks or any add-on filters.

He argued that the long exposure was the reason for such effect. I told him, it was not the case. I hinted that the resulting effect was due to the lens behavior, rather than long exposure. He did not agree.

After about half an hour of arguing, I told him it was due to the small aperture, usually at F11 and above. He did not believe me. So, I gave him one night to try it out.

The next day, he agreed that I was right.

Another simple tip to get nice star effect direct from the shot. Nothing else matters.


A comparison of F11 (left) and F5.6 shots. Notice how the star effect starts to diminish as the aperture gets bigger.


Zuiko and The Camera System


Camera system? What is it?

Is it something to do with just DSLRs, or other similarly complicated forms of camera? Or it's just simply photography made more complex with gadgets?

What I observe is that this term scares a lot of people thinking of doing some form of serious or enthusiast photography. It's too much for them, the thought of mixing and matching the parts of the camera to make the system work is perplexing. It's like rocket science!

Well, when I am confronted with similar questions by would-be enthusiasts, I would simply ask back this simple question: What is the purpose and interests?

Now, why would I ask that?

Simply because to build a system camera is actually fun, if you already have the main purpose in mind. Too many times I hear regrets and shortfalls in expectations in both fora and discussions on the subject. Too many times I see money not well spent for a simple need that grew into vexxing wants.

Some people jump into the DSLR bandwagon expecting the digital revolution will give them the magic wand to get beautiful pro quality image. Now, that is simply wishful thinking. And I am not touching talent and business cunningness here!! And to their realization, they can't make it to work; thus, blaming the sytem as being too complicated. The lens is not right, the noise is too bad, or simply the model is not beautiful!!

A quick analysis of their problems lies not to the gadgeteries, but to the overall workflow. To me, this is what represents the real system camera; the end-to-end workflow from image creation to image presentation.

When approaching a system camera concept, the camera itself (with it's ancilliary attachments such as lenses, portable lightings, tripods/monotpods, and supplementary power) is just a tool. Nothing more, nothing less. So does the post-processing in the camera or computer using image manipulation programs, or just simply outsource them to a very good photo lab. These gadgets are part of the overall workflow. Not to forget, a good reliable bag or carriage system that does not bog down the shooting process is also important to the workflow!

Coming back to my initial question. What is the purpose and interest? This is one of the toughest question to the aspiring enthusiasts. Most of the time, they would not know!

This is the chicken and egg moment!

In this instance, I will advise them to get the cheapest set that they can afford and use a basic image enhancement tool such as Windows Picture Manager. Well, that was where I started, too! The standard kit lens that comes with current DSLRs is already very good for the beginners, and I always ask them to explore their specialization to zero-in the best workflow.

Sometimes, only the basic DSLR kit and a simple photo lab are required. And, if this is sufficient for more than 80% of the needs, does it really matter to get into more complicated things? Well, that's a tough one!

The question is again boils down to the desire to do more. To learn more. To use better equipment. To develop better workflow. The journey to better photographic experience continues. In time, I advise them to do a reality check and review their photographic journey. Is it all worth it?

Most of the time, I find them learning something new and eager to explore new challenges. That's what makes us human, and that's also what fires the fun in exploring the ultimate camera system for them. "What lens should I buy next?", they asked. Or, "Do I need a flash?".

There is one instance when one of my friends asked me on how to do night car racing photography. My first question was "How is the lighting there? Adequate for EV8?". Well, the first thing he asked was, "What is EV8?".

E-P1 with M.Zuiko ED14-42mm F3.5-5.6
42mm, f/5.6, 1/8s, ISO1600 (EV4 lighting)

You can see that my first query was on lighting, or the existence of available light. In the end, this is the essence of photography itself!

My next query was "How are you going to handle the low quality output?" Then he replied, "Is that a problem?". In this instance, I already set the workflow in place, as the situation definitely called for some level of post-processing, especially in noisy/grainy images!

After establishing the start and the end of the process, only then I advise on the camera requirements. The lenses, the exposure, panning techniques, monopod or the need of the flash, noise reduction software, etc., etc.!

He already had the subject and interest in mind, and this made my advise so easy. I even went out to simulate the situation on a street nearby my office block. And he was amazed at how simple things are when a full understanding of the workflow can simplify a highly complicated camera system!

Bottom line, get your purpose right, and learn the strength and weakness of your workflow. If your workflow requires an expensive Full Frame system, so be it! But, it's an overkill if you are simply doing Cartier-Bressonesque style with the current Full Frame system.

There's all to it!!!

For me, I find the Olympus E-system Fourthirds, Think Tank Photo, Lumiquest, Neat Image and GIMP to be the perfect camera system for my workflow. The future; who knows. Maybe adding the MicroFourthirds into the mix?


Wednesday, July 8, 2009

E-P1 and Daffodil

Daffodil by E-P1, originally uploaded by thru-the-zuiko.

I wanted to highlight the strong colors of the petals, the yellows were so striking. The original image had the background adequately blurred, but the background was still distracting.

I cropped the image into a square format, and used the Lomo Effect filter in the The GIMP v2.4. The contrast was increased with additional saturation, while at the same time blackened the background. I further applied additional contrast with a Contrast Mask blending (without negating the mask layer), and a touch of the S-curve profile in the overall tones.

This was finished off with a sparing use of the High-pass filter for sharpening.

The yellow petals just glow in the dark for me!!

Sunday, July 5, 2009

Zuiko and the Eternal Wait


I was out and about on a Sunday morning. After an hour-long shopping for fresh groceries at the Farmers' Market, I sped to Shah Alam for a morning walk.

E-30 with Zuiko Digital ED14-35mm F2.0 SWD
14mm, f/2.0, 1/1250s, ISO200, -0.3ev, Pinhole Art Filter effect

I have this habit of carrying at least a camera and a lens wherever I go; at least I try to...

Since it was very cloudy with a tinge of haze, I opted to use the "Hoya Pro1 Digital" Circular Polarizing filter to cut the ugly glare and light refractions. The colors were highly saturated, as the hidden colors were revealed by the filter. This worked marvelously, as the image attests.

The main problem with this shot was getting the right balance of the main subject, central supporting subject and the background. There was a gazebo at the right of the image, and using the E-30 I had to use great care not to capture a portion of the roof (should be just to the right of the minarets).

The main subject was central to the message, invoking solemn loneliness in search for life's main purpose. The background, whilst blurred, showed the distant faith that needed to be omni present to keep any hope and sanity in check. The supporting subject suggest that help is nearby, whenever needed.


Abstract shots are very difficult to create, e.g. landscapes in portraits. Sometimes it just waits to be captured. Just be there, and look for it!


Friday, June 5, 2009

Zuiko and In-camera Editing

Sometimes, in-camera editing is handy for those quick touch ups. E-system users are blessed with very powerful in-camera editing tool, such that simple but essential capabilities can be accessed with a quick touch of the editing buttons.

With my E-30, editing images can be done for both RAW and JPEG formats. The plethora of control also enable multitudes of possibilities. Take for example, the E-30 has an added control for multiple layers. I have not done this, but knowing I can do this function in-camera is just great!

For this example, I added Auto Gradation and upped the maximum Saturation twice. I chose to process the JPEG instead of converting from RAW. Typically because I did not see much advantage of the RAW for this image.

E-30 with Zuiko Digital ED14-35mm F2.0 SWD
14mm, f/5.0, 1/100s, ISO200, -0.3EV

JPEG Large SuperFine, Auto Gradation, maximum Saturation 2x

Thursday, June 4, 2009

Zuiko and the Bridge Up Close

Next time, try to shoot landscapes using a telephoto lens. And put an interesting subject in the foreground, for example.

You'll be astounded with the compression effect.

E-30 with Zuiko Digital ED50mm F2.0 Macro + EC-14 Teleconverter
70mm, f/6.3, 1/800s, ISO200

"I have never seen the bridge this huge before...".


Thursday, May 28, 2009

Zuiko and Digital Workflow, Part 1

Once in a while, my friends will ask me what "PP" I do to my photos. PP means post-processing the image. Most of the time I will say that I rarely PP my images. I just like the way my E-system does it. To me the color and tonal renditions are just sublime.

When I mentioned that I shoot about 90% of the time in JPEG, they are quite surprised. Well, the E-system JPEG is very flexible actually, as I am able to set the level of quality I want. The highest JPEG quality, with the compression 1/2.7 will yield a very high quality image rivaling TIFF formats. I do not really need RAW unless I am really challenged with a very high subject brightness range or a tricky mixed lighting situation.

To add to the JPEG is the excellent White Balance system, particularly on the E-3 and E-30, that enables me to confidently shoot in Auto setting even in the most difficult lighting situations. It is just that good!

Then again, to say that I do not PP my images - that is totally untrue also.

I need to PP mainly because I shoot in default Sharpness, Contrast and Saturation settings. If I really bother, I will only select the Color Mode - particularly I like the Vivid, Natural and Portrait color renditions. I tend to skip Muted, though.

Because of the default settings, sometimes my images do not generate enough "pop" that I am looking for.

Now enter my Digital Workflow.

To be fair, every serious photographer will have his/her own workflow. The process and scale are normally dictated by skill and duration. For me, my Digital Workflow can be described as minimal and quick.

My favorite image manipulation software is The GIMP. I love it simply because it is open source, and supports various effect actions that are easily available on the internet.

Now, what do I do with an image?

I normally start with the general idea of the image. This will result in cropping, either emphasizing the composition or changing the technical orientation, or even both.

Then, I will analyze the contrast and exposure. The best tool for me is by applying a contrast mask to the image. By manipulating the overlay of the duplicate image, usually in 30-40 opacity, I can easily control the strength of the contrast. This will also push or pull the shadows and highlights of the image, particularly at Zones II and VIII.

If I choose to increase contrast, I will end the workflow with a quick dash of the High Pass Filter, usually at sharpness of 4 for a 10MP image. I stopped using UnSharp Mask many months now, as I find that HPF is much more effective in sharpening the image than USM.

On the other hand, if I choose to lower contrast which is usually to counter very highly contrasty image, I will instead opt for Dodging & Burning. The selective contrast effects of this action will also simulate a sharpening effect. In a typical 10MP image, I will use a Thin Amount of 10 and Thick Amount of 30. Be careful with this effect, as too much of it will render the image unreal.

These 2 or 3 step action will result in a slight shift in color and tint, but I do not really care about it. To me, it is part of the manipulation of the overall contrast. The most important thing is to get the White Balance spot-on in the first place!


Here is an example of my typical Digital Workflow.


Original JPEG 1/4 compression

This image suffers from unbalanced foreground and background exposure. This is a result of the flash not providing suffient light to counter the strong ambient sunlit background. In order to balance the exposure, I choose to use the contrast mask action.


Contrast Masked, Inverted 30% Overlay with Gaussian Blur 20 pixels

By looking at the two left and right vertical grids, the histogram has shifted inwards; thus, pulling the shadows and highlights and balancing the two extremes with the middle grey.

To add to the finishing touch, a hint of Dodging & Burning is applied to bring out the "pop" to the image.


A hint of Dodging & Burning with Thin 10 & Thick 30 Amounts

The Dodging and Burning has smoothen a bit the harsh contrast transitions in the image, as can be seen in the lessening of the "spikey" lines along the histogram.

A quick PP action within 5 minutes is all it takes.

Wednesday, May 20, 2009

Photography 101: Basic DSLR Class

I will be conducting a Basic DSLR course this coming Saturday, 23rd of May 2009. Starting at 8pm, the beautiful KLCC Park - at the heart of Kuala Lumpur's Golden Triangle, will provide the vista for condusive learning.

Topics cover range from "Mastering the Camera" with emphasis on creative exposure and focus control, and "Mastering the Lens" with emphasis on perspective control and creative visualization.

Ending at 1pm, students will learn all the basic and important aspects of photography that will be the solid platform for intermediate or advance techniques as the students progress.

Interested?

Please contact me direct 012-2040883, as there is still available slots for this session.

Fee is RM100, with food & drinks provided.

Facebook link here.

Sunday, May 17, 2009

Zuiko and Rose Petals

A simple still-life shot.

E-3 with Zuiko Digital ED35-100mm F2.0
52mm, f/8.0, 1/500s, ISO100

Below is the setup used to get the shot. A very direct two-light approach; one from the top, one from the side.

FP TTL with Remote Controller flash at -3EV
FL-50R Ch1A +3EV (override at flash), FL-36R Ch1B +3EV (override at flash)

I shot this in Manual mode to override the background exposure to near black. Because of the shutter speed increased to more than 1/250s (max. X-sync for E-3), I opted for FP TTL setting.

In post-processing, I did a Contrast Mask action using The GIMP with Overlay at 70%. This increased the contrast, rendering the scene to be more punchy.

In the original JPEG shot, I used Vivid colors on the E-3. Thus, I expected the image to be more lively. And it did!

Monday, May 11, 2009

Zuiko and Easy Self-Portraits

One lazy Sunday morning, I did a photoshoot. Of myself, again!!

The beauty of the E-3 and E-30 was its ability to provide live feedback while shooting self-portrait! Flip the LCD to face the intended subject, set to remote control to trip the shutter with 2 seconds delay, and activate the Live View for live framing for easier self composition.

How easy was that?

Very easy!!!!


E-3 with Zuiko Digital ED14-35mm F2.0 SWD
FL-50R & FL-36R wireless RC (camera on tripod 6 feet high)

I set the E-3 with the 14-35mm lens at 6 feet high using the Velbon Sherpa 250n tripod to get a downward angle, and made a portrait orientation; hence, the LCD was position at the highest point for easy viewing.

I looked at the LCD screen, adjusted my posture and location, and pressed the remote control. That's it.

The next two shots were made possible with the Manfrotto 209 Table-top Tripod with #482 mini ball head. The height of the E-30 and the 7-14mm lens was a mere 6 inches. The upward angle exaggerated the perspective lines and created a very elongated effect!


There were 2 flash guns. The FL-50R was on a 5-foot ladder and I mounted it on the top most step. This provided the main illumination on the left of the camera. The FL-36R was on the ground on a 6-inch tripod to provide the fill illumination and targeted the lower part of the body.


Thank God for Live View & flippable LCD screen. I shot myself using the remote RM-1 and viewing myself for the correct pose and position via peeking through the live view screen.

This is an excellent system for self-portraits!!!
Definitely!!!!

Saturday, April 25, 2009

Zuiko and Outdoor Flash Photography

Playing with wireless flash, the primary on the right and the fill on the left. I set the flash to Super FP mode allowing high shutter speed capabilities, so that I have full control of the aperture range from f/2.0 to f/16.0.

My intention was to get this darkened effect. What did I do?

E-3 with Zuiko Digital ED7-14mm F4.0 & FL-50R + FL-36R
7mm, f/4.0, 1/4000s, ISO100, -1EV

Camera setting:
  • Select aperture priority with remote commander activated
  • Lower the overall exposure by -1.0EV (dial the exposure compensation)
  • Lower the RC flash to -3.0EV; this is to reduce the fill-flash from the RC
  • Set RC panel at Channel 1 & High
  • Set RC panel for Channel 1 A at +3EV with FP TTL; this is the FL-50R on the right (Main)
  • Set RC panel for Channel 1 B at +3EV with FP TTL; this is the FL-36R on the left (Secondary)
Flash setting:
  • Set both flash 5 feet away from the subject with 45-degree azimuth angle
  • Set the flash height at the eye-level of the subject, and tilt down towards the guitar
  • Put a diffuser on the Main light (adjust the FL-50R to +1EV to compensate for the diffuser light loss)
  • Adjust accordingly to get the desired illumination
My test shot showed perfect exposure for the image, but that was not I was looking for. I was looking for a darkened effect. The easiest way was to meter the blu sky directly above.

So, I just looked up and lock the camera Auto Exposure using the Spot Meter (in which I programmed in the AEL/AFL button). With the exposure locked, the overall exposure was pushed -2EV (camera already -1EV, the blue sky forced another -1EV). Hence, the darkened effect.

Some say it was underexposed, and I agreed.

To get more detail, I lifted the shadow areas using the simple Contrast Mask procedure. Whilst the effect is still darkened, you can observe the more details coming out from the shadows without sacrifing the highlights at the background.

The GIMP v2.4 with Contrast Mask at 40%
&
High Pass Sharpening at 4.0 points

Either image, that was what I wanted - a darkened effect. And I like them both.


Click image for slideshow of the whole photoshoot.

Sunday, April 19, 2009

Zuiko and Street Fashion

Photographic opportunities sometimes come at times you do not expect. It is good to always have your camera ready for those instances; be it a simple family candids or a street riot or even a fashion show.

A good compact system, especially the Olympus E-system, will serve you good in those situations. Take for example the petite E-420 with the Zuiko Digital ED 50mm F2.0 Macro lens. With a combined weight of just below 800 grams, and a size just enough to fit in a small purse, this is one combo you cannot leave behind.

Don't let the size fool you, too! With the full professional image parameter controls, this little pocket rocket will really sizzle your eyes.

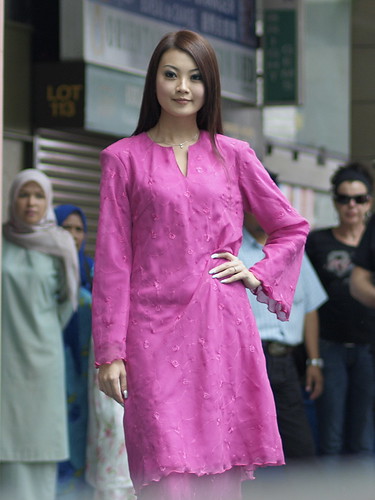
It was one of those days when a simple photography opportunity came my way in a form of a Street Fashion show. I was walking by Ampang Park shopping mall when I chanced upon this event. A bit low-key event, I would say, but the lighting for the shoot was marvelous. The catwalk was a simple deck adjacent to the five-foot by-way, and the semi-translucent glass roof provided subtle softlighting to the models.

E-420 with Zuiko Digital ED50mm F2.0
50mm, f/2.0, 1/500s, ISO100, +0.7EV

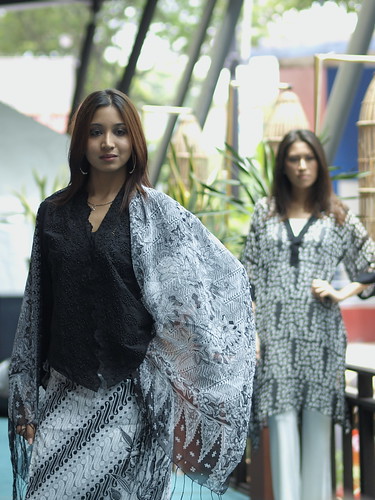
The most beautiful thing about this series are the skintones. I love Olympus skintones. Really true to the real thing, in my opinion. I set the color mode to Portrait with low contrast -1. This subtle setting made the tonal and color renditions to the portraits even more beautiful and captivating. Add the legendary sharpness of the 50mm f2.0 lens, the setup is complete. All I did was to concentrate on the lighting composition and facial expression of the models.


The situation for shooting this kind of event was how to control the distracting background. One way was to use large aperture like the f2.0 to blur the background, and another way was to use selective cropping during the shoot, with regards to get the best angle, lighting and timing.


With a clear distance separating the model with the background, f2.0 aperture seemed to be the best selection. The depth-of-field was just enough to get the whole part of the models in focus, whilst having the background blurred. Just perfect!


50mm, f2.0, 1/200s, ISO100, +0.3EV
Througout the series, you can see the intricate details of the models' kebaya dress. The flower motifs with the bright colors added dimension to the image. The Zuiko delivered the details, even if shot wide open. Now, that's professional quality glass. Really awesome!!


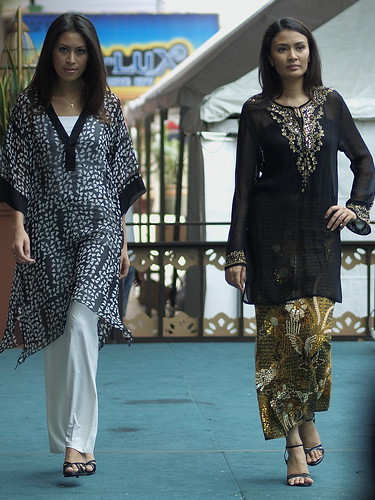
The models approaching. I just ensured focusing was on track, and all was just right.


What I liked about this image was the lighting. The transition from the lighter part facing the street and the darker part to the mall added natural tones to the already beautiful models.

The experience was just exhilirating. How can I say this? If all the things were set for you, all you needed to do was just watch the light and shoot.

How simple can this be?

Monday, March 9, 2009

Zuiko and FP Flash Portraits

Shooting with flash in bright sunlight is very important. With the correct balance between the sunlight and flash power, beautiful images can be created with minimum shadow harshness.

One of the problem with DSLR shooting outdoors with flash is the use of the focal-plane shutter. This archaic design is the bane of modern photography, and should be banned, in my opinion. But, the strength of this design compared to current modern design is still valid, though. With focal-plane (FP) shutter, very fast speeds up to 1/8000s is possible. Modern leaf shutter can only go up to 1/2000s which is evident in current point-and-shoot digicams.

With focal plane shutter, there are 2 mechanisms being used to control exposure.

For lower shutter speed, the exposure is done instanteneously throughout the frame; thus, there are no issues to sync with the flash. In olden cameras, fastest sync speed were typically 1/125s. Nowadays, most modern DSLRs have sync up to even 1/500s. Typical sync speeds are 1/180s to 1/250s.

For shutter speeds higher than the sync speed, the DSLR controls shutter exposure differently. Instead of exposing the whole frame in one moment, the shutter moves from one end of the frame to the other end of the frame creating a stroboscopic sweep of exposure. Now, here lies the problem... In order to sync with higher shutter speed, the flash needs to have FP Flash support. If not, only part of the frame will be exposed with the flash as the stroboscopic sweep is not in-sync with the flash burst.

Normal TTL flash uses impulse response upon trigger, with the flash emitting the maximum power set by the camera. It only lasts for a few microseconds. It does not need high sync accuracy; hence, the speed limitation.

FP TTL flash, an invention of Olympus back in 1986, uses step response upon trigger. The burst is set to low power but longer duration, maybe 50-100x longer than Normal TTL. With the longer burst, it is possible for the shutter sweep to be illuminated throughout the frame; thus, achieving accurately exposed image.

E-3 with Zuiko Digital ED14-35mm F2.0 SWD & FL-50R
21mm, f/3.5, 1/800s, ISO100, -1.3EV, FP Flash +2EV

In this image, I manage to get a balance between the sky and subject. Usually the camera will over-expose the sky to white to get the subject bright enough. In this case, I override by -1.3EV so that it's enough to render the sky strong blue. In order to compensate for the loss of exposure to the subject, I override the flash power to +2.0EV. Overall balance is flash +0.7EV over sunlight. In this instance, I will get a darkened effect rather than natural exposure.

Notice the shutter speed is 1/800s, which is way off E-3s 1/250s flash sync. FP Flash technology made it possible. If not, there will be two situations: white sky with nice subject, or blue sky with silhoutte subject.


Two more samples at different apertures for different Depth-of-Field.

Sunday, February 15, 2009

Zuiko and 108MP Image

Digital Zuiko lenses are sharp end-to-end, even at wide open. The consistency of exposure is excellent too, with the vignetting at corners are very minimal. These qualities enable me to do some stitching of images with high precision and accuracy.


E-30, Zuiko Digital ED50mm F2.0 Macro
44 images stitched and cropped to an approximately 3x3 frame of the 50mm coverage

With the composite of 44 images, and later cropped out about 25%, this single frame sized up to 3x3 of the 50mm coverage. In relation to the framing, it is safe to say that this is similar to the coverage of the Leica S-system format.

Using the industry-defining ED50mm F2.0 Macro lens, it is not surprising to see the results to be outstanding. The aperture is at F2.0, and the resultant depth-of-field is very narrow and shallow.

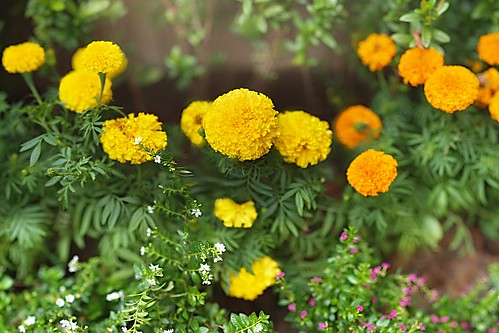
What I really want is to have the capability to get a highly sharp image with razor thin depth-of-field. The marigold flower is medium-sized, and to have up to 15 in the frame really shows the coverage of the image.

I actually created a quasi-Medium Format image similar to a sensor of 48mm by 32mm, with real resolution in excess of 100MP!!! It is not surprising, as a single image from the E-30 is a 12MP image - with 9 composites will be approximately 108MP!

Not bad for a small format system. As long as the lens is top notch, anything is possible!!!

Tuesday, January 27, 2009

Zuiko and Zoom Blur

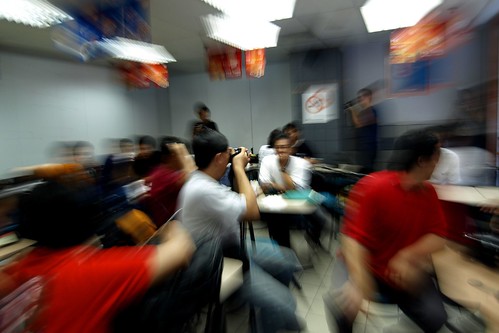
One thing I love about In-body Image Stabilization system is the capability to use any lens and be assured with some form of stabilization.

With the E-510 and Zuiko Digital 11-22mm f2.8-3.5, I was able to create this zoom effect. It was simple really!

The surreal effect with the focus on the central photographer was simply magical! Dynamism was captured in a static scene.

This scene was shot in McDonald's near Chinatown KL, with the other Olympus gang for our 2nd walkabout. This walkabout covered parts of Chinatown and Central Market during Deepavali in 2007.

I just selected a slow shutter speed, say 1/5s, and used Shutter priority to override the shutter automation. With this effect, I managed to travel the focal length from 11mm to 14mm. The ISO was 100, with aperture at f3.2. And the IS did the rest!


Another example of zoom blur...


E-510 with Zuiko Digital 14-54mm f2.8-3.5
14mm to 25mm zoom, 1/2.5s, f8, ISO200

Another thing. Be sure to have steady hands; one to hold the body, the other to twist the zoom ring.

Somehow, it was so easy even with the little E-510 beginners D-SLR!!