Blog Keywords

Popular Posts for the Month

Showing posts with label special technique. Show all posts

Tuesday, May 24, 2011

Zuiko and Picnik

.

I have been using the Picnik software in flickr.com for quite a while.

And, I love it.

There are so many effects that can be used to make the picture more alive and stand out. Or quickly get some special effects that require hours using Photoshop, rather.


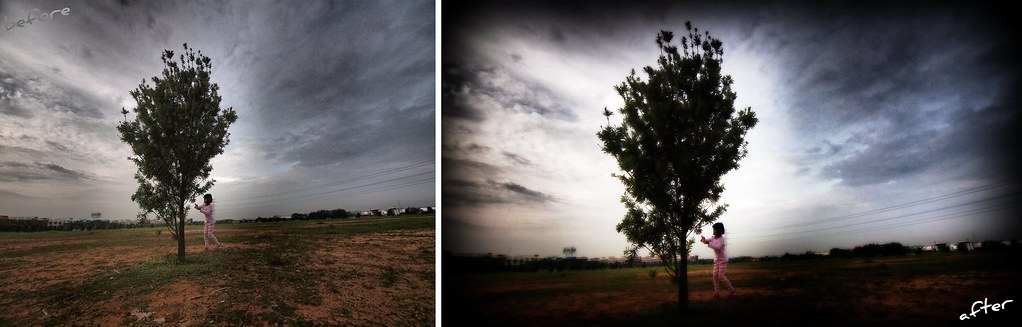
E-5 with Zuiko Digital ED7-14mm F4.0
7mm, f/5.6, 1/1600s, ISO200, -0.3ev

From the original picture, I crop it from 4:3 into 16:9 to give the cinematic effect. Then, changed the tonal and focal impact using the Orton Effect filter and added vignetting to the sides to emphasize more on the central subject.

That's all to it... Well, other than using a super-duper ultra-wide lens, that is!!

Sunday, January 16, 2011

Zuiko and a Little Planet

.
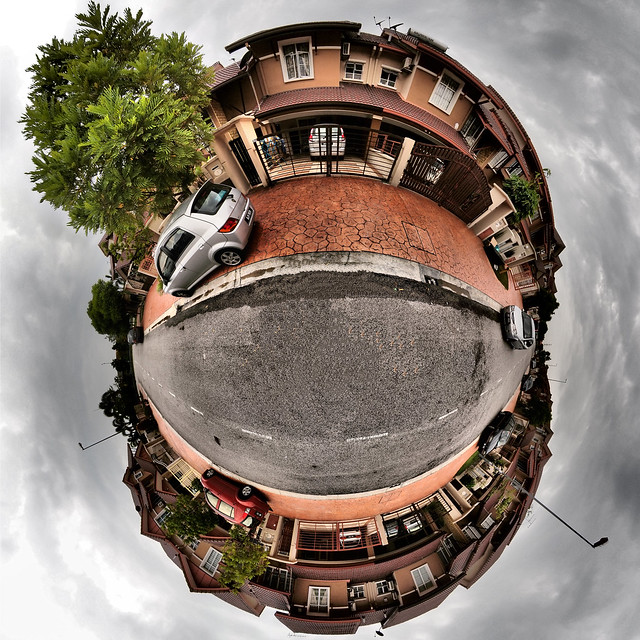
Little Planets.

This is the first Little Planet shot,
and the nadir point is covered with pure clone stampings.

I came across this type of photography a couple of years ago. And, though I was intrigued by the techniques to achieve such creative output, I never put the time and effort to learn how to do it.

Somehow, out of the blue, today I took the plunge from zero to hero!

It's a good thing that Flickr.com has a group dedicated to this art. All I did was read through the threads and learned the techniques rather quickly. It did help having an ultrawide angle lens like the Zuiko Digital ED7-14mm F4.0 to assist in getting high quality 360-degree panorama with the least stitching. In fact, I only needed 7 to 8 frames for 52-45 degrees coverage per shot (in portrait orientation), and 2 frames for the nadir point (this is the point where I stood).

As advised by the group, I downloaded the freeware software "Hugin Panorama Stitcher". This software is really very good. The stitching is near flawless as I had a tough time identifying the stitch borders in the panorama pictures.

The software is rather straight forward. It starts with the Panorama Stitcher screen with the "Assistant" tab as the main controller. This tab has a 3-step process to stitch the panorama. It is quick simple as the first step is to 1.) Load Images (where the Lens parameters are very important to ensure the least distortion and error to the image output), and secondly to 2.) Align (where the software automatically scan the images and stitch them into place).

Next is to transform the normal panorama scene into radial that is called Little Planet. On the Hugin "Fast Panorama Preview" window, there's a tab called "Projection" and select "Stereographic". Next, there's a tab called "Move/Drag" and change the "Pitch" parameter to 90 and leave the other two parameters 0. Then click "Apply". The image immediately transforms into a planet, a very small planet. Just slide the zoom applicator and the image will enlarge. Crop to taste.

Finally, 3.) Create Panorama (great output controls which includes TIFF/JPEG and also HDR processing).

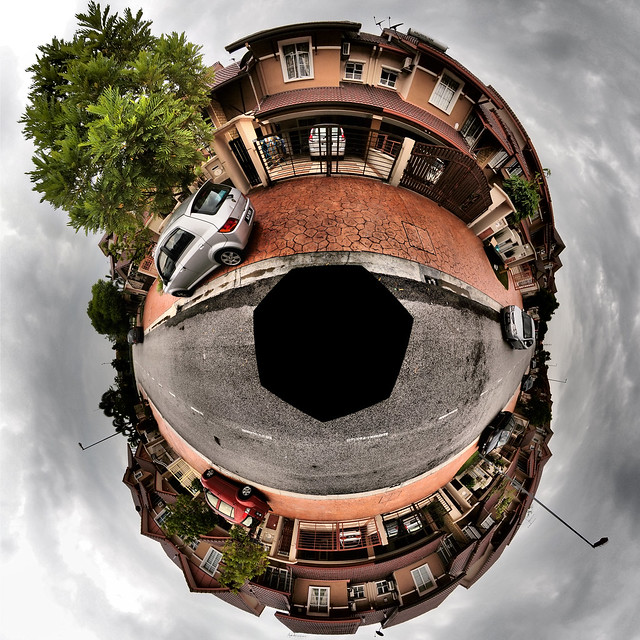
Wham... I was hit with the problem. Just look at the picture below!

This is the result just after stitching, and the heptagon is clearly seen.


Wow!! That's a big hole!!

How did that happen?

Well, I forgot that the nadir point, i.e. the point I was standing was not in the picture. Thus, the heptagon was so revealing in the picture!! Definitely not what I wanted! Well, to cure that, I simply cloned the road. Not a very elegant solution, I would say. But, it worked none the least.

The image below is the one with the nadir point shot taken (2 frames, in fact).

A refined planet with nadir points using actual frames,
and cloned my feet off the picture

To compare, I did another Little Planet. This one used 8-frames for the 360-degree panorama plus 2-frames for the nadir point. I find this image is much finer in reproduction as it has more frames to construct the planet.

Oh ya!! As I was using Dramatic Tone Art Filter for these shots, I didn't activate the HDR feature in Hugin during stitching. I find the E-5 effect much to my liking.

But I prefer the first image in this blog, as the picture is biased to my house and enlarged it in comparison to the rest of the neighborhood.

At last, I have my own Little Planet at home!


Saturday, January 1, 2011

Zuiko and a Happy New Year

Yes, it's 2011. A new year brings new hope.

Well, not really a good thing for me today. Coz, I am stuck in the office doing some emergency stuff.

So, while waiting for the system to settle down, I took some simple shots, and fiddle with the HDR stuff in the GIMP.

A simple two-button press to access the Exposure Bracketing mode, and set to 5 frames of 1ev steps with 5fps rapid shoot mode I am good to go. Fraap, frapp, frapp, fraappp, fraaapp.... am done!


Original Frame

High Dynamic Range Frame

Using the GIMP, I opened 3 files in layers mode, being the -2ev, 0 and +2ev exposures. With the layer masks, it was easy. Desaturate the -2ev and +2ev layers and invert the +2ev layer, and merge. A final touch of Dodge & Burn action finished the HDR job.

Well, it's not perfect though. As I didn't really take the color channel shifts and contrast loss into account in the final correction process. Maybe another time, as I am still fine-tuning my HDR techniques.

Happy New Year!!!


Wednesday, December 22, 2010

Zuiko and Monotone Filters

.

Not much to do. I am sick today. Caught the flu bug, as the weather here in Klang Valley has been total haywire the last few days. Tropical sun and thunderstorm mingling interchangeably during days and nights without end. Time for some rest.


Red Filter

Good thing my E-5 is around. Nothing much to shoot, though. Thus, resorted to playing around with the E-5.

Do you know that all Olympus DSLRs allow in-camera processing of RAW files for any JPEG style you want? Yes you can!! You can do anything the camera allows, like different color profiles (Natural, Monotone, Art Filters, etc.), different image parameters (sharpness, contrast, etc.), and also different JPEG compressions and various aspect ratio crops. The possibilities are more than I can fathom, and I don't have to worry much if I don't have my PC to post-process the RAW files.


Yellow Filter

For this blog entry, I am showcasing the monotone filters. All of the JPEG files are treated with Red, Yellow and Green filters with Large SuperFine JPEG files (pretty large at 8MB, and no other manufacturer offer this JPEG quality!).

Green Filter

Well, nothing much to say as the pictures tell the story. Nevertheless, I always preferred the Red filter for brighter skin tones rather than Yellow and Green. And, with E-5 much better image quality, the noise often associated with older DSLRs like the E-3 is much controlled with the Red filter.

Time to shoot more monotones!

Friday, November 26, 2010

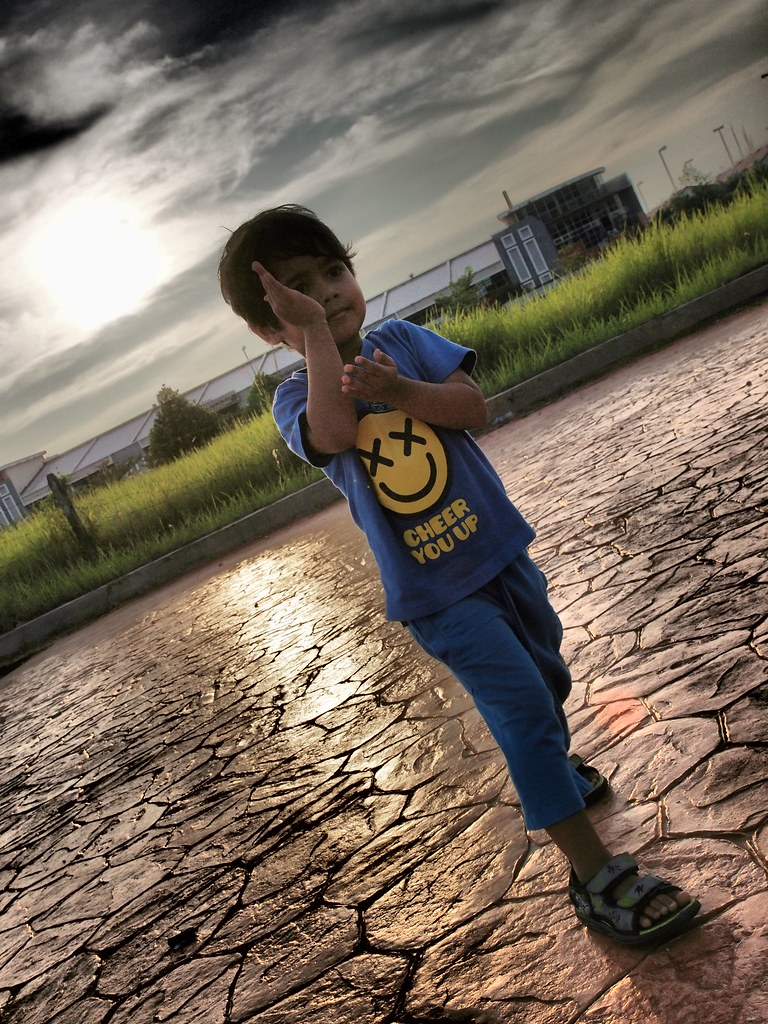
Zuiko and Dramatic Tone for Landscaped Portraits

.
I am still warming up with the E-5. Though it is mostly based on the E-3, the technical jump has challenged my creativity to a new level. Notably on the technical improvements are the image quality ranging from ISO100 to ISO1600 with the excellent sensor pixel sharpness. With my collection of F2 zooms, this has opened a plethora of situations with regards to exposure value parameters (aperture, shutter speed, and sensor sensitivity). On the creative improvements, the addition of Art Filter 10 Dramatic Tone and Hi-Def video at 720p have pushed a new level of imaging possibilities.

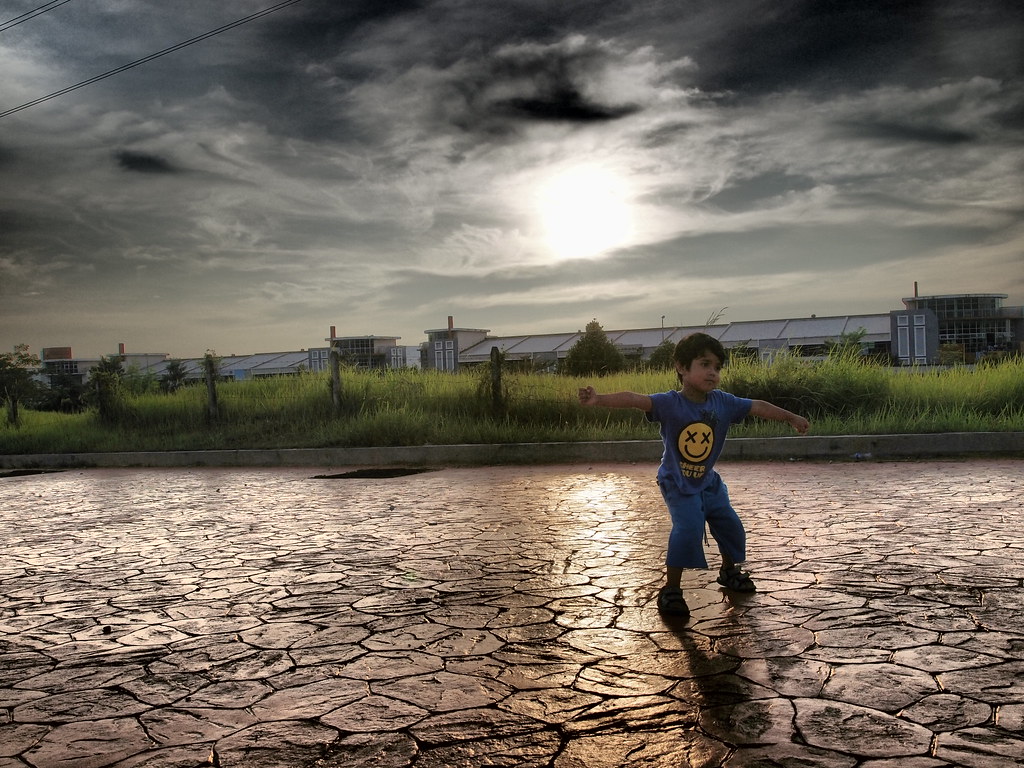
E-5 with Zuiko Digital ED 14-35mm F2.0 SWD
22mm, f/8, 1/100s, ISO200, -0.3ev

Recently, I have been focusing a lot on the Dramatic Tone art filter. And why not? This new filter beckons to be explored. I started with simple landscape shots during my E-5 review. The 3-day loan was not long enough for me to explore its creative possibilities. Only now do I have the time to explore the beauty of the E-5.

The previous blog entry showed how the Dramatic Tone art filter interacts with wireless TTL flash setup. The diffused lighting seems to bid very well with the filter. I really like the output. I am looking forward to explore different lighting setup with this filter.


In this entry, the exploration of the Dramatic Tone filter with portraiture against strong backlight; in this case direct sunlight, was done. It's simple, actually. I put my composition setup as shooting landscape, meaning small aperture (f/8 or something like that) and pseudo hyperfocal distance focusing technique (not that I use Manual focus, but during Auto Focus, I keep in mind the hyperfocal distance relationship towards the subject to achieve image in-focus sharpness across the frame).

And I purposely did not use the flash for fill-in, as I really wanted to explore the capability of the filter to lift the near silhouette subject, in this case my ever-willing son.


To my surprise, the filter did a very good job. No doubt there was still noise even at base ISO200, but considering that the filter lifted easily about 3 to 4 stops of exposure, I considered this to be very good indeed. I doubt whether the E-3 or the E-30 can deliver this quality (just take a look at the SAT output). The TruePic V processor really shines!


In case, if you noticed, the solar ghosting and flares were also tamed. With the Dramatic Tone tendency to exaggerate contrast, I was smitten with the clear and crisp output. This was practically due to the Zuiko Digital ED 14-35mm F2.0 SWD lens. The optical properties for this lens was just phenomenal!

Hmmm.. what's next? Maybe shooting with the Circular Polarizer (C-PL) with wireless TTL Flash. That sounds interesting. The color saturating properties of the C-PL should produce more vivid output to the already eye-popping Dramatic Filter effect.

Now... where did I put my filter pouch?!!!


Saturday, November 20, 2010

Zuiko and Flashed Dramatic Tone

.

Yesterday, I bought a back-issue photo magazine, if I was not mistaken it was the American Photographer. I like to read up old pro-grade magazines because to buy them new is very expensive, in the territory of RM40 for an issue. The old ones, about 5-6 months old, is about RM10.

I was particularly interested to read the article about lighting technique by Joe McNally. Apparently, the magazine showed Joe's work in Petaling Street right in the heart of Kuala Lumpur. Now I remember, Joe came here for a workshop early this year. The article was very interesting, especially about the part that he shot with full wireless TTL flash. That's very me, too!!


E-5 with Zuiko Digital ED14-35mm F2.0 SWD + FL-50R
19mm, f/6.3, 1/125s, ISO200, -3.0ev


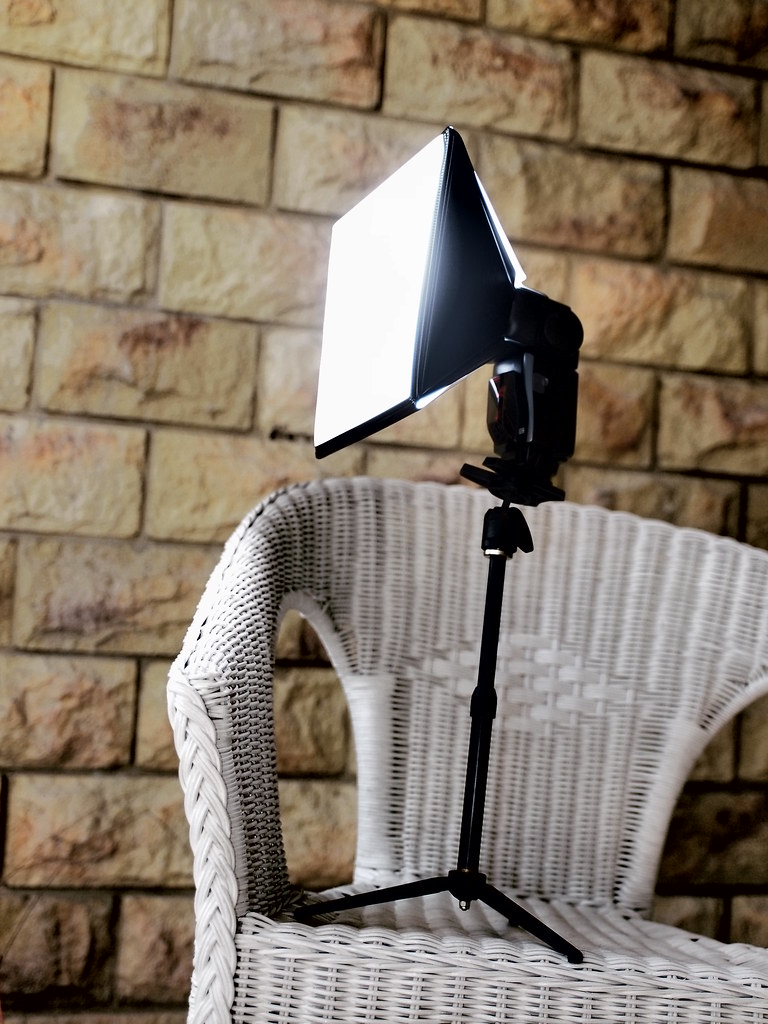
Looking at his techniques and gears, I could not stand the fact that he used the Lumiquest Softbox III on his SB-900's. Prior to this, I did not hear pleasant comments about this box. I checked with a few flash shooters that I knew, and none have much good to say. But, looking at Joe's results, I might be missing something here. A quick rush to the nearby camera store, J-One at AmCorp Mall was a Godsend! They had a unit. Without hesitation I bought it immediately. On the box, it literally stated that it only works with full TTL flash.

Duh, now I get it why there were some unpleasant comments about it. Lucky me, I am a full TTL flash shooter. I just couldn't stand Manual or Auto flash settings!


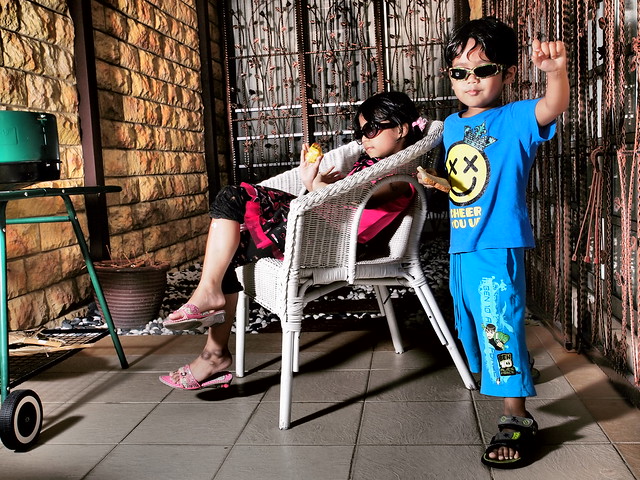
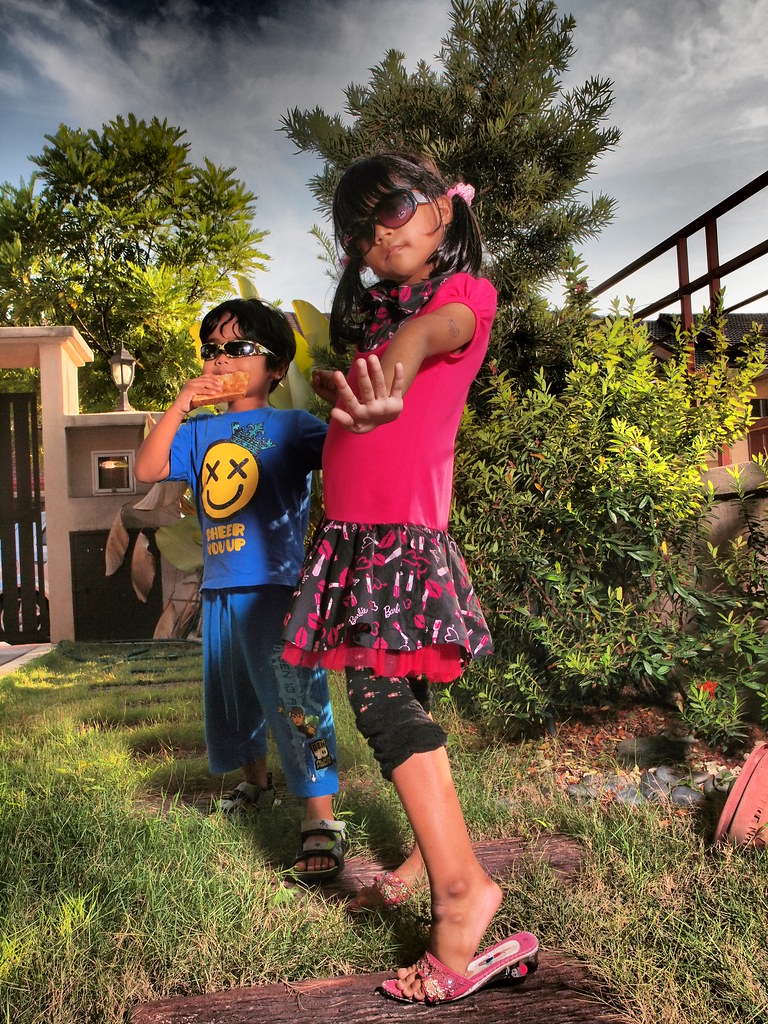
Now, having gotten the E-5 a couple of days back, I couldn't resist waiting any more. Quickly I set up the flash on the Manfrotto table-top tripod, and do a rapid TTL flash exposure setting (-3ev on the body, +1 on the flash); this setting will get me the blue sky background. All I needed was the subject. A good thing though. My kids were in a very good mood for a photoshoot. Without much hassle they did the Ultraman and Barbie poses. Shooting was a breeze, both on the photographer and the models.


E-5 with Zuiko Digital ED14-35mm F2.0 SWD + FL-50R
17mm, f/10, 1/250s, ISO200, -3.0ev


I just loved the combination of Dramatic Tone effect with Fill-flash effect. The subject and background just popped up. No post-processing required; the output was just right!!

The E-5 continues to intrigue me in ways I have yet to fully phantom!! This is indeed the best camera Olympus have ever produced, even easily trumping the OM-4!! ( I have the OM-4 in the dry box, the shutter is jammed and I have yet to get it fixed. Bummerrrr!!!).


Monday, October 4, 2010

Zuiko and E-5: Day 4

.

This is the day. The sad day. The day I have to return the E-5 to Olympus Malaysia.

E-5 with Zuiko Digital 14-54mm F2.8-3.5 mk2

On my way to work, a small mishap happened. I ran out of gas!!! A small miscalculation on the reserve. I was just 1km away from the nearest petrol kiosk. But then, it turned out to be a blessing.

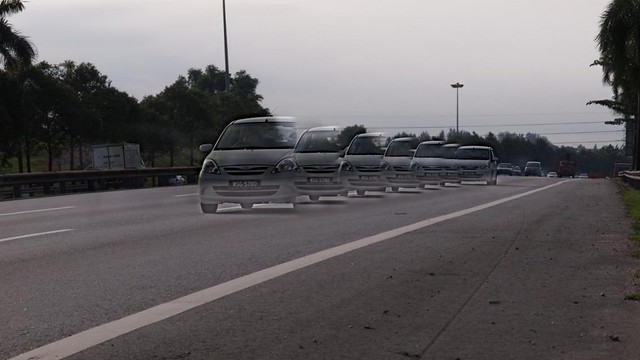
While waiting for the ELITE Expressway Patrol to pass by, I managed to make some C-AF rapid shots. The fast moving cars at the excess of 100km/h (55mph) were just perfect!!

As I had experience shooting C-AF sequence at 5fps with RAW + SuperFine JPEG (total of 18-20MB per shot) during my kid's concert yesterday, the limit of the buffer was 7 frames. As can be seen in the panorama stitch shot above, I was stuck after the 7th frame!

About the C-AF performance? Well, most of it was based on technique and approach. In this case, my experience was about 70-80% hit rate. This was the only clean sequence I got out of 4 attempts. To tell you the truth, if I had been doing this type of shots day-in day-out, the hit rate might have been in the high 90%.

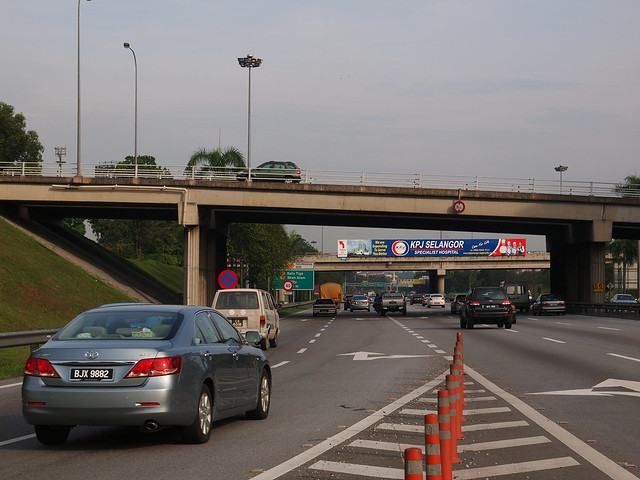
A quick landscape shot of the ELITE and KESAS expressways interchange


After my mishap was settled, I sped off to Olympus Malaysia office at Mont Kiara. I was thinking, I might as well milk out the last drop of pixel out of this E-5. Yeah, that's a great idea! The indoor shots were between ISO800 and 1600, while outdoor shots were at ISO200. All using Dramatic Tone, as I was at high emotions actually!

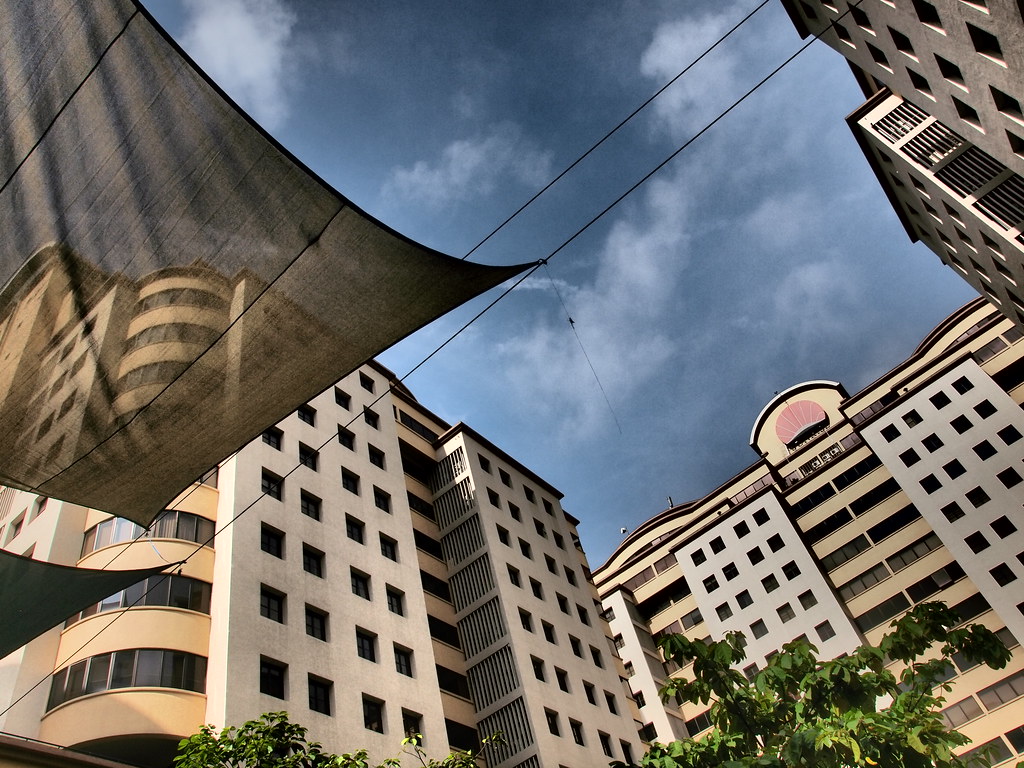
Dark parking bay below the office.

Olympus office is somewhere here.

At Olympus, I was greeted by Mr Yang (not a real name). I shared my experience, and felt very sad about it. We exchanged experiences shooting the E-5, and he showed me some great prints at A3-size to show the edge-to-edge details. Well, I haven't printed my shots yet, and boy were the prints looked great!!

After about half an hour chit-chat, I bid farewell, just after we were joined by Mr Big Boss. I also exchanged experience about the shoot with him, and also tried to lobby them to loan a couple of E-5s to our small community's upcoming trip up Mount Ledang (the MyChiaroscuro.net). Hope they agree to the idea, because brother Robin Wong will be joining the trip, too.


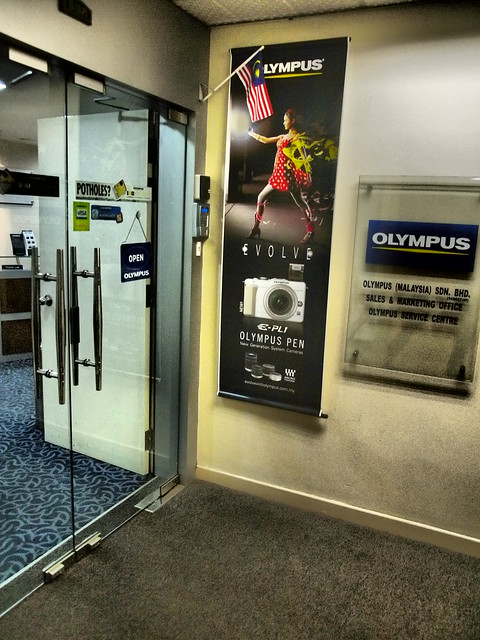
Entering with sadness...

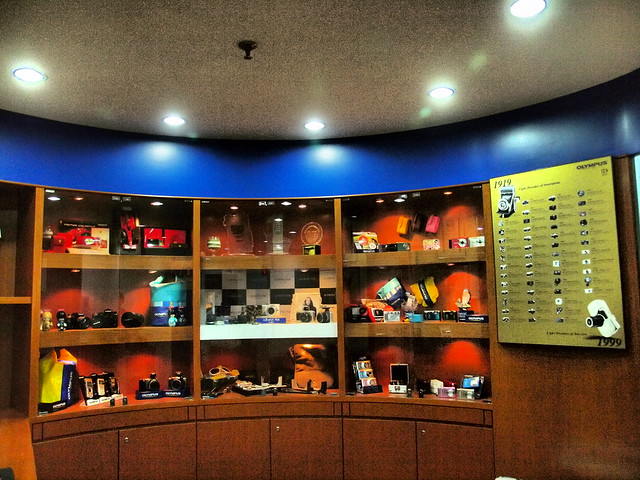
Olympus cameras display

I just wished that I just could just grab hold of the bag and ran away!!

Well, now I am having a severe E-5 withdrawal syndrome. My mood is a bit off, and strangely when I arrive home I immediately grab hold of the E-3... Three days were just not enough!!! And, I apologize for any shortcomings of my write-up regarding the E-5 as I did not have much time to really study and test its capabilities.

It's going to be a tough few weeks for me to cope with the loss!!


Tuesday, September 21, 2010

Zuiko and the Balancing Act

In my class, I cram my students with many photography nonsense. Especially with the mantra, "When outdoors in the hot sun, shoot with your flash on and 100% direct." Most of the time, my students will show blank stares disbelieving what I just said.

There are many other mantras, and one of them is, "If you don't like a person in a group picture, please use a wide angle lens." Well, this may be a good topic for another blog. For now, let me stick to the hot-sun-flashing-shooter thing.

Ah, well... I give them the assignment, and these are the results.


E-30 with Zuiko Digital ED14-35mm F2.0 SWD + FL-50R Flash
33mm, f/11, 1/250s, ISO100, -2ev, flash +1ev

My approach is simple. Most of the time, the camera using Matrix metering is quite smart enough to detect the background exposure. Thus, by dialing down the overall exposure compensation to -2ev, the background is darkened. The flash, then is set at higher compensation, say +1ev, to illuminate the darkened scene. In total, the image has a composite of -1ev exposure, which is just the right balance for portrait with landscape picture.

The above image uses slow x-sync flash that limits the shutter to 1/250s; thus, entails for small aperture exposure. In this case, it is f/11.


E-30 with Zuiko Digital ED14-35mm F2.0 SWD + FL-50R Flash
14mm, f/3.2, 1/4000s, ISO100, -2ev, flash +1ev

Say that you are a sucker for shallow depth-of-field, or bokeh-anywhere type of shooter. Then, you can dial up the aperture to f/2 for example, and the shutter speed will still jam at 1/250s. In this case, the Matrix metering is dumb! The picture will be overexposed. The only way to jump the shutter up is to use high-speed sync, in Olympus language it's FP Flash. Be careful though when using this method, as the bulb tend to be abused with low power but long bursts of light. I killed my FL-36 during a wedding once due to FP abuse, and it was not nice!!

Notice the blur effect due to the larger aperture even at wide angle 14mm? I should have used f/2.0 to get more blur. Doh!!

Using the same exposure principles of the first picture, the second image is recreated with the same exposure balance.

Sunday, July 25, 2010

Playing with Slow Sync Flash

.

7.5mm (35mm equiv.), f/8.0, 1/5s, ISO500
Slow sync Flash, +2ev

One guy told me that his brother knew a little trick to make the portrait shot has a spinning background. He didn't know how his brother did it, but I told him that I can guess the technique.

Quickly I whipped out my S90, and made the shot. Well, to make a perfect shot, more samples must be taken. This was just made with one shot!!

He was impressed, and told that's exactly what he say his brother did.


Wednesday, April 28, 2010

Another Session...

I just conducted another basic photography session.


A bit of activity to teach the tricks of group shooting.

To my students who are reading this blog entry, take note that the photo above is perfect composition based on the Golden Mean where the triangles A, B & C are clearly seen.

Me and my students.

The gist of my basic teachings are :
1. Get the exposure right, know the exposure triangle
2. Get the focus right, know where to point the lens
3. Get the perspective right, know the right angle, lens, and distance to get the shot

Monday, April 5, 2010

Zuiko and Green Apples

.
I had some spare time after sending my daughter to Enopi Math class. The 30-minute gap was used to do some quick flash shoot.


35mm, f/4.0, 1/60s, ISO100
This was processed in High-key to accentuate the full breadth of flash coverage


Green apples.. that looked simple but cool!

How did I do a 2-minute setup?

Get the E-30 with a moderate telephoto lens, in this case the Zuiko Digital ED14-35mm F2.0 SWD.

Get the FL-50R flash, and set to Remote mode. Quickly activate the Remote Commander menu on the E-30, and fiddle with the TTL setting.

Place the two apples on a dark glass table. Shut the room lights, and use ISO100 to blacken as much as possible the disturbing backgrounds.

Position the flash in various angles and height to see the different effects.

And don't forget the Do's and Don'ts of simple composition techniques. Rule-of-Thirds, Depth-of-Field separation, contrast isolation, parallax error, etc, etc.

Shoot in RAW only, and later process it using the Olympus Studio software. The E-30 Art Filters are available in Studio v2.2.

Voila!


By changing the angle and light intensity, a different effect was created.
This was processed in Low Key to accentuate the dark contrast zones.

Zuiko and Flash Techniques

.
Event shooting is all about getting the right shots and meeting the client's needs. You only have one chance and there's no repeat! Hustle, hustle!!


E-30 with Zuiko Digital ED14-35mm F2.0 SWD + FL-50R
23mm, f/5.6, 1/1250s, ISO400, -0.3ev + Direct FP Flash + Spot Metering

Those were the mantras I kept repeating in my recent Event Shooting class. And boy, did the participants got a whole load of flash techniques.

You name it; the basic flash techniques for quick event shooting were covered. It started with simple direct flash and output balance calculation. Then we proceeded with the bounce & white card, and estimating ceiling height factors. Next, it was dragging the shutter in dark lit room, playing with 2nd/rear curtains. We went outdoors, and played with FP high sync flash to negate "the skull effect". High speed coverage with rapid flash and rapid movement followed, which was finally topped off with the indoor/outdoor flash balance technique.

Of course, the basic EV measurements along with GN calculations and DoF controls were thrown in the whole sha-bang! At least I managed to confuse most of the class before they got their hands dirty the next day and saw what I was talking about the whole day before!

Though I was tired, it was satisfying. To see the participants learning a lot within a short span of time was very rewarding.


On to the next class....

Sunday, March 28, 2010

Zuiko and Curtains

.

E-30 with Zuiko Digital ED14-35mm F2.0 SWD
35mm, f/2.8, 1/100s, ISO800, -0.3ev


I was lying down under the window, when I noticed the pleats of the curtains providing beautiful abstraction of light rays pounding on soft fabric. I quickly took the shot with my camera. The surrealism of the curves of light on the fabric gave an eerie effect that I thought was mesmerizing, at least.

A bit of light balancing post-process techniques that included Contrast Masking with Layer Blending mixing providing the tones and hues that I wanted.

The abstraction looks a bit frightening at a quick glance, though.


Tuesday, March 16, 2010

Zuiko and a River

A river runs through it.

Canon S90, 7.5mm, f/8.0, 1/20s, ISO80


It has been more than 10 years since I visited this small Malay village en-route to Slim River from Tanjong Malim. The water still flows cool and clear. The scene is still beautiful. Nature at its finest.

It was an impromptu visit, and I didn't have my swimming trunk and even the DSLR with me. Luckily, the Canon S90 point-and-shoot was there.

While the IS helped a lot to get low shutter speed to get the water flowing effect while ensuring the image is sharp and crisp, I was not able to get a lower shutter speed to say 1/4s. This was because of the f-stop limitation! The S90 only allowed until F8.0, as this was the theoretical limit before diffraction effect kicked in. Even with ISO80, the shutter speed wouldn't go lower than 1/15s.

Nonetheless, the S90 did a very good job. I got the image as I perceived it to be. That's the bottom line.

Monday, February 22, 2010

Zuiko and Birthday Wishes

.
Wow... I didn't touch my DSLR for quite a while. Having the S90 in the back pocket did not help the situation at all. But, for this occassion, I had to shoot the DSLR. I knew the S90 won't cut it! My son's birthday was 12 days ago, and I confessed that setting up the DSLR gears took quite a while for me to do!


E-30 with Zuiko Digital ED14-35mm F2.0 SWD
31mm, f/2.8, 1/160s, ISO800, -0.3ev

Making a child happy is the greatest thing any person could do. It's the most wonderful feeling. The moment, the innocence, the cheeriness - everything is shown through their eyes. Seeing and feeling it with him is wonderful, and to capture the right moment is magical.

Birthdays are easily one of the things that make a child happy. Having his friends around him celebrating in joy, the presents, and the fun of it all. To see them mesmerized with the event and immersed with the love is just bliss!

And, make sure the flash batteries are all charged up, coz I forgot mine! Maybe due to the monthlong isolation from serious photography has made me a forgetful photographer. And, somehow without motor drive mode, I managed to get the shot! Talk about luck!

Tuesday, January 12, 2010

Zuiko and a Self-Portrait


A simple self portrait I did with the E-30 camera and the Zuiko Digital ED7-14mm F4.0 lens.

I used a two-light source, main at high point, fill at low point; with self portrait composed using real-time Live View screen and triggered with a wireless remote.

I tried to do a macho look, so-called a self-portrait of the ultimate maleness in myself. Hmmm... I think I didn't do quite a good job.

The thing is, when I was doing this, I solely relied on two features in self-portrait shooting. 1. The remote trigger, in this case the usage of the RM-1 remote trigger. 2. The flippable LCD, in this case I used the LCD screen flipped facing me so that I can compose myself into the frame (this was done in full Live View mode).

Oh yeah, I used full TTL shooting with the Olympus wireless flash system; with the main using FL-50R and fill using FL-36R. The E-30 was mounted on the Manfrotto 709b table tripod for a very low angle shot.

Well, these feature made shooting self-portrait much easier. But, it still did not solve the problem that I was not a very good model.

Ah well....

Sunday, December 20, 2009

Zuiko and a Talent Contest

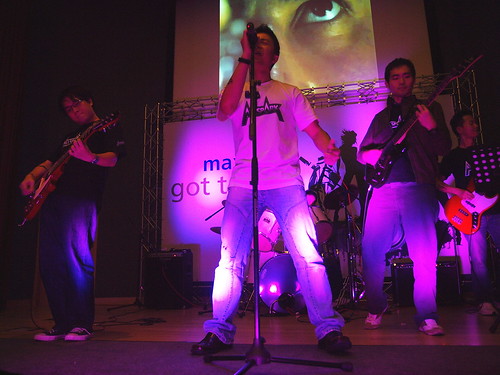
I was asked to cover a talent contest, and it would be in a very dark and small auditorium.

Immediately I assessed the situation:
  1. Fast lens with high ISO and high shutter speed setting was a must
  2. Working in compressed and limited area was inevitable
  3. Lighting and white balance would be very difficult
Wow, this was going to be tough! And since I was using the Olympus E-system - a system that anyone would say won't cut it for such an event. I took this as a challenge, it's good to see how it would fare in those situations.


Show some 'ttitude, bro!
35mm, f2.5, 1/80s, ISO1000, -0.3ev

And at the same time, I had the E-P2 on loan from Olympus Malaysia for me to test out and write a short field review. Thus, I knew that I had to limit my E-system setup so that I would not bog up my gears. The E-30 was chosen for its better high ISO performance than the E-3, and I paired it with the Zuiko Digital ED14-35mm F2.0 SWD and ED35-100mm F2.0 PRO lenses. I also had the FL-50R flash for any flash situations.


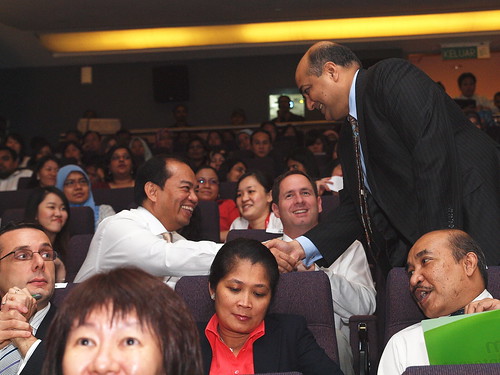
Being a corporate event, it wouldn't start until the CEO arrived. Not much protocol, just a handshake between the organizer and him sufficed.


14mm, f2.0, 1/60s, ISO640

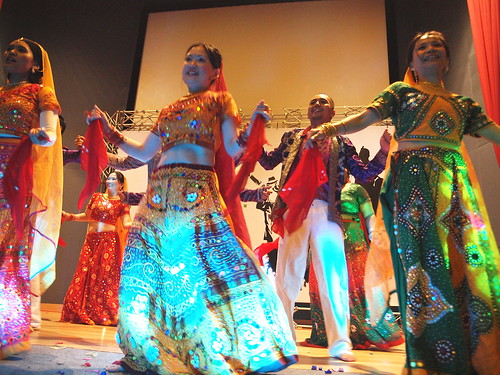
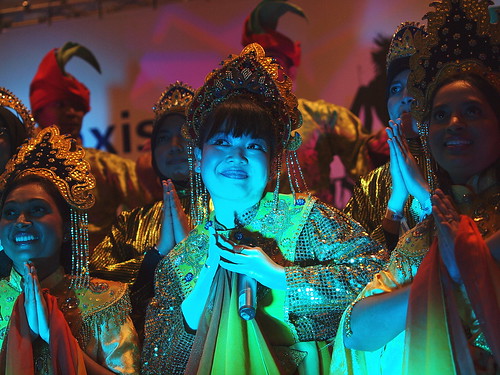
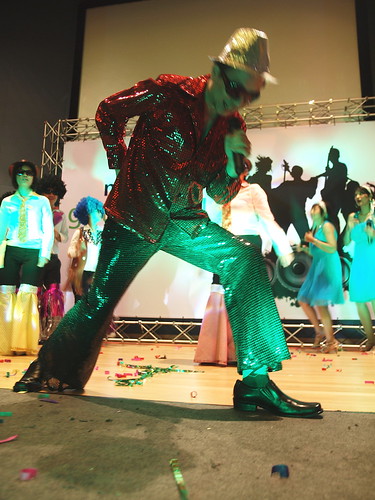
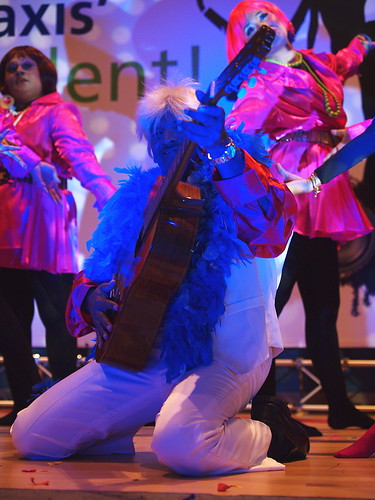
The house was immediately set rocking with the Heavy Metal performance of Linkin' Park's New Divide. Throughout the contest, there were variations of musical genres that encompassed Rock & Roll, Bollywood, Local, Latin, and even Hip Hop!


E-P2 with the 14-42mm 3.5-5.6 did a great job here capturing the energy of the event.

I got the main spot at the front stage, just a few feet away from the performers. And just mere 3 feet back was the auditorium's seating area. It was very cramped! The vantage point was mostly shooting upwards, and during in-between performances, I quickly snapped candid shots of the VIPs attending the show.


No doubt shooting was tough. Fast action performance with audience provided the same level of energy, it was electric. Fast pace, low compromise shooting was a definite challenge!

I nearly messed up this job! Half way through, my batteries both in the HLD-4 extension pack were dying out, and very fast!!!! I told the client, and she panicked!! I assured her, there's enough juice, but may not be enough to cover the prize giving ceremony. To reduce power consumption, I flipped the LCD screen inwards and I used the top panel to check my camera settings. (I couldn't believe I shot without chimping for most of the time!!)


Latin number with classical guitar accompaniment was just immaculate!
100mm, f2.0, 1/60s, ISO2000

In between shots, I sometimes swap the 14-35mm with the 35-100mm lens for those long range shots. But most of the time, the 14-35mm f2.0 lens was the workhorse. The E-30 managed to tame the 14-35mm erratic AF, and I did get a high hit ratio.

Overall, I believed I did a good job. I did a bit of post-processing, mostly on the tone curves correction and USM sharpening. The final image was resized to 3200 x 2400 for the client. The images turned out alright, and the client was pleased.


Shallow depth-of-field with low shutter speed, a challenge to get sharp shots
f2.0. 1/80s, ISO1250, -0.3ev

Her husky voice and pro-like performance lived up to her snazzy jazz number!

Throw white balance down the drain when everyone's turned green!!

I messed up this shot with low shutter speed, luckily I realized it!
14mm, f/2.2, 1/13s, ISO200

Rock and Roll was alive in this beautiful rendition.

Thank you for the music! This was a great show!


Saturday, November 28, 2009

Zuiko: Using the 7-14mm Ultra-wide

I made a point to myself to use the Zuiko Digital ED7-14mm F4.0 more.

The morning was actually quite rainy, so I chose to use the Olympus E-3 as it was weather-sealed should rain to come during the middle of the shoot. The 7-14mm was weather-sealed, too.

Palace of Justice, cropped in 16:9
7mm, f/9, 1/200s, ISO100

Initially I did not know I would end up here at Putrajaya, but thinking logically that the 7-14mm would be more useful for many architectural and landscape shots, the national capital was the perfect location.

I was driving along the main road, and the Palace of Justice struck me. Since the town was virtually empty due to the long Eid Adha holiday weekend, only a couple of tourists and keen photographers were there. This was good for architectural shots! And a bonus; the sun suddenly appeared amongst the clouds to render the buildings with good light.

Shooting with an ultra-wide lens was very tricky. One thing that could really could screw things up were the perspective. It could easily be a nightmare if not done properly. For that shot, to keep the perspective in check, I used the E-3's focus markers and put the horizon along the 5 points. And I checked the 3 vertical markers with the building's pillars to ensure the perspective was correct. And all was done handheld, without any tripods or supporting gizmos. To get it right the first time, I held my breath to freeze my framing and quickly but calmly clicked the shutter.

The composition was heavy bottom, with half of the frame being the road. Well, I just cropped off the bottom.

Another thing, to get all in focus, it was very easy as the depth-of-field for such a wide lens with the 4/3 format was very huge. I just dialed in F/9.0 and it was more than enough.


Palace of Justice framed in the Putrajaya Holdings HQ main entrance
7mm, f/8.0, 1/1000s, ISO100

For both images, the sun was directly in the frame. This posed a problem in the Dynamic Range department. And, I chose not to use RAW, instead opted for the Superfine JPEG (which means the JPEG file is ultra huge, but not as huge as TIFF). The original file showed much shadows in the buildings' details; thus, I had to post-process the images using my trusty GIMP software.

Using tone mapping with Overlay settings at 40%, I used 3 layers duplicated on top of each other and merged them one-by-one. A bit of S-curve to enhance the shadows and highlights, and increased the saturation by 40 points did the trick (during the tone mapping, the colors faded).

One thing that ticked me off during the shoot. I was actually chased away by the security, claiming that this place was not for public shooting. I was aghast, and immediately responded that I am taxpayer, and these buildings were built using the people's money. I was not even inside the building, just outside within the corridors!

I was shocked, and immediately left the place. I managed to get a couple of great shots, but those were it!


Friday, September 11, 2009

Zuiko and Low Light Corporate Event

Hmmm...

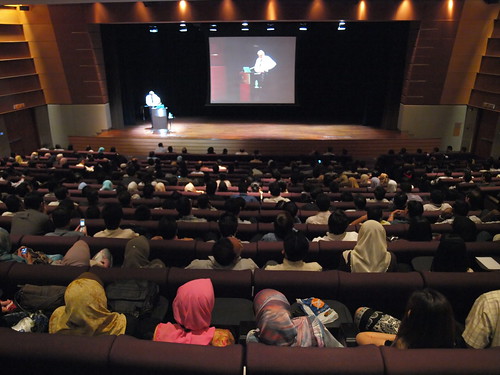
E-3 with Zuiko Digital ED14-35mm f2.0 SWD
35mm, f/2.0, 1/80s, ISO800, -0.7ev

Yes, I have heard it many times. Olympus can't shoot low light. It's too noisy, it lacks dynamic range. Bla, bla, bla... the debates go on, and on.

It is funny, though. When it comes to clients, they don't know all this technical mumbo jumbo. What they want to see are great pictures showing the important moments of the event, and please don't make the CEO look stupid on stage.

In the end, what matters most to the client is the results. Please keep that in mind, and don't really worry about your "bad" Olympus camera!!!


Covering a corporate event is a mixed situation. There are occassions where it requires quick and rapid shooting, and there are situations when it is very laid back. It is similar to wedding photography, but in my opinion it is less stressful. Partly because the client is not very particular of the nitty gritty details.

It is important to keep in mind that to shoot corporate events, make sure there are enough batteries to keep things running. And please bring the fastest lens you have!!

In this particular event, the photographers were hit with a bombshell!!

Due to videography requirements (thanks to the live screen on stage), flash photography was prohibited!! Why was that? Simply because the screen will instantly show the flash in full feedback effect, similar to a Viper fighter scrambling out of the Battlestar Galactica's flight deck! That was very annoying.

One Nikon shooter was put out of commission because he was only using the 18-200 variant with a big SB-800 flash, not knowing about the no-flash ruling. At that moment, I had my Zuiko Digital 14-35mm f2.0 and 50mm f2.0 lenses. No problem at all. I later saw him shooting with the 50mm f1.8 lens. Not much for him to shoot, though.


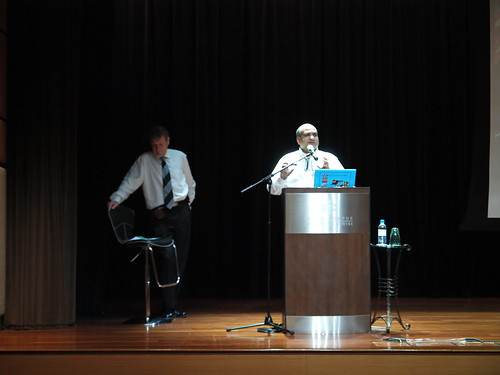
In this shot, the CEO was making a strong point to the staff on key milestones and goals. The expression said it all. To be honest, I took multiple shots to ensure I got the right gesture to convey the story.


Corporate people are not very boring, actually. Most of the time they are very serious at what they do. This is no fault of them. However, they can be very funny with sharp, rapid quips. And, it is very important to capture the moment. All I can say that it is rare; so, it is better to be on your toes so as not to miss any of it!!

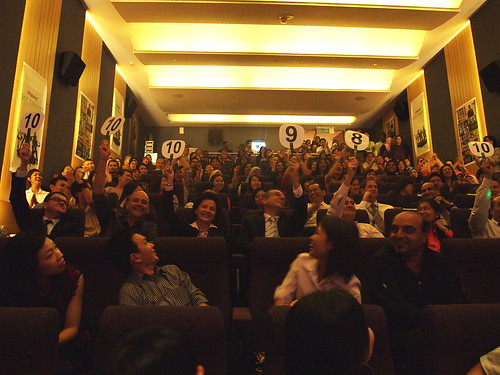
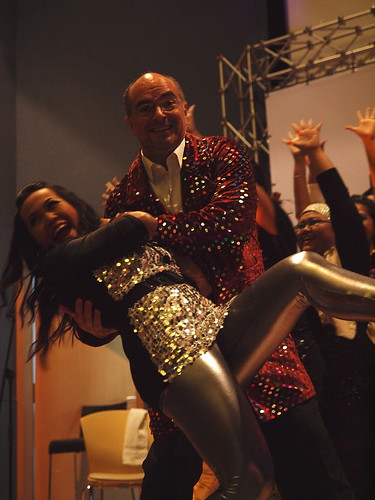
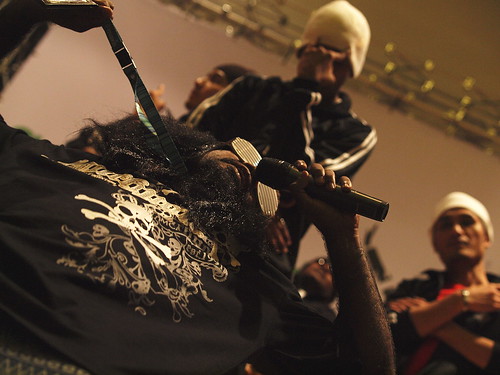
This shot made the whole auditorium broke into laughter. The picture was actually one of the senior executives, and this snap was a shot of him gasping for breath at a recent Iron Man event!


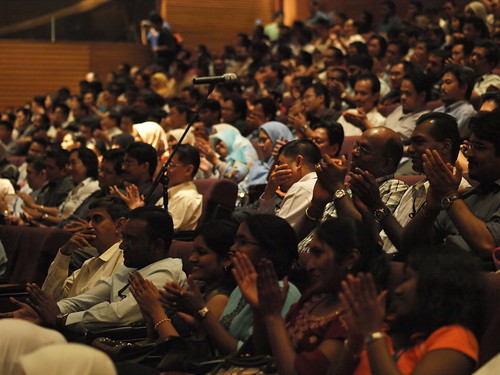
At the end of the day, everybody was happy. The staff was happy. The client was happy. I was happy!
And isn't this what photography is all about?!