Blog Keywords

Popular Posts for the Month

Thursday, June 4, 2009

Zuiko and the Boat

A boat zipping across the lake. The texture richness of the water surface intrigued me!

What I like most about this scene was how the water form being sliced through by the speeding "sampan". To emphasize the fine textures of the shadow and highlights, I chose the "Film Grain" Art Filter. Indeed a wise choice!

E-30 with Zuiko Digital ED50mm F2.0 Macro with EC-14 Teleconverter
70mm, f/6.3, 1/800s, ISO200, Grainy Film Art Filter

The trail of the boat's wake can be seen across the image. The calmness of the lake stirred by the motorboats roaring blades captured brilliantly in shades of shadows and highlights. 

If it was in color, I do not think it will convey the same impact!

Zuiko and Two Sisters at Putrajaya

Doing some street photography; that is one of my photography goals for 2009. 

To start with, I am not really a real street photographer, as I do not have the panache for such subtleness to shoot strangers in public. But, sometimes, I do manage to sneak a few images into my niche street photography portfolio.

E-30 with Zuiko Digital ED50mm F2.0 Macro + EC-14 Teleconverter
70mm, f/6.3, 1/800s, ISO200, Light Tone Art Filter

I already set in my mind to shoot a compressed landscape with a 70mm focal length, especially with the magnificent PICC building as the point of convergence. 

Then, with an instance two sisters raced to the car. The elder arrived first... I noticed this and quickly reframed my shot.

All I did next was just waiting for the little sister to run in front of the dark columns to accentuate her running profile. 

Snap... perfect.

The compression of perspective introduced by telephoto lens strengthened the background, and I did crop the bottom part of the image as it was mainly pavement.

This is one of the images I made during my brief escapade to Putrajaya. There will be more coming in the next blog entries... 

The E-30 was really cooking, in which I really put the Art Filters to the test!

Sunday, May 31, 2009

Zuiko and Birds of Prey

While I was residing at Bukit Jelutong, which was just adjacent to the TUDM Air Base, I had a chance to shoot a few birds, luckily some birds of prey.

This was of an eagle, circling the airspace hunting for prey. It was hovering the airspace flexing its prowess. It was breathtaking to see such scene of pure power.

I present to you the king of raptors!

E-510 with Zuiko Digital ED50-200mm F2.8-3.5
200mm, f/9.0, 1/250s, ISO100, +0.3EV


Also, there is the other version of raptor lurking over the skies of Bukit Jelutong. Usually, we will be treated with roars of jet afterburners at least twice a year - during the F1 race and National Day.

The king of the skies, supersonic jet fighters!!!

E-510 with Zuiko Digital ED50-200mm F2.8-3.5
182mm, f/3.5, 1/640s, ISO100, +0.7EV

The TUDM F-18D Hornet making a landing approach. The landing gears can clearly be seen!

There were four of them birds making the descent, in which they just flew mere hundreds of feet above me!!!! I was shooting them within the compounds of my apartment.

The speed was mind boggling, with the crescendo of thunderous jet power!! Panning was difficult.

Forget F1, this is the ultimate speed machine!!!


Zuiko and Two Peacocks

When you enter the Kuala Lumpur Bird Park, you are greeted with these beautiful and vain pheasants. These birds just litter the whole pathway of the bird park, and minding their own business. 

A beautiful profile of the Indian Blue Peacock, Pavo Cristatus.

Olympus E-3 with Zuiko Digital ED50-200mm F2.8-3.5
208mm, f/4.5, 1/1000s, ISO800, +0.7EV


Just wait for the right moment, and you will be rewarded.

A grandeur pose of the Green Peacock, Pavo Muticus.

E-3 with Zuiko Digital ED50-200mm F2.8-3.5 + EC-14 Teleconverter
283mm, f/4.9, 1/1000s, ISO800, +0.3EV


Indeed a regal sight.

Zuiko and before it Flutters By

This was a candid shot, as I remembered.

E-3 with Zuiko Digital ED50mm F2.0 Macro + EC14 teleconverter
70mm, f/4.5, 1/2500s, ISO200, -0.3EV

I was out at my garden shooting some macros, that I stumbled upon this butterfly. It was just perching on the heliconia leaf. 

The 10am sun was shining brightly; hence the perfect lighting. To top it off, the background was just bright enough to provide the ample contrast difference to accentuate the majesty of the wings.

Simply gorgeous.


Zuiko and a bit of Photo Painting

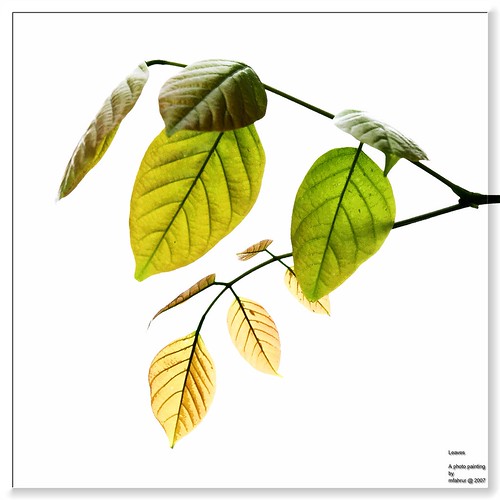
A simple painting effect.

I can't remember what program I used, but looking at the shooting date, I suspect it was using Photoshop.
E-510 with Zuiko Digital 14-54mm f2.8-3.5
54mm, f/6.3, 1/160s, ISO400

For this shot, the metering was at ESP and was not tricked by the strong backlight! I needed to ensure the shutter speed was fast enough to freeze the leaves as the wind was blowing gently; thus, increasing the ISO was inevitable. The aperture at f/6.3 was adequate to get the whole frame sharp.


Thursday, May 28, 2009

Zuiko and Digital Workflow, Part 1

Once in a while, my friends will ask me what "PP" I do to my photos. PP means post-processing the image. Most of the time I will say that I rarely PP my images. I just like the way my E-system does it. To me the color and tonal renditions are just sublime.

When I mentioned that I shoot about 90% of the time in JPEG, they are quite surprised. Well, the E-system JPEG is very flexible actually, as I am able to set the level of quality I want. The highest JPEG quality, with the compression 1/2.7 will yield a very high quality image rivaling TIFF formats. I do not really need RAW unless I am really challenged with a very high subject brightness range or a tricky mixed lighting situation.

To add to the JPEG is the excellent White Balance system, particularly on the E-3 and E-30, that enables me to confidently shoot in Auto setting even in the most difficult lighting situations. It is just that good!

Then again, to say that I do not PP my images - that is totally untrue also.

I need to PP mainly because I shoot in default Sharpness, Contrast and Saturation settings. If I really bother, I will only select the Color Mode - particularly I like the Vivid, Natural and Portrait color renditions. I tend to skip Muted, though.

Because of the default settings, sometimes my images do not generate enough "pop" that I am looking for.

Now enter my Digital Workflow.

To be fair, every serious photographer will have his/her own workflow. The process and scale are normally dictated by skill and duration. For me, my Digital Workflow can be described as minimal and quick.

My favorite image manipulation software is The GIMP. I love it simply because it is open source, and supports various effect actions that are easily available on the internet.

Now, what do I do with an image?

I normally start with the general idea of the image. This will result in cropping, either emphasizing the composition or changing the technical orientation, or even both.

Then, I will analyze the contrast and exposure. The best tool for me is by applying a contrast mask to the image. By manipulating the overlay of the duplicate image, usually in 30-40 opacity, I can easily control the strength of the contrast. This will also push or pull the shadows and highlights of the image, particularly at Zones II and VIII.

If I choose to increase contrast, I will end the workflow with a quick dash of the High Pass Filter, usually at sharpness of 4 for a 10MP image. I stopped using UnSharp Mask many months now, as I find that HPF is much more effective in sharpening the image than USM.

On the other hand, if I choose to lower contrast which is usually to counter very highly contrasty image, I will instead opt for Dodging & Burning. The selective contrast effects of this action will also simulate a sharpening effect. In a typical 10MP image, I will use a Thin Amount of 10 and Thick Amount of 30. Be careful with this effect, as too much of it will render the image unreal.

These 2 or 3 step action will result in a slight shift in color and tint, but I do not really care about it. To me, it is part of the manipulation of the overall contrast. The most important thing is to get the White Balance spot-on in the first place!


Here is an example of my typical Digital Workflow.


Original JPEG 1/4 compression

This image suffers from unbalanced foreground and background exposure. This is a result of the flash not providing suffient light to counter the strong ambient sunlit background. In order to balance the exposure, I choose to use the contrast mask action.


Contrast Masked, Inverted 30% Overlay with Gaussian Blur 20 pixels

By looking at the two left and right vertical grids, the histogram has shifted inwards; thus, pulling the shadows and highlights and balancing the two extremes with the middle grey.

To add to the finishing touch, a hint of Dodging & Burning is applied to bring out the "pop" to the image.


A hint of Dodging & Burning with Thin 10 & Thick 30 Amounts

The Dodging and Burning has smoothen a bit the harsh contrast transitions in the image, as can be seen in the lessening of the "spikey" lines along the histogram.

A quick PP action within 5 minutes is all it takes.